Drywall is dead. Long live drywall. I can’t say that I’ll miss him (I’m assuming drywall is a him), but he seemed nice enough. Faster than a three-coat old-fashioned plaster job, and less expensive to boot. But there has always been something about him I just couldn’t put my finger on. Something about drywall that made me a little nuts. And it wasn’t until a few weeks ago that I figured it out . . .
It’s Too Perfect
Drywall is too perfect! As my plaster teacher said, “It is monolithic splendor.” A rather dubious description of both its perfection and inhuman feel. That what’s been driving me nuts all these years. And while it may not sound like a problem, let me explain.
The problem with drywall’s perfectly flat and smooth surface it that it is rather cold and lifeless. And inevitably it will be marred at some point. That mark, whether it is the inevitable nail pops as the house settles, the rogue door knob, or the multitude of screw and nail holes that accumulate very quickly from our family photos will stand out like a sore thumb. You can patch it, but if your drywall is textured (and most is) you’ll never get it to match.
Not to mention drywall’s other problems:
- Creates massive waste (off-cuts are almost always thrown out in order to have the fewest seams).
- Makes a terrible mess of unhealthy sanding dust that is difficult to clean.
- Takes too long to install and finish.
- Most homes use 1/2″ drywall which is not nearly thick enough for sufficient sound proofing.
- Surface is soft and very easy to mar.
Put all that together and you have a system that is ripe for disruption. And I plan to disrupt it indeed!
My Mission
Starting today, my company Austin Historical, will no longer install standard drywall. Even if you want it, I won’t install it anymore. For too long, I have installed what I feel is a subpar product. And by installing something that is not of the quality our company demands, I have dropped the ball. So, I plan to use whatever clout I have to promote a much better solution and to encourage my friends and colleagues to do the same.
The Plan
So here is what we will be doing, and I think the rest of the historic renovation industry needs to stand with us. If you disagree, I’d love to hear why in the comments below.
We will be using a hybrid modern plaster wall that, in most cases, is:
- Faster than standard drywall
- Cheaper than standard drywall
- Stronger than standard drywall
- Has less environmental impact than drywall
- More attractive than standard drywall
How does that sound? I thought it might interest you. This is nothing I created (I wish!). It is a tried and tested technique that has been used is different forms for decades. I’ve just been studying and practicing the technique for a while now, and we are just tweaking and presenting it in a new way.
If we can offer a better product at a better price with less environmental impact, why on earth are we still using the inferior option??
Below is the outline of the plan we are going to follow and I hope you’ll join us. I’ll also be releasing a step-by-step video training series in the coming months to help you implement this solution in your business or in your own home.
Modern Plaster My Way
Our modern plaster is essentially a mix of 50% joint compound and 50% veneer plaster. The combination of the two allows modern plaster to securely adhere to almost any substrate. Brick, concrete, blue or green board, Hardi board, metal and even regular drywall. The joint compound provides the excellent adhesion, and the veneer plaster provides the quick setting and hard finish. I’ll go into much more detail in future posts and the videos, but here is a brief overview of the process.
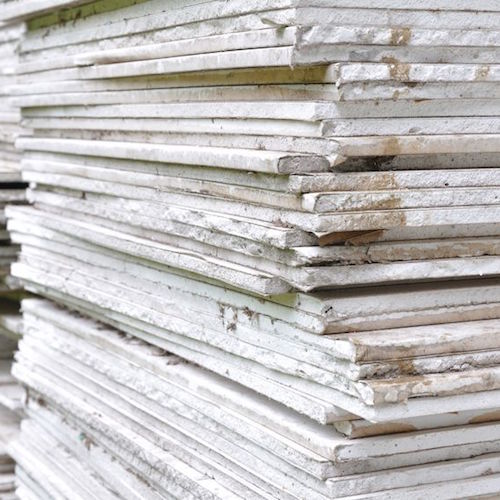
- Hang 5/8″ Drywall – Hang 5/8″ drywall as usual, except this time, we use our off-cuts instead of trashing them. The amount of seams doesn’t matter because the whole wall will get a skim coat of plaster.
- Tape & Plank – Mesh tape the seams and then coat the seams with the modern plaster mix, much like when finishing drywall. Then, come back after the plaster begins setting up, and knock down to smooth out high spots.
- Plaster the Wall – After the seams have setup we coat the entire wall with a thin 1/16″ to 1/8″ coat of modern plaster.
- Knock Down and Finish – Once the plaster begins to setup we knock down the surface if the client wants it smooth if not we leave it alone.
And that’s it. No sanding, less trash, and because the plaster sets up so much faster than joint compound, we don’t have to wait a day between applications. We can apply multiple coats in one day if we are fast enough.
Finish Options of Modern Plaster
Also, with this system, there are a huge variety of texture options compared to drywall. You can:
- Burnish the wall for a super-smooth, almost shiny Venetian plaster look.
- Use brushes and other tools to create innumerable textures and patterns.
- Add sand or other aggregates for a rougher texture.
No More Painting
And one of my favorite things is that we can add pigments, or even ordinary paint to the plaster! Save the expense and trouble of painting! Your wall gets plastered and painted in one step with only the cost of the paint itself. Adding paint to the plaster creates no more labor for the installer and therefore, only a minimal up charge in materials.
This also creates a wall with the paint color throughout the body of the wall. No more nicks and marks that scrape the paint off. On the bad side, you likely wont be able to ever match the color again, but the wall can always be painted like usual when a color change is desired.
The Most Important Thing
And if all the benefits listed above were not enough, there is one more reason we’re changing to modern plaster. A plaster wall is handmade and it shows. It carries the mark of its maker. It’s hard to describe exactly what that looks and feels like. The closest description I can come up with is that while drywall is cold and rather lifeless, a plaster wall shares the warmth of the human touch that created it. And that is something I would be proud to build in anyone’s house.
Especially for those of you who think I’m crazy, let me hear your thoughts in the comments below.


Founder & Editor-in-Chief
I love old houses, working with my hands, and teaching others the excitment of doing it yourself! Everything is teachable if you only give it the chance.
Hi Scott! We just bought a 1927 cottage and I’ve been spending a lot of time on your site, it’s a great resource. I’m really looking forward to trying this method! Would you recommend modern plaster for a bathroom?
This is really cool. I love the aesthetic of plaster, although I hate when I need to cut a hole in it. Especially a hole above my head.
One thing I’m wondering about is the finishing of it. My ill-advised attempts with veneer plaster, I ran into issues because I laid it on with the intention of being able to trowel it through it’s set. It ended up setting faster than I could get back to it.
I had the same thing happen this weekend resurfacing a closet with hot mud. I left it on heavy so that there would be some fat to water trowel with. Most of it was too far gone before I could hit it with water. Fortunately, it was ez-sand, so the worst of it was knocked back with a knife. Lots of cat faces to fill.
Would this set up slower since there is so much joint compound involved? How long would you wait before smoothing it out?
The joint compound slows the setting time down a bit, but not much. Try an extended set veneer plaster like X-Kali-bur. Or try using ice cold water to mix the plaster which will slow the setting time down significantly.
Thank you for this wonderful resource! We just skim/trowel coated and sanded a room that had heavy orange peel texture, and now we have very smooth mudded walls. We used plain drywall compound in the bucket, mixed with water. The initial plan was to prime and paint, but now we like the bare mud effect. It was a ton of hard work and we have more rooms to do – your modern plaster method will save us time in the future. So, how would you finish this room and proceed? Would a top skim coat of the plaster mix work? Would the color look similar? Is there another way to seal the mud surface? Or should we just stick to the original plan and switch to your method in the new rooms? This is in a midcentury modern house with lots of indirect natural light. Thanks for any help you can provide!
I love the way the bare plaster looks and could be convinced to leave it that way too. Try a test room or closet of the modern plaster since it is very different to work with than the joint compound and see what you think. Ultimately, I think it comes down to personal preference.
Thanks Scott – we’ll give it a go! If we decide to tint, what’s a rough estimate for the paint-to-mixture ratio?
1 gallon flat paint to 5 gallons plaster. Go darker with the paint color than you think.
Your article says that a modern plaster finish is faster, cheaper, and has less env impact than regular drywall. But the first step is ‘hang regular 5/8″ drywall. I get that you’re saying it’s faster and cheaper than finishing drywall fully with tape and mud, but I don’t see this taking much less time than a normal finish because you’re still taping the seams and applying multiple coats of plaster. And how is that cheaper or more environmentally friendly? You’re using the exact same sheet rock, and far more modern plaster than you would use if you just put mud on the seams. I don’t know how much mud you waste when doing drywall, but this seems like just as much money and almost as much work, even though it ends up looking more handmade. Am I missing something?
Ralph, the savings come in a couple places. 1. We can use smaller cut offs of the plasterboard since we are skimming the whole wall and therefore I end up with less waste Sheetrock than when I drywall where we try to keep the seams to a minimum and use only big pieces.
2. The seams are taped and bed just like with regular drywall, but there is no waiting or sanding. We can come back after 1 hour and put our one and only skim coat on the wall. The whole process is done in one day with no drying time and sanding between steps.
We can finish a room in about 2/3 the time as we can with regular drywall methods and we leave the homeowner and ourselves safe from any silica dust. Which considering the inevitable silica dust work rules due out from OSHA, protects everyone involved including the environment.
Ok, in the absence of any knowledge and my local stores not having veneer plaster, I attempted to perform the above technique using plaster of paris. Well, I can only hope there is a marked difference between veneer plaster and POP. That stuff turned hard INSTANTLY. And by instantly, I mean INSTANTLY. Two small batches lumped up with in 3 minutes, the whole mess Rick hard in under 10. I did mess with a tiny bit before making the bigger batches and I really liked the test piece. I only hope veneer plaster is slower hardening than the powdered POP? disregard my previous questions, I have kind of figured alot of it out. I just want to make sure it is feasible to do a whole room like this, because plaster of paris is no joke and not possible
Frank, plaster of Paris does harden almost instantly and it’s not a good choice for this as you discovered. Veneer plaster has some of the characteristics of POP but used extenders and other additives to make it more workable and give a much longer open time.
Thanks for the reply, Scott. I am picking up the Diamond Veneer plaster(finish) tonight. I plan on mixing in a very small amount of tan paint to give the walls a very light tan color and leaving it skip troweled or heavily textured to mimic and adobe wall.
Another quick question:
I have about 300 sqft of some reclaimed 150 yr old heart pine flooring. The nail holes are still present through the tongue in groove flooring, but the nails themselves removed. I want to keep as much of the natural color and appearance as possible. After testing a number of different polys, I realized that the oil based poly inevitably darkens the wood and takes away character significantly. I tried some water based poly and loved how it came out. I was think of using a water based poly that is rated for floor use but wanted your thoughts. The matte version of this stuff is crystal clear and seems to keep the wood condition pristine.
Thanks again for all of the knowledge!
Frank, water based polys work fine if you like the look. You’ll need at least 4 coats of water based on floors for adequate protection though since they don’t cover as well as oil based.
If you could,
– What sort of working time does ‘modern plaster’ get?
– Do you apply it like veneer – corner-to-corner in one batch (AIUI), or can it be joined mid-wall?
– Can it just be applied by trowel, or are there particular tools that would be helpful?
Thanks
George, same working time as veneer plaster very little difference. Also applies exactly the same and works best when applied corner to corner. Joints mid wall are always imperfect. I’m sure there are other ways to apply but troweling works fastest and best in my experience.
Scott-
Awesome blog and self help site. I am wondering about doing the paste over drywall for my new sunroom. I built a 300 sf room with cathedral ceilings and used some 175 yr old hand hewn chestnut beams I bought from the Amish up here for a very cheap price. The post and beams border and traverse the room as a cosmetic. However, I am now piecing drywall on the exposed framing and insulation and have been searching for a period authentic finish. I researched just simply skip troweling joint compound, but then found your blog. Question: when doing the plaster and joint compound coat, can I skip trowel this or heavily texture it to appear more like adobe walls or something that would match old hand hewn beams. By the way, thanks to the blog, I bora cared the beams to rid the powder post borers and it seems to have worked. Thanks!
Also, you mentioned a video or more detailed post about this method and I can’t locate it. If you could point me in the right direction, I would greatly appreciate it.
Questions:
1. Do you use a particular joint compound?
2. Diamond Finish plaster? (As opposed to Diamond base coat.)
3. 50-50 mix by weight? volume?
… is that before or after mixing the plaster to “sour-cream” consistency?
4. Over old paint, you recommend priming. Do you have any thoughts on the primer – shellac-type (BIN), PVA, oil-base, ‘bonding’-type? Or, plaster bonder?
Thanks
George, Answers:
1. Regular premixed joint compound not the lightweight stuff and not the powdered stuff you mix yourself.
2. Diamond Finish Plaster yes
3. 50/50 by volume, mix the plaster to sour cream and if you have 1/4 bucket of plaster add 1/4 bucket of joint compound. It doesn’t have to be exact.
4. Oil based primer over old paint (unless it’s flat paint) for even adhesion or use a bonding agent.
Good luck!
Also it is a terrible idea to use scrap peaces to complete your walls they will crack out guaranteed , if you want to use the scrap peaces then you had better be doing the old brown scratch coat white coat finishing , but then I still don’t recommend it . Just keeping everyone in check here. I have been around drywall , several types of plaster, old stucco and e.f.i.s. I know a little something about a little something!!! Lol
This is nothing more than just plastering , nothing new here, the real reason he is trying make this sound different is because he can’t finish drywall and have it come out like it should . Drywall is the best way to go and if u want thicker walls just use 5/8 . Then call a professional to finish it , there u have . 30 yrs in the drywall business. Have a good day
Thanks for commenting Dunzy and you’re entitled to your opinion, but you’re wrong. I know how to get a quality level 5 finish on drywall if need be. I have done orange peels and knockdowns of all sorts, but none of it is attractive to me. And applying plaster vs joint compound is not at all the same. I’m sure I haven’t done as much joint compound as you in your years, but I can assure you that learning to work with plaster is a different experience. You may not like my methods or ideas and your welcome to ignore them, but it’s drywall guys like you that have been putting anachronistic walks into these old houses that I end up coming in to fix. So what I guess I’m saying thanks for the extra work!
seriously, dunzy, did you even bother to read the post, or any of the comments from real homeowners of antique houses, to understand why we don’t like drywall? there’s a very real need for folks who understand the aesthetic and other factors involved in repairing antique homes, and being so dismissive like you are being, shows you aren’t one of those people. you know how on antique roadshow sometimes people bring something in and it’s lost all its value because someone cleaned or polished it? there are certain qualities to genuinely old things that both appeal to people and lend things real worth. it’s just the way things are. and if i walked in to an old victorian or craftsman house to discover that it was missing all the original woodwork and had the plaster replaced with drywall, i’d consider it worthless, and so would anyone else who loves historic architecture for what it is. if the walls absolutely needed replacing in such a house, or someone chooses to put an addition on, in both of those cases, you really appreciate folks like scott sidler who maybe can’t go back in time and create walls that are actually historic, but at least understands how to create walls that look and feel appropriate to the house. call it an artform if you will, and then we all can recognize there’s a big difference between people who are merely skilled construction workers, or technicians, versus those for whom their work is truly an art. the world needs both, but the latter is always preferred in historic preservation and adaptive reuse. if you don’t *quite* get it, just ask yourself why everyone thinks Europe is so beautiful compared to the US. it’s mostly that they have an abundance of historic architecture. our country will not be beautiful like Europe except to the extent that we value architecture as an at form, both when we preserve existing buildings, and when it’s time to build new ones. we have sadly been really lacking in the latter. attitudes like yours won’t help with either.
I removed old 70s era wall tile from my parents’ small bathroom.
The walls were tiled 50inches high and above that it became drywall to the ceiling. Now I’m left with these walls that are covered in tile adhesive with an untaped Seam at the 48 in high mark. Is it possible to just tape that seam, cover this entire wall issue with this plaster/compound mixture, and just build up the higher parts of the wall to be the thickness of the adhesive on the lower part of the wall?
Is there a video or more in depth instructions?
Great info here! I have a 1916 Craftsman currently undergoing renovation. Can I apply the plaster/compound mix directly to old sheetrocked walls with texture and paint?
Damien, I would prime the walls first since for, grease, or glossy paint can create problems with bonding.
Great! How exactly do I prime it?
Damien, use an oil-based primer.
Sorry, I know realize my previous question was vague. By primer, I thought you might have been referring to a bonding agent, like that pink stuff typically used to prep standard drywall for plaster application. But you mean primer as in plain old paint primer, yes? Do you think I should also sand or shave the texture off the wall a bit beforehand?
If the texture is particularly deep then scraping might help, but it’s not necessary most times. I use a bonding agent for straight veneer plaster, but skip that step when using the modern plaster.
In Europe, we have eliminated Drywall, plaster and all dirty/messy forms of wall and ceiling systems. This is the easiest and greenest alternative. NO DUST, NO WATER, EXTREMELY FAST! _CLIPSO.COM_
you can cover a 16’8″ x 150′ wall without seams in a day. Comes prefinished so no painting, requires almost no framing………………. the list goes on
Is it 50% of each powder then add water, or do I first premix them separately and then add them together?
First premix the veneer plaster powder with water to a sour cream like consistency (with no lumps) and then add the premixed joint compound. Do NOT use the powdered setting type joint compound, but rather the premixed stuff that comes in a bucket.
Hello I’m thrilled to have found this information. We are finishing a space above our garage as a game room for the kids and I was dreading the sanding part of drywall. So, all I need to do is put up regular drywall, mesh tape the seams, mix half and half joint compound and finishing plaster and apply it to the walls? No bonding agent over drywall or mud to the seams? So excited!
Chris, no bonding agent needed! I apply one coat to the seams of the 50/50 mix and knock that down before skim coating the entire wall. It makes the whole process much simpler with almost identical results. The best part? No sanding!!
Perfect!! Thank you for such a quick response!
Could this be done over paneling, too? You’d need to fill in the grooves, presumably, but would there be any other issues? Thanks!
I’ve done it over paneling and has good success with it adhering. Just test it first in a small area to make sure it will work for your particular paneling.
What do you suggest for filing in the paneling grooves? Compund too many shrinkage coats, still shows lines? Wood putty? Taping?
Thanking you in advance,
Karen
Put one coat on the grooves and then skin coat the wall with the modern plaster mix.
We have an early 1960’s repo that we are renovating. Due to years of water leaks through the roof, I have cut out sections of the ceilings and some wall areas in various rooms, largest is 8′ x 8′.
The walls were made with gyprock plaster system, i.e. 3/8″ gyprock, ~4/8″ sanded plaster (like mortar), 1/16″ plaster skim coat (total wall thickness ~7/8″). 6 contractors said to tear out as plaster is “dead” and there are no plasterers in the area.
I was so thankful to find your website as we love the old plaster walls.
I want to do as you say and put up 5/8″ thick drywall in the areas I cut out. Seems it doesn’t matter if I use “modern plaster”. In reading on the web, veneer plaster sounds like it is harder to work with as one needs to be fast. So, any particular kind brand/type of drywall?
What do I do at the seems? For the ceiling, I have 7/8″ finished plaster wall that will butt up against 5/8″ drywall on the ceiling. How do I connect the two? To remove the ceiling I had to cut through the metal lath in the corners. Now I have a gap between the top of the finished plaster wall and the ceiling joists to which I’ll hang the new drywall.
For wall repair, I have 7/8″ finished plaster that will but up against 5/8″ drywall. Again, how do I connect the two?
Do you have any videos showing how to apply your suggested system? (I realize you didn’t invent but I’m not finding videos or how-to’s with this system.
Also, I have one room with just gyprock on the walls…it was covered with wood panels instead of plaster like the rest of the house. I can’t find any videos of how to apply plaster to gyprock.
Thanks much
A thousand thanks, Scott! For years I’ve been hating on drywall, waiting for a solution to sanding. Quick question: out here in California the term “veneer plaster” leaves most building suppliers looking at me as if we don’t speak the same English. No Diamond in the greater LA are – La Habra owns this market… are we talking about the top coat? the finish coat? rather than a base coat product? and how fine on the sand if I want a toothier look and feel?
Jacquie, it is a final top coat. You really can add almost any aggregate into the finish if you’d like. I’ve added sand, perlite, etc with great success.
Sometimes I think it would be nice to live in a new modern house until I think about giving up my plaster walls which I love….I even hate to remodel because contractors don’t want the inconvenience of having to deal with them and would throw them over for drywall in a minute. I’ve been considering raising my dormered ceiling to the roofline but haven’t wanted to lose my uniform imperfection of plaster. I always hated drywall and not sure why but I think you hit the nail on the head….it’s too perfect until it’s not..papery wet tears and tape….screw heads….ehhhh….thanks for this idea.
Your website (and book) are so helpful! We are in the middle of renovating a 115 year old Four-Square that has been hacked up over the years with many terrible renovations. Because of this we are doing a mix of repairing plaster, building new walls & drywalling over some plaster. This technique sounds perfect for all these different situations, I’m just wondering what type of veneer plaster I should be adding to my joint compound. Veneer plaster isn’t readily available where we live so if I’m going to special order I’d like it to be the right kind- there are basecoats, finish coats, and one coat veneer plasters. Which of these should I mix with joint compound? Thanks so much!
I use the one coat veneer. Usually Diamond or X-Kalibur brands are what I like the most.
Thanks so much! And if I were to tint the mixture could I just use regular interior paint?
Yep, flat paint works best in bold colors. Definitely do some testing first because the added paint makes things look a bit different than expected.