

If there was ever an all around favorite building materials used in old houses it would have to be good old fashioned beadboard. Even though my spellcheck always has a problem with the word, old home builders never did.
Beadboard was used everywhere in old houses from beadboard wainscoating in bathrooms to beadboard ceilings on porches. There was really no place that it didn’t work well.
In this post, I’ll show you a few of my favorite places that you can use it in your old home for utility and design. Beadboard is to me what shiplap is to Joanna Gaines, I just can’t stop singing its praises.
What is Beadboard?
Beadboard was traditionally 3/4″ to 1″ thick tongue and groove boards most commonly about 4″ wide with a beaded detail in the middle of the board and at the tongue edge so that when installed they look like once cohesive structure that hides the joints of the boards.
The backside of the boards were typically smooth and this made them extremely versatile. The boards were installed in innumerable ways with the beaded side facing out on porch ceilings, wall panelling in the form of wainscoting, with the smooth side showing as porch flooring, as a total wall and ceiling covering in “carpenter houses” to save the expense of hiring a plasterer.

I have seen beadboard used as a handrail in attic beadrooms, spacers and fireblocks in wall framing. I’ve seen doors built out of beadboard (and built a few myself). It really is everywhere in old houses and once you start looking for it you’ll see what I mean.
The Evolution of Beadboard
Over the years beadboard has gotten thinner just like all other lumber. In the mid-1800’s it was almost all 1″ thick and today you’re lucky to find a full 3/4″ version at the lumberyard.
Most folks don’t even know of beadboard as individual boards, but rather they see and use the sheet versions of it sold at home stores today like Home Depot and Lowe’s where you’ll find 3/8″ plywood and 1/4″ MDF versions to my dismay. It’s not the same and looses the aesthetic of the truly dimensional original stuff.
Beadboard Ceilings
When you look up at those “haint blue” porch ceilings on old houses there’s a good chance that ceiling is going to made from beadboard. Even on new constriction today the detailing helps hide irregularities in the level of the ceiling and adds visual interest.

You can almost always assume that these beadboard ceilings are installed by running the boards perpendicular to the ceiling joists and then blind nailing them at each joist to hide the fastener.
Beadboard Soffits
Just like porch ceilings beadboard was used often in soffits both with exposed rafters like on Craftsman Bungalows or on enclosed built-up soffits on Foursquare homes and a bunch of other styles as well.
Typically the plain 1×6 roof decking was run to the edge of the roof and then the decorative beadboard planks were installed only where they would be visible around the soffit edges, again for visual interest.
Porch Flooring
You may not notice it, but often the underside of your smooth porch flooring is beaded. Since beadboard had pone side beaded and the other side smooth that meant that builders could flip it upside down and install it as porch flooring.
This amazing utility allowed one material to supply multiple uses and that is one of the big reasons it was used so extensively. It’s sheer utility is so great.
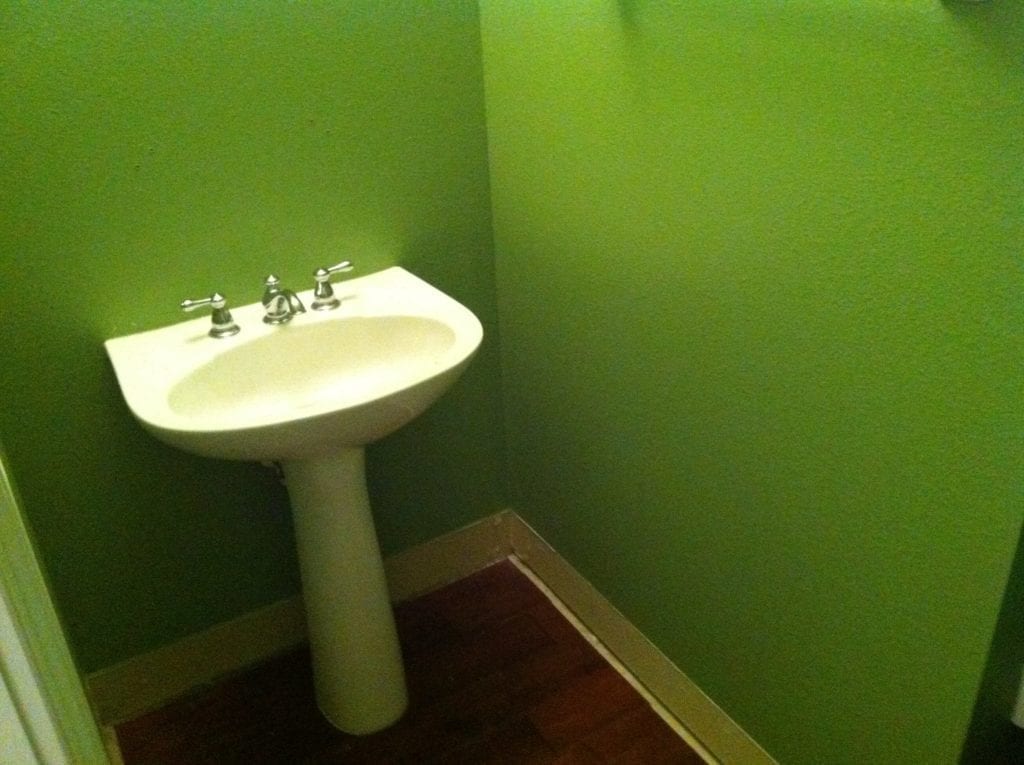
Beadboard Wainscoting
Probably its most common and simple use in many houses is as wainscoting. High end homes would typically have raised panel wainscoting but in the everyday homes most Americans lived in around the turn of the last century beadboard was the material of choice for wainscoting.
Most commonly found in bathrooms, kitchen and dining rooms the wainscoting varied in height from about 32″ to as high as 60″ in some utility rooms.
It provides a tough surface that can take easy cleaning and doesn’t mind getting wet or the occasional dings from chairs making it a great substitute for plaster walls in these hardworking rooms.
How To: Install Beadboard Wainscoting
Since adding wainscoting is a fairly DIY friendly option I wanted to give you a quick tutorial on installing true vertical plank beadboard wainscoting.
Once of the biggest challenges with this install is because unlike on porch ceilings or floors where the planks are run perpendicular to the framing for wainscoting you need to install them parallel to the framing which requires some hidden modifications.
Historically, the correct height for wainscoting is one-third the height of the room which for a typical 96″ ceiling height would be 32″. In bathrooms, that height is often extended higher to as high as 60″ like we mentioned earlier to protect the walls in a wet room.
Materials Needed:
- Beadboards in 3/4″ thickness.
- 1×4 select Pine board for the top rail.
- 1×3 inexpensive backer boards.
- Cove molding
- 1×2 select Pine for cap. (you can use any creative piece of trim to top your wainscoting. This is just what we used for this project.
Step 1 Prep & Layout
Take a look at the space you are planing to do the install. Remove everything from the walls that may be in the way, including the baseboards and base cap if there is one. Save and label or number these so you can remember where they go later because they will be reinstalled at the end.

The sink and toilet tank will also have to be removed as well as any baseboards which will be reinstalled at the end. Next, scribe a level line at the height you intend to run the wainscoting.
Helpful Tips:
- When determining your height, remember that your top rail will go above this and the cap will have to fit on top of that.
- Plan to use your materials wisely. The planks usually come in 8′, 12′ or 16′ lengths so using a 48″ or less height for your wainscoting will allow you to get twice as much footage from your materials opposed to more than 48″.
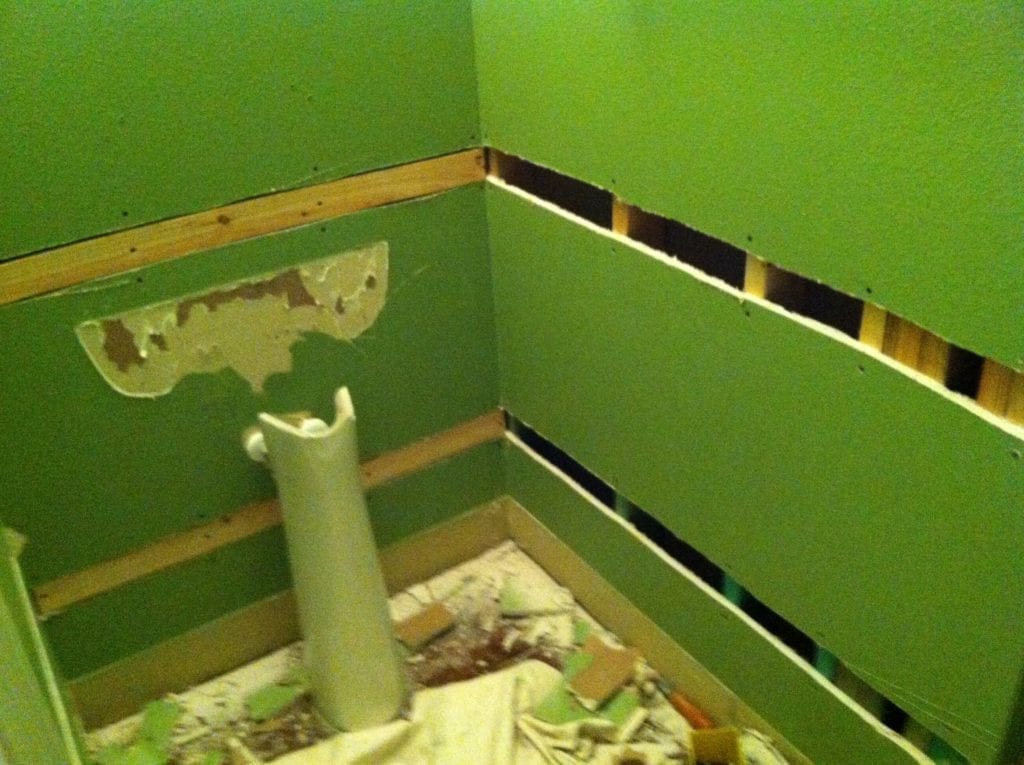
Step 2 Install Backer Boards
Cut away the plaster or drywall using a Rotozip or keyhole saw and razor knife to remove 2 horizontal strips of the drywall the size of the backer boards. Rip the backer boards down to 1/2″ (or whatever the thickness of the drywall/plaster is,) and after cutting them to length, screw them into the studs and screw the remaining drywall edges into the studs as well to make sure it is secured properly and flush. Each beaded-plank will get one nail into each of these back boards and the bottom plate of the framing.
Some people recommend just using construction adhesive to hold your wainscoting in place. I have done it in the past and found that installing backer boards provides a much more secure installation. Stay away from the goo and go with nails.
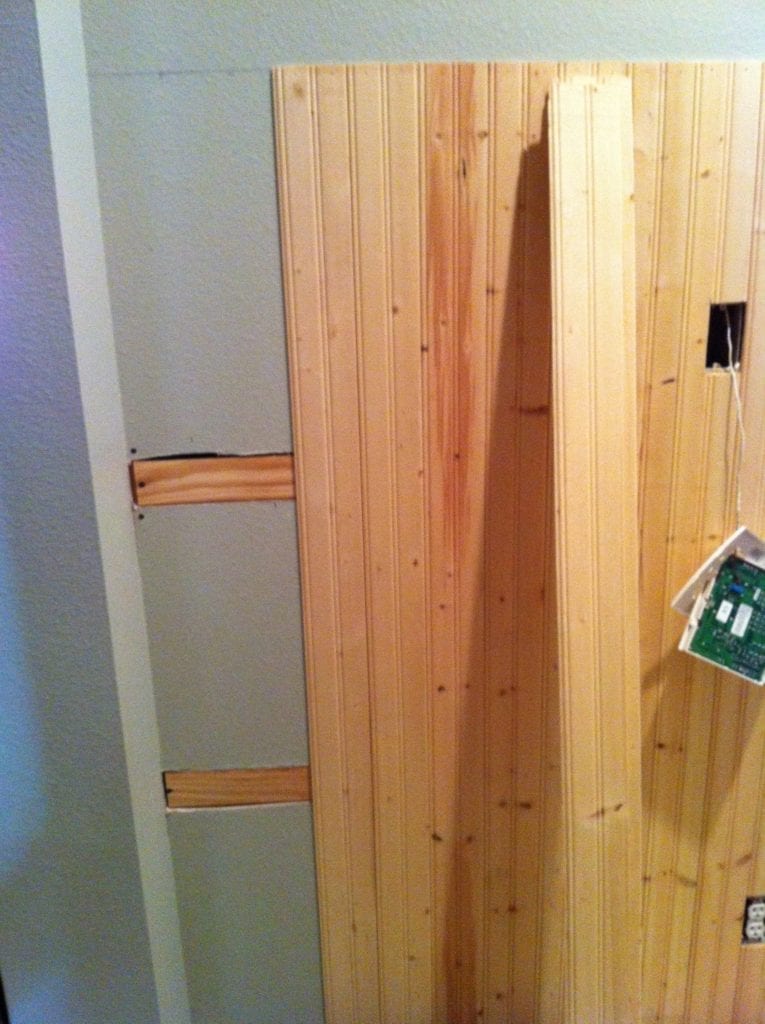
Step 3 Install Beadboard
Start your installation at the outside corner. Cut the groove side of the two corner boards at a 45° angle. Use a little glue and get this joint tight and straight before nailing it. These first boards are the most important to set straight. Once you are happy with this joint, move along the wall installing the beadboard. Continue installing, keeping in mind that you’ll need to notch out for electrical boxes and any pipes. A jigsaw works well for these areas.

If you’re using 3/4″ beadboard, you can blind nail the boards into the backer boards through the tongue. If you’re using something thinner, you’ll need to face nail the boards because the tongue is too thin to secure the boards properly.
Step 4 Install Top Rail/Cap
Rabbet out the back of the top rail to accept the beadboard. If you’re using 3/4″ beadboard, you’ll need another piece of backerboard installed behind the top rail to fur it out just a bit. This rabbet allows the top rail to hold the top of the breadboard securely to the wall and hide the cut ends. Nail the top rail into the studs.

For this project, we cut our cap stock to 1 1/2″ and rounded the edges just a bit so that we could also install a 3/4″ cove molding underneath the cap for a little extra pop. Lay the cap flat above the top rail and nail it down into the top rail using 15 ga 2″ nails. Don’t forget to notch the cap to accept the door casings.
Install the cove molding underneath the cap for a bit more dimension and visual interest.
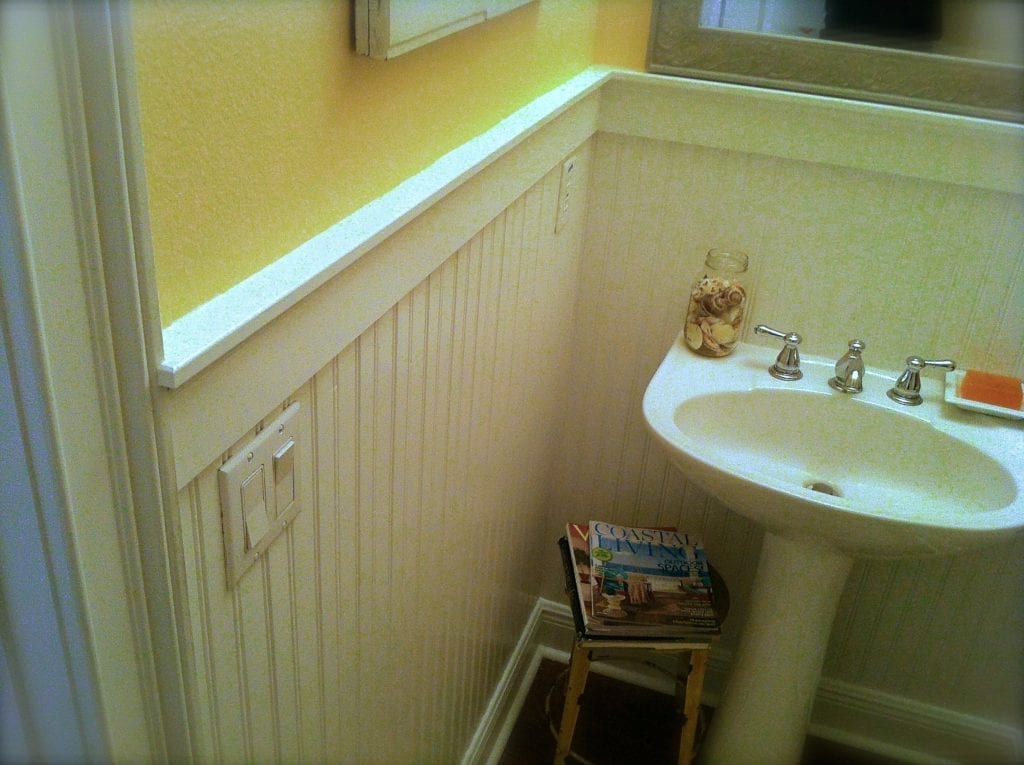
Step 5 Re-install Baseboards and Paint
Bring your baseboards back and reinstall them over top of the beadboard which will hide the bottom joint. Caulk all the joints especially where the baseboards meet each of the little gaps the breadboard creates behind them.
Fill all the nail holes with painters putty. Then, prime one coat and paint two coats with a high quality semi-gloss or satin enamel trim paint. On this project we used Sherwin-Williams Pro-Classic Semi-Gloss Waterbased Acrylic-Alkyd for a nice hard finish without the messy oil-based clean up.
After you’re done painting, you can put back the sink, toilet tank and switch plates. Now it’s time to sit back and enjoy the traditional look of your new beadboard wainscoting!


Founder & Editor-in-Chief
I love old houses, working with my hands, and teaching others the excitment of doing it yourself! Everything is teachable if you only give it the chance.
Our 1947 bungalow in Lemon Grove, CA (12 miles east of downtown) has extremely textured bead board. There are no “solid” sections, basically there are lines every 1/8th of an inch, then another design every 8 inches that has a deeper set of 4 grooves an inch apart, then more grooves. Repeated this has been painted (except inside the pantry, where we can see the original wood), and the walls have a gap so that you can see light between the rooms. I haven’t been able to find any bead board photos like what is in our house. Have you ever come across this excessively grooved bead board?
Hilary & Peter
Lemon Grove, CA
Thinking about using beadboard as sheathing for the roof on a gazebo which we’d shingle with architectural asphalt shingles. Any thoughts on how to not have to look at a bajillion roofing nails when it is all done?
This article starts off amazing but ends with a bit of “draw the rest of the owl”. It doesn’t talk about or visually represent the inside or outside corner details at all, when these are some of the most challenging aspects of the install to get right.
Great info! Thank you! Question…should there be a difference in size concerning the top rail and the baseboard? Should the rail be slightly smaller than the baseboard? Seems like I read this somewhere before.
We have an 1890s summer cottage with no beadboard except for the Z bar closet doors. It was obviously scrap from the dings on it. Love the old stuff!
Hi! The previous owners of my house installed beadboard as backsplash in the kitchen, but left a seam behind the sink, which has now warped. My handyman is going to address it, but I’m wondering if that is a recommended use for beadboard?
Trying to recreate what you have in the last picture.
Could you please elaborate on the top rail and cove you did in that picture. You mention you cut the stock to 1 1/2 but 1x2s are already 1 1/2. And the 3/4 rail plus the 3/4 cove would have the cove and 1 1/2 inch cap edges meeting. Is this the case in the last picture? If so did you round over the top and bottom of the cap or just toe top edge?
Also for the rail did you use 1x4s (3/4×3.5) or true 1x4s(1×4)? And did you rabbit the baseboards as well to fit over the beadboard? Thanks.
Hi Scott. I have a 1924 Craftsman with a beadboard ceiling on the front porch. It has probably 50 coats of paint on it. How do you effectively strip these down and get all the paint out of the middle grooves? I would like to stain them moving forward
Hi Scott. I have a 1924 Craftsman with a headboard ceiling on the front porch. It has probably 50 coats of paint on it. How do you effectively strip these down and get all the paint out of the middle grooves?
That’s going to be a heck of a job, but best bet I think is the eco-strip Speedheater.
We own a house that was built in the 1830s or 40s. Around the turn of the century we think, the bead board was installed almost everywhere; we have photos. When we purchased the house in the late 1990s, some of the hose no longer had headboard. The previous owner, who we know had replaced it with drywall. But the headboard is still in many places: the walls and ceiling in the hallways, some walls upstairs, window molding, the porch ceiling, inside of some closets, kitchen drawers and cabinets (we think the previous owner made them from the headboard he removed. When we arrived, none of the beadboard had been painted. Most of it is painted now. You are right; the old beadboard is thicker and far superior. I love beadboard, too.