Just like anything your asphalt driveway or walk needs some maintenance and regular sealcoating is an inexpensive way to dramatically extend it’s life.
Even if you have a less than perfect driveway sealcoating can bring it back to life so it’s worth learning a bit about. The great thing about sealcoating is that it is extremely DIY friendly. You can do it yourself in a weekend with clear skies, and the benefits will last for years.
What Is Sealcoating?
I remember the first summer my dad had me help him sealcoat our driveway. I spent the day with buckets of a smelly black tar-like substance and made more than my share of messes, but at the end of the day our driveway really did look brand new! I then realized how great this stuff could be.
Your asphalt paved driveway needs maintenance just like your yard and home do. It’s susceptible to the effects of everyday life, including vehicle and foot traffic, sun, wind, and rain. Snow, ice, and salt are particularly tough on asphalt.
Within a few short years, your once tidy driveway can show such signs of damage like erosion, chips, and cracks. You’ll start notice some of the asphalt granules coming loose eventually and sealcoating helps protect against all this wear and tear. Think of it like waxing your car to protect the paint.
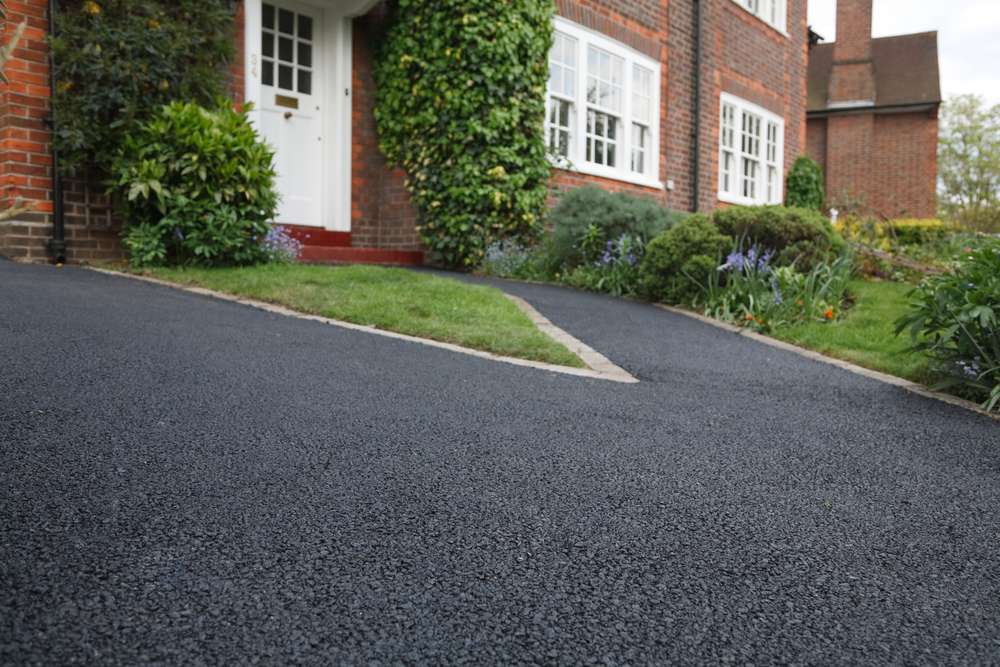
Sealcoating is a roll on coating design for asphalt surfaces to help extend the life of your driveway by filling in cracks, protecting against harsh weather, and preventing water from causing further damage. It’s also attractive, with its fresh and shiny appearance. You might liken it to a fresh paint job for your driveway, but it’s so much more than that.
Sealcoat is made of asphalt bitumen which has been heated up to a temperature above 240°F in order to turn the thick bitumen thinner making it easier to apply. This is the same binder used in road construction and is a byproduct of petroleum.
The granules in an asphalt driveway don’t wear out very quickly but the bitumen needs to renewed from time to time and that’s exactly what sealcoating does.
Sealing Your Driveway
You can apply a sealant yourself, but you’ll need to follow some housekeeping steps first. We’ll start with the easiest of these tasks, which is to park in the street. Keep all vehicles off the sealant for 48 hours so it can properly dry. Temperatures need to be above 50 degrees, and you’ll want several consecutive days of dry weather so rain doesn’t interfere with results.
The night before you embark on your project, position sealer cans lid-down. This makes the mix easier to stir, which you’ll want to do before application with a corded drill and paddle. Here are a few additional tips to get you started:
- The job will go faster with outdoor power equipment like a pressure washer and blower
- Wear old clothes, including shoes and gloves that can be discarded
- Purchase one more container than you think you’ll need to be safe
- Trim the grass, including that which runs alongside the driveway and has grown in between asphalt/concrete cracks
How to Prep For Sealcoating
Now that you’ve moved the car, situated your sealer cans, and trimmed the lawn, it’s time to clean the driveway. If your driveway is in good shape then a simple cleaning should be all it needs.
This requires a general degreaser that can be applied with a garden sprayer or pressure washer. Remove gas or oil stains with a stiff bristle brush and specialized cleanser. Once the driveway is thoroughly cleaned, rinse it from end to end with a pressure washer.
With the cleaning completed, you can use a crack sealer to repair breaks that are greater than 1/4-inch in size. This sealer is an asphalt-like caulk you pour or squeeze over cracks. If you have any pot holes fill those with an asphalt repair mix, screening it smooth as you go, and blow off the driveway a final time when finished.
How To Apply Sealcoat
Just like painting a wall cut in your driveway borders with a 4-inch paintbrush. You’ll throw out this brush once you’re finished, so don’t worry about protecting it or buying a really nice paintbrush. Make sure you hit every corner and small spot with sealant. If your driveway runs along paver steps, a garage door, or concrete slab, tape them off so you don’t accidentally seal them. Sealcoating doesn’t clean off these surfaces easily.
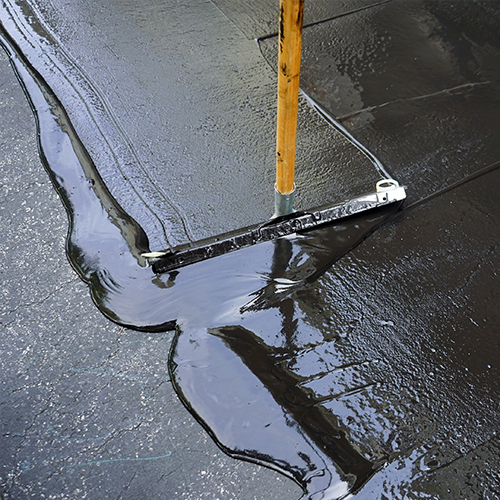
The final step is to seal the rest of your driveway. Most sealants can be poured directly from the bucket and applied with a thick nap roller or squeegee, but it’s best to read the application directions first. You may need to apply more than one coat, and moving in a uniform direction is best. Start a new bucket once you’re halfway through the first to ensure the colors match and you get a uniform surface.
Use Caution
When pouring the sealant, it’s important you don’t splash on any bushes, grass, flowers, or other landscaping. You also need to select the best sealer for your climate. A thick consistency is better for winter weather or driveways with many potholes, cracks, and bumps. Thin sealer, on the other hand, is ideal for climates that experience less snow or driveways with less damage.
A quick-drying formula will allow you to walk on the finished driveway in just an hour, and you’ll be able to park on it in about 24 hours. But this sealer will require you to work quickly. And finally, check your chosen sealant for minimum application temperatures, especially if you apply in the spring or fall.
How Long Does Sealcoating Last?
Depending on your climate and the starting condition of your driveway sealcoating can last 1-3 years. That lifespan may seem short, but sealcoating every couple years to avoid repaving your driveway is a big money saver.
How Much Does Sealcoating Cost?
You can find a 5-gallon bucket of sealcoat for around $25-40 which is surprisingly cheap in my opinion. Five gallons will cover about 300-350 SF so for the average driveway your looking at maybe $250-300 to sealcoat a driveway including sealer, degreaser, rollers and brushes which is a very cheap investment.
When is the Best Time to Sealcoat?
For folk up north the spring is the best time in my opinion because the temps are usually warm enough (over 50°F) and that will give you a well protected driveway for the duration of the season. If you’re in the south then late winter may work best so you can avoid the intense summer heat. Just make sure you have a weekend of clear, dry weather and relatively moderate temperatures to avoid issues.


Founder & Editor-in-Chief
I love old houses, working with my hands, and teaching others the excitment of doing it yourself! Everything is teachable if you only give it the chance.