Owning a private well is a great way to save costs and provide your family with a natural and healthy drinking source, but that also means that you are responsible for maintain a safe and clean water supply instead of relying on your city’s water. Learning how to perform your own well water testing is key in these situations.
If your home gets water from a well it can be very wise to test your well water quality occasionally to make sure it is healthy and clean. Changes in the environment can affect water quality and safety. This simple guide will give you everything you need to test well water at home and interpret the results with accuracy.
Step 1: Schedule a Well Water Testing
The best time to check well water is during the spring. We recommend that you perform testing at least once a year and look out for possible contaminants and solids. By doing so, you can avoid mechanical and health problems in the future.
If you’re experiencing any of these conditions or symptoms, it’s time to gather up some water samples and take a closer look.
- Problems with other wells in your area
- Flooding and other land disturbances
- Presence of nearby waste disposal sites
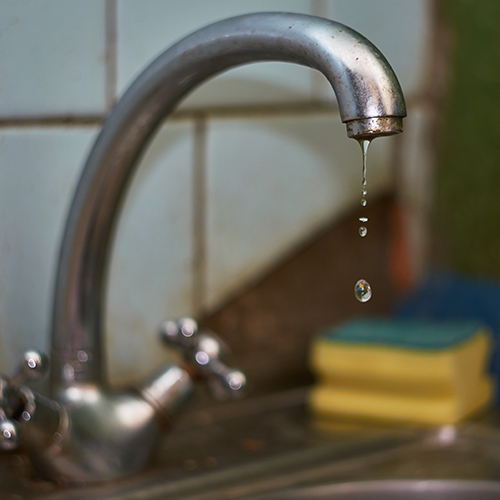
- Sudden change in water taste, odor, or color
Remember, you can’t always tell if the well water has been contaminated by just tasting or smelling it. By proper testing, you can get accurate results and plan for future maintenance and treatments.
Step 2: Get a DIY Well Water Testing Kit
You can complete your own well water testing and there is no need to hire a professional or pay a laboratory to do it. Going online, you can find affordable water testing kits: no need to wait days or weeks to find out if your well water is good for drinking or general use.
What’s Inside a Testing Kit?
I recommend all-in-one water testing kits that are user-friendly and affordable. You can find them at most home stores or online pretty easily. If there are specific things you’d like to test for check out the test kit for a list of the specifics to make sure you’re covered, but most are pretty extensive. They come with detailed instructions, vials, and charts.
Generally, here’s what you’ll find inside the average $30 kit:
- Instruction manuals
- Interpretation charts
- Vials and testing tubes
- Multiple testing strips
- Chemical tablets
Step 3: Gather Sample and Run Quick Tests
This step should only take you about half an hour. Find a cool, dry place with good lighting and lay down the contents of your testing kit.
To prevent contamination, avoid touching the inside of your test tubes and vials. Also, make sure you have a waste bin nearby for proper disposal. Once you’re all set, gather fresh samples from your water well using the accessories found in your testing kit.
The instruction manual will provide you with specific steps to follow. The whole process is very easy and takes a few basic steps.
Take Water Samples
There will be specific vials, tubes, or droppers for each test. Make sure to keep them separate. For bacteria testing, you will need to fill a water sampling bag with a specified amount of water.
Use Test Strips
Your test strips will come with different patches of color. These are expected to change in appearance after interacting with your water sample.
Dechlorinate and Incubate
For bacteria testing, you’ll need to fill a water sampling bag and dechlorinate the water using a dissolving tablet usually included in most kits. After transferring to a vial with a testing tablet, you’ll keep your water sample away from sunlight for two days. By then, you’ll be able to interpret test results by examining the change in color.
Step 4: Interpret Your Test Results
Based on the colors in your test strips, you can determine whether your well water quality is good or not. The interpretation chart from your test kit will help you assess, measure, and identify the following:
Total Coliform Bacteria
Coliform bacteria are found in the bodies of warm-blooded animals, soil, plants, and water surfaces. They do not always make you sick, but they are a good indicator of the presence of other harmful micro-organisms such as parasites, germs, and viruses.
Alkalinity, pH, and Hardness
These indicators test the “usability” of your well water. They can also affect its taste, smell, and appearance. If you don’t have the right levels for these quality indicators, your pipes can get damaged, causing heavy metal leaks. You may be able to resolve some of these issues by adding a water softener.
Pesticides and Heavy Metals
Whether it is runoff from nearby farms or old pipes that are leeching things like lead into your water this is an extremely important item to test for. These substances can cause serious health damage and make you sick. If present in your well water, you’ll need to check for leaks or other sources of contamination.
Nitrates and Nitrites
Consuming too much of these can affect your circulatory system. In the long run, consuming water with high levels of these can cause blood vessel damage and heart disease.
Step 5: Treatment and Maintenance
Did you get the results you expected? If not, you can seek further water treatment, use water softeners, or improve your filtration system. Other times, you’ll simply need to disinfect and distill well water before drinking. Regular tests are helpful for ensuring your safety and satisfaction in the long run.
For major issues cleaning up your well water may take professional help, but at least you can be sure of what the issues are and make the decisions based on your own well water testing rather than trusting a potentially biased company interested in selling you a service you may or may not need.
Knowledge is key when it comes to maintaining your water quality. By performing easy tests, you can be confident that it’s safe for drinking and consumption.


Founder & Editor-in-Chief
I love old houses, working with my hands, and teaching others the excitment of doing it yourself! Everything is teachable if you only give it the chance.