

Learning how to read a tape measure may seem like basic knowledge, but I bet there are a lot of powerful features on your tape measure you’re not even using. Sure, everyone knows the basics of how to read a tape measure, but do you know what the black diamonds are every 19.2 inches? How about the red numbers every 16 inches? There’s a lot more than just those two features!
In this post, I’ll show you the basics of how to read a tape measure, which I’m hoping you already know, but I’ll also cover the special features on most tape measures that can make sure you measure everything perfectly the first time. You might even be able to measure once, cut once after you read and watch this!
1. The Lock
Every tape measure has a lock to keep the tape from pulling back into the housing. This is tape measure 101. Pull the tape out, press the lock down, and the tape stays where it is until you release the lock. Some tapes have an automatic locking mechanism that locks the tape as you pull it out and then you have to press a button to have the tape return. I’m not a fan of those, but different strokes for different folks, right?
2. Basic Measurements
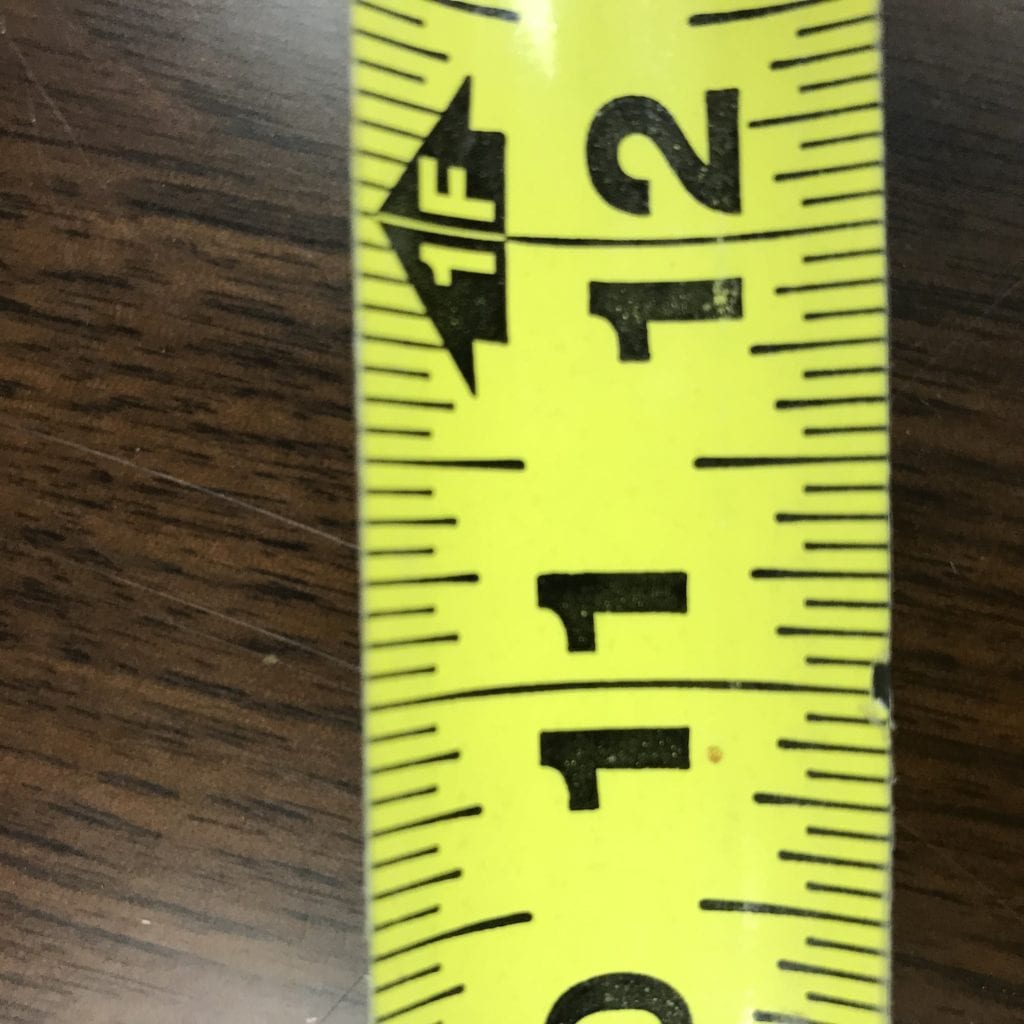
You can get tape measures in Metric and Imperial measurements depending on your needs and you can find different specialty tape measures as well. For the purposes of this post, I’ll be talking about a good old American Imperial measurement tape. The one I like is a Dewalt 25′ Tape Measure. There are hashmarks every 1/16″ with longer hashmarks for every 1/8″, 1/4″, and 1/2″ increment so you can easily determine the measurement. Some tape measures can get even more specific and include 1/32″ hashes, but that just makes my eyes go crossed.
For most measurements, find the inch marking and then count your hashes till you get to your fraction of an inch. Some tape measures also have a simple way to show your measurement in feet and inches. Instead of reading a 95″ measurement. You could read it as 7′ 11″. Those are helpful if you don’t want to start dividing your inch measurements by 12 all the time.
3. 16″ O.C.
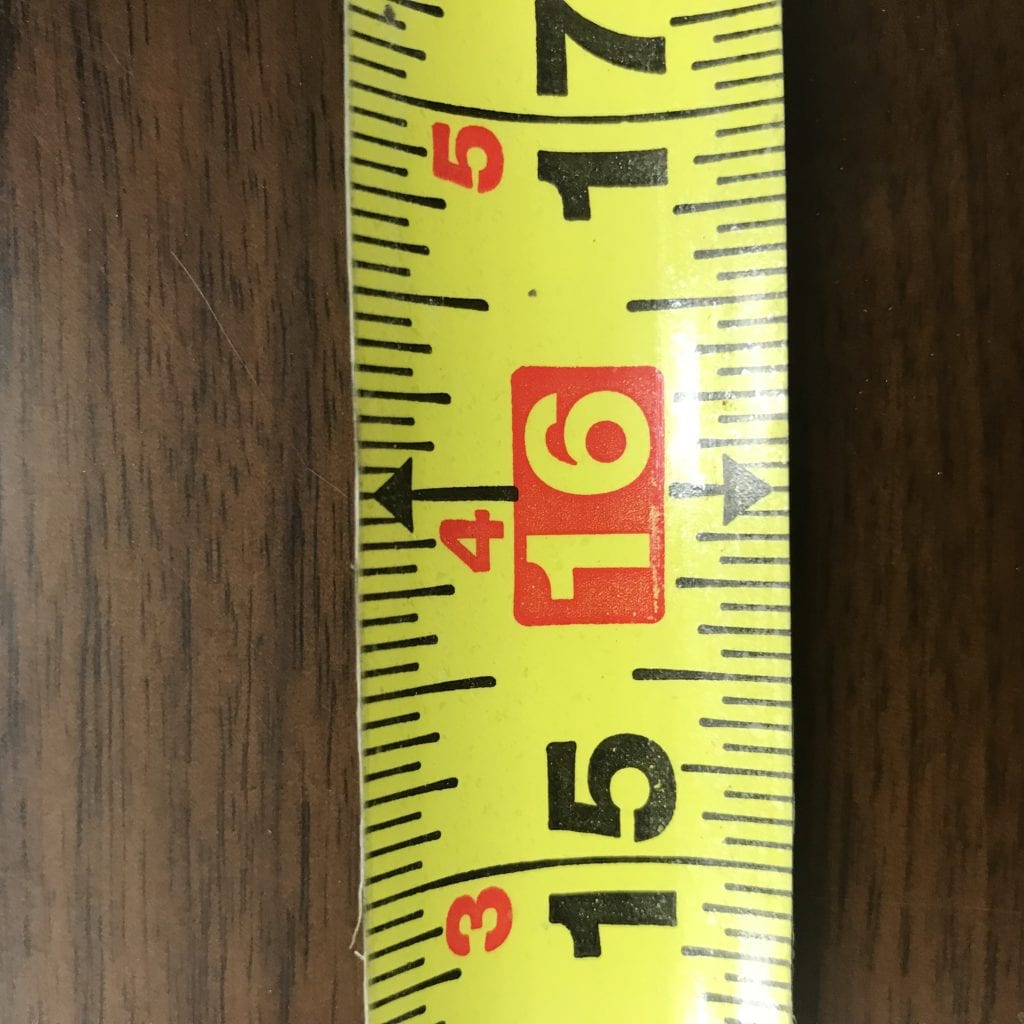
The O.C. doesn’t stand for Obsessive Compulsive but rather On Center. Most tape measures have a bright red number every 16 inches to help you layout wall framing (which are commonly built with studs spaced every 16″ O.C. in modern platform framing). You’ll see a red square or red number at 16, 32, 48, 64, 80, 96 and so on up. Use these to space your studs evenly and you’ll greatly speed up your framing.
4. The 19.2 Black Diamond
You may not have even noticed the little black diamond placed at 19.2″ on most tape measures. I’ll give you a moment to check yours. Now that you see it, you’re probably wondering why on earth they would put a diamond at that random measurement. An even bigger question is why a decimal rather than a fraction? Weird I know, but I’ll explain.
When you divide an 8 foot wall into 6 studs, you get a stud every 16″ which explains the red number every 16″. If you divide that same wall into 4 studs you get a stud placement every 24″ which is pretty darn simple. But what happens when you divide that same 8 foot wall into 5 studs (or in many cases 5 rafters)? To get 5 studs evenly placed in an 8 foot wall, they should be placed 19.2″ O.C.. That is why that little black diamond appears every 19.2″ on your tape measure.
Roofs don’t often require the same spacing for their framing since they don’t carry as big of a load as walls, and a 19.2″ spacing saves lumber and time as long as you know how to read a tape measure and use those diamonds to your advantage.
5. Hook Tab
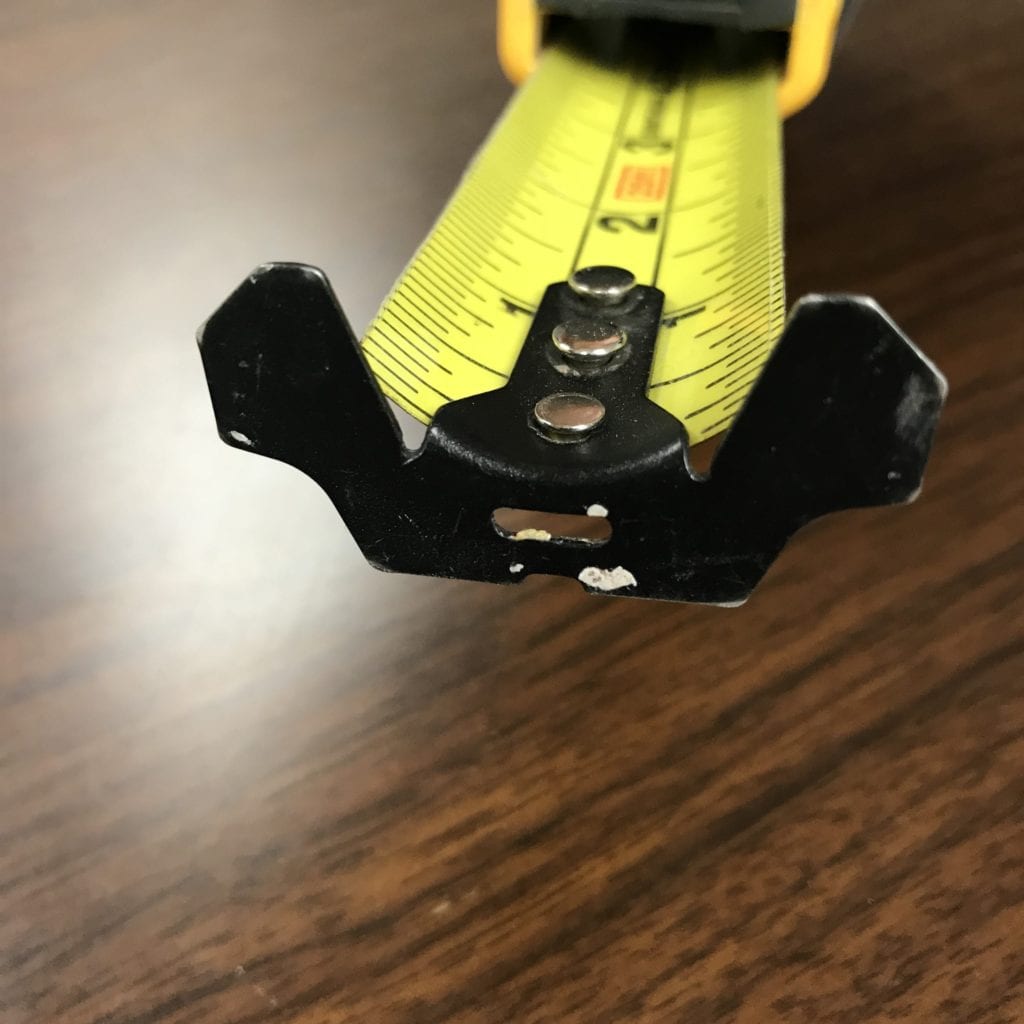
The hook on the end of your tape measure is an incredibly versatile little feature. It is designed to move in or out a 1/16″ to accommodate for an inside or outside measurement which is muy helpful. The little hole in the hook also serves a notch to fit a nail head so that you can make longer measurements without a helper to hold the other end of the tape. One last thing it does it that some of these hooks have serrated edges that can serve as marking tools for when you have either dropped or lost your pencil.
6. The Tape Body
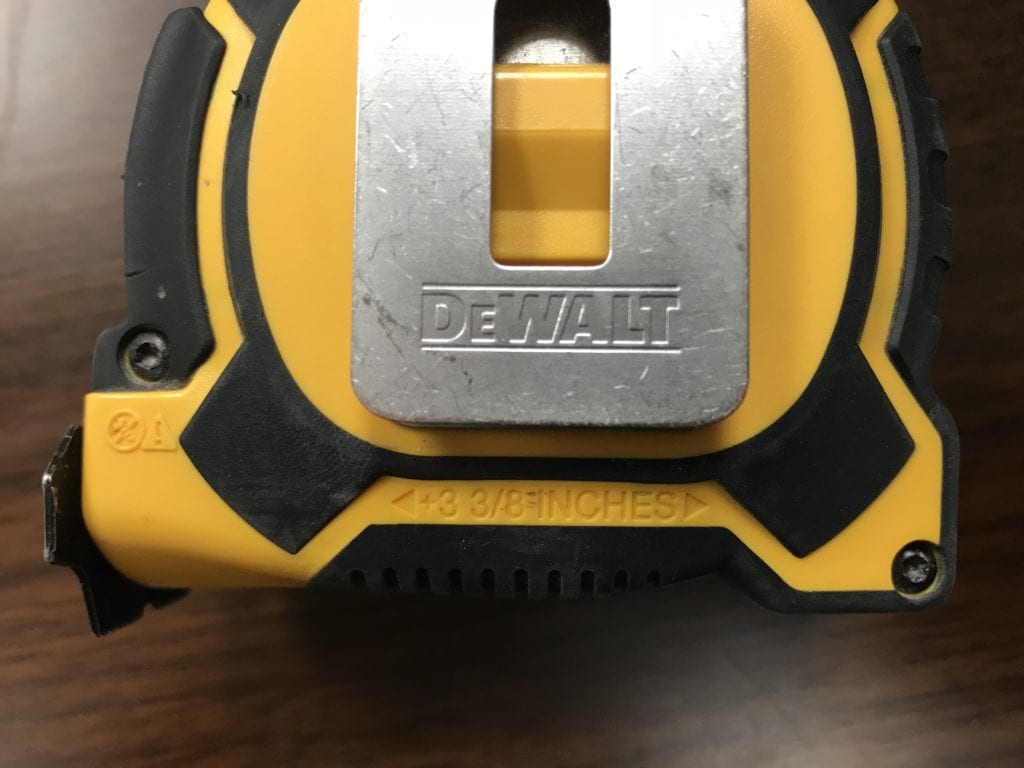
Every tape measure has a measurement on the back bottom of the tape body. This measurement that you’ve probably never noticed before tells you the width of the tape measure’s body. Why do you need to know this? Because taking an inside measurement can be difficult to get exactly right since the tape measure bends in the corner. Instead place the body of the tape measure back into the corner, then read the measurement where the tape disappears into the body and add the number on the back of your tape measure to your measurement. That will give you a true inside measurement with no more guesses!
What else did I miss? I know y’all have tricks about how to read a tape measure that make your tape measure one of the most versatile tools in your pouch and I wanna hear your thoughts in the comments below.


Founder & Editor-in-Chief
I love old houses, working with my hands, and teaching others the excitment of doing it yourself! Everything is teachable if you only give it the chance.
Ugh, I made the mistake of buying one of the type that supposedly locks when you pull out the tape, then unlocks when you push the button. Works fine for the first 30″ or so, but past that, the lock no longer holds and the tape starts to self-retract–all but useless!
Yeah, I’ve never liked those. Seems like too much work since I naturally hold the tape in place with my fingers anyway.
The best back scratcher in the world. You can reach any spot on your back with ease.
Ha ha! Nice!!