 Whether you’re refinishing your floors, making a table, cabinets or any other project that requires finishing, it’s useful to learn how to apply stain properly and make your projects really shine.
Applying stain is a pretty easy process that doesn’t need more than a couple sentences to explain (which I’ll go into at the end of the post), but how to properly prep wood for stain is a whole other thing.
Certain woods like pine, maple and others either have a difficult time accepting stain at all or they become so blotchy when stained that the results are a mess. To avoid that, I’ve tried lots of techniques over the years to help my projects take stain evenly.
We refinish a lot of wood floors, many of which are difficult woods like pine, which take a little extra work to make the stain look right, but it’s not as complicated as you might think. I’ll show you my secrets on how to prep wood for stain right here!
How To: Sand Wood Before Staining
It all starts with sanding. You need a smooth surface with no blemishes because stain will highlight scratches and dings in the wood. Always sand down to clean wood (if you have enough meat left of the wood) before applying any stain.
Look out for any swirl marks from orbital sanders which may be hard to see initially, but they will pop out like a sore thumb after you apply stain if you miss them.
A lot of folks make the mistake of sanding to either too fine of a grit or not fine enough before applying stain. Too fine and the wood won’t be able to accept the stain. Too rough and the wood will be very dark almost to the point of being black.
So, what’s the right grit? Generally speaking, for woods like oak and pine, I don’t like to go any finer than 120-grit or any rougher than 100-grit. Stay close to that range and the wood should look great.
My Secret for Smooth Staining
Once you’re done sanding, make sure you’ve gotten rid of ALL the sanding dust before you do anything else. Use a good vacuum and then a tack rag to wipe the surface clean of any contaminants.
The next step is the trick here. Wipe the surface thoroughly with a a wet cloth. Not damp and not dripping, but somewhere in the middle so that every inch of the wood is wet, but with no puddles.
“Popping” the Grain
The technique of wetting the wood down before staining is called “popping” the grain. What it does is open the pores of the wood to allow it to take the stain evenly and deeply.
When you water pop wood, you won’t have to do multiple coats of stain either. The wood grain is so open that in one coat you should be able to get the look you want.
Even with difficult woods like pine, I have had great success in getting even stain coverage without the common blotchiness that happens so often. If you are working on a pine project that you plan to stain, this is the only way to go.
The Biggest Mistakes to Avoid
The biggest mistake I see when water popping wood is that people either leave puddles or missed spots. When you miss areas those areas will not take the stain as deeply and look much paler, so make ABSOLUTELY SURE that you hit every area equally.
Applying Stain
Once the water has completely dried, you are ready to apply your stain. Don’t rush this! Wait until every trace of water has evaporated before putting any stain down.
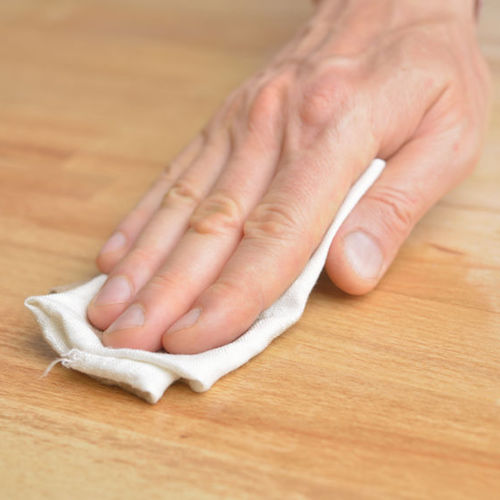
As for how to apply stain properly, it’s pretty easy. You wipe it on and wipe it right off. Apply a generous amount of stain to the floor or project and work it into the grain and then wipe it right off. Don’t leave any puddles or wet spots. Wipe it with a clean rag until the surface is relatively smooth.
If you do find you need a darker color, wait until everything has dried and then go back with another coat. Dried stain on wood should leave very minimal color rub off on a rag or socks if at all. That’s how you know it’s ready for finishing.
Make sure when you are applying stain that you have plenty of lint free rags like old cotton shirts. You don’t want to run out halfway through and have nothing to wipe off your excess stain.
That’s the whole enchilada when it comes to stain as far as I’m concerned. Stain is a great way to make creative projects. You can mix and match as many different colors as you want to make your own custom colors. Just make sure you keep water-based stains with water and oil-based stains with oil. I personally prefer oil-based stain.
What about wood conditioner?
I’m sure some folks will ask this and for them I’d say that wood conditioner works much the same way as water except that you pay a whole bunch of money for something that just as easily could have come out of the tap for pennies.
Save your money for the big projects and don’t waste it on wood conditioner. And that’s my 2 cents.


Founder & Editor-in-Chief
I love old houses, working with my hands, and teaching others the excitment of doing it yourself! Everything is teachable if you only give it the chance.
So I sanded all my hardwood floors and they looked great. I added an extra step and added the conditioner before staining but now the stain didn’t absorb into the wood and three days later still tacky. Is my only option to strip the floor with mineral spirits and start over. Sand starting low 36 60 100. I have never had this problem but normally don’t use pre conditioner. Please help.
Hi Scott
I have a Norfolk Island pine log that I’ve carved into a chair
I’ve treated with mould intergain tts mould treatment and linseed oil so far
I’m after a natural finish to allow the timber to age
Will a wax polish be suitable to keep the timber in a raw state
Thanks for this great info. I’m refinishing 100 year old douglas fir floors and trim. I’d like a nice medium brown. I’ve tested a number of oil-based pigment stains and everything turns orange! No blotching, but horrible colours, The grain, or springwood takes a nice brown but the summerwood turns orange. Will the water popping address this issue? I’ve done some reading on dyes. Any insight into whether dyes will produce better results? Thanks so much.
Dyes have a tendency to actually obscure the grain in my opinion. You might try sanding to different grits and see if that makes a difference. Or try a different line of stains.
If you use dye make sure it’s a lighter color, apply to wood let dry, then apply stain. We have this issue with eucalyptus and white oak(streaking) some take the stain and others don’t leaving the wood looking light and dark, dye is other thing that will help(water based stain)
Thank you for an interesting, thoughtful post on the technique. I have a couple of questions. First, after sanding maple plywood with 120 grit and then carefully cleaning and using a tack cloth, I proceeded to “pop” the grain as you directed. I did half of the test board this way, the other half I left sanded and cleaned. After the piece was thoroughly dry, I then applied one coat of gel stain to the entire piece. The treated end was much more uniform. However, there is a noticeable difference between the smoothness of the two halves with the water treated being slightly rough. I wonder if the clear coat will take care of this. Secondly, on the “popped” section there is a place where there was obviously a branch in the tree. This turned out darker than elsewhere. Suggestions on how to either fix or avoid these results?
That’s just a part of woods natural beauty. It’s called a knot. Enjoy it!
I have a few night tables I am going to clean up and restain, do I have to sand down to completely bare wood or can I just sand and testing over what was previously on there
Hi Judy!
You can always try a tiny spot on what’s already existing and if it works, you’ve just saved yourself a lot of work! But in most cases it seems that sanding is typically required. But there’s definitely no harm in giving it a shot on a test portion!
Thanks for reading our blog and I hope you’re having a great week!
-Alyssa at The Craftsman Blog
I’m redoing wood floors in a house that’s 100 years old. They have been very poorly taken care of. Painted, had carrier over them for years. Lots of pets at some point. It seems to me like they are very dry. Want sure if after some sanding to remove paint and poly if i can oil them? Then do another sanding? Then the water popping technique, then stain? What will the oil do to my stain application? I just want to take good care of my floors. Lol
Water pop after sanding then add a few coats of oil based stain which will rejuvenate the wood before coating with your choice of poly.
Hi , I have had my cabinets sanded down at our salon and I asked them to use a 220 grit to make sure it was nice and smooth . The wood is cherry and I fairly new . Would you recommend water popping on this project also or wood conditioner? Should I llighrly rough up the wood first because of the smooth surface before I start ?
If you plan to stain then water pop otherwise no need.
If properly sanded, it seems a shame to stain cherry which creates its own patina over time. 220 grit is a bit too smooth for stain absorption. A lot of what is considered to be cherry today is actually another species such as birch which has similar grain and is stained to look like cherry.
I appreciate you providing some tips on how to prep wood for stain such as sanding it first and foremost. It is important to find a smooth surface as the stain would definitely highlight the damage to the wood such as scratches and chips. I personally don’t know much about sanding but this article should come in handy if I ever need to sand my own wooden table. Thanks for sharing this. http://aerospacefacilitiesgroup.com/Sanding_Booths.html
I have pine trim I am stripping the shellac off and attempting to stain (Old Masters American Walnut). I stained some pieces (a different color Old Masters stain) and didn’t like the color so I stripped and sanded the wood back down, the problem now is that I can’t get it to take the stain well- without blotching(if I sand and stain a test portion of freshly de-shellac-ed trim it is fine). What Can I do to get this pine that I have messed with (too much) turn out like the others? Is there any way to reset the wood?
Usually just sanding enough and Water popping the grain should do it.
On pine trim/baseboards/window casings/doors what grit do you recommend finishing at before water popping the grain and staining? And should I wipe on stain and wipe off quickly?
Hi-
I’m curious about the time to leav.e the stain on a project. All the mini wax cans say leave it on for 5 – 15 minutes, and if I am understanding you correctly, you are suggesting wiping stain off right after it is applied.
Please clarify the amount of time to leave stain on a wood project.
Thank you
The longer you leave it on the deeper the color often. You don’t have to wait very long to wipe it off though if you pop the grain prior to staining. Just a couple minutes.
Is a couple of hours sufficient to letting the water dry? To the touch and eye the water looks absorbed but I’m paranoid that I’m “rushing” it?
If it looks dry then it is usually good. Often it only take about 15 mins or less.
Can a stain/polyurethane combination be used after using the “popping” method?
Yes, absolutely!
I did the water popping and after applying 2 coats of gel stain I applied polyeurothane. I allowed a good 24 hours to let the stain dry. It looked a little rough in spots so I lightly sanded it then applied the polyurethane. I used a paint brush like I have always done & never had problems until now. After I applied the polyurethane I noticed right away a lot of bubbles started forming all over the top. I left & came back a couple hours later & it was terrible. It was so rough & the bubbles stayed & made it look like crap. I waited a couple more hours then tried lightly sanding it. The polyurethane was coming off & gumming up all over. The only thing I did different was using 120 grit sandpaper instead of 220 in the beginning wood prep stage & I wiped the top with a damp rag, barely damp to pop the wood. I’m sure that’s what caused this big problem. Now I gotta sand it all off. I’ll never do this method again.
Your issue here may be the use of gel stain as opposed to traditional stain. traditional stain sinks into the wood whereas gel stain sits on top of it so wetting the wood to open the grain would provide no benefit to gel staining.
Does water popping cause cupping I’m Hickory, site laid floors!
A heavy soaking might but water popping doesn’t cause issues.
I didn’t know this about water. So we have blochy spots from where floor was unevenly wet. One coat of stain has already been applied. Is it possible to add water again everywhere or do we need to completely resand?
Hope you can help, thanks!
Usually it’s an all or nothing scenario. It would be hard if not impossible to water pop just certain sections.
I stripped and sanded my table before applying red mahogany to it. My wife decided she didn’t like the color and so I attempted to use paint thinner to wipe as much off as possible, then stain over the top of that.
Will this work with any degree of success? Can I do anything to improve the coverability of the second stain color? (Wood conditioner or grain pooping?) Or am I just SOL?
Scott – Great read. Sorry This doesn’t really go with Sharon’s post I seem to be technically challenged. We are about to stain some Cypress for the gable on our southern TN home we are building. If there is anything we should do differently for Cypress please let me know. We plan to follow your instructions to the T.
Keith, cypress should do great with these instructions.
I didn’t read this before I stained my pine tables. I didn’t use the pretreat or wet the wood before I applied the stain. The grain did raise. Can I sand it with 220 grit and restain afterwards if necessary or should I just go ahead and put on the polyurathane?
After you wet the wood,let it dry, then stain, do you sand the wood before putting on the finish?
No sanding needed
Scott,
I’m trying to finish a wooden hilt for a sword I have been making. In regards to finally applying the stain, it all runs down, do I apply it like a paintbrush then rub it off? Or just apply and leave it?
Thanks
Apply with a rag and then wipe off with another rag. That will keep drips to a minimum.
Thanks Scott.
Hi, I’m redoing an old wash stand– we see them in old movies, sitting on top is a pitcher and big bowl. I’m believe the wood in chestnut–it has a very fine grain, tan/redish in color. I’ve sanded it down with 220, but after reading your info, I may have to use a heavy grit paper. Thanks for you sharing your experience.
I wouldn’t worry bout the heavy grit cuz once you pop the grain, the wood naturally roughens.
Made walnut end tables with solid cherry drawers and cherry plywood panels in walnut stiled doors. Gonna stain all with minwax dark walnut stain. Thinking of boiled linseed oil after, then maybe shellac. Good choice? And should I water pop all first?
Hello,
Well written article.
The best results I’ve had have come from scraping the wood with a paint scraper, sanding smooth with a 220g, then popping and the stain comes out so even and rich.
One coat with hard maple.
I find sanding the previous stain/finish only embeds it further into the wood.
Maybe for those having absorption problems should try the scraper beforehand. It gets it right down to the bare wood.
Cheers,
Scott my floors have been sanded and the first coat of ebony oil based stain has been put down. Unfortunately the floors were not popped and perhaps as a result, they are not are dark as what we had expected. Our plan now is to add another coat of stain, this time with black pigment added.
My question is whether we should pop the floors now, after the first coat of stain but before the second. Will this help the wood absorb the second cost?
Thank you!
Jim, don’t add water to the floors now. Just add another coat or two of stain until you get to the right color.