 Whether you’re refinishing your floors, making a table, cabinets or any other project that requires finishing, it’s useful to learn how to apply stain properly and make your projects really shine.
Applying stain is a pretty easy process that doesn’t need more than a couple sentences to explain (which I’ll go into at the end of the post), but how to properly prep wood for stain is a whole other thing.
Certain woods like pine, maple and others either have a difficult time accepting stain at all or they become so blotchy when stained that the results are a mess. To avoid that, I’ve tried lots of techniques over the years to help my projects take stain evenly.
We refinish a lot of wood floors, many of which are difficult woods like pine, which take a little extra work to make the stain look right, but it’s not as complicated as you might think. I’ll show you my secrets on how to prep wood for stain right here!
How To: Sand Wood Before Staining
It all starts with sanding. You need a smooth surface with no blemishes because stain will highlight scratches and dings in the wood. Always sand down to clean wood (if you have enough meat left of the wood) before applying any stain.
Look out for any swirl marks from orbital sanders which may be hard to see initially, but they will pop out like a sore thumb after you apply stain if you miss them.
A lot of folks make the mistake of sanding to either too fine of a grit or not fine enough before applying stain. Too fine and the wood won’t be able to accept the stain. Too rough and the wood will be very dark almost to the point of being black.
So, what’s the right grit? Generally speaking, for woods like oak and pine, I don’t like to go any finer than 120-grit or any rougher than 100-grit. Stay close to that range and the wood should look great.
My Secret for Smooth Staining
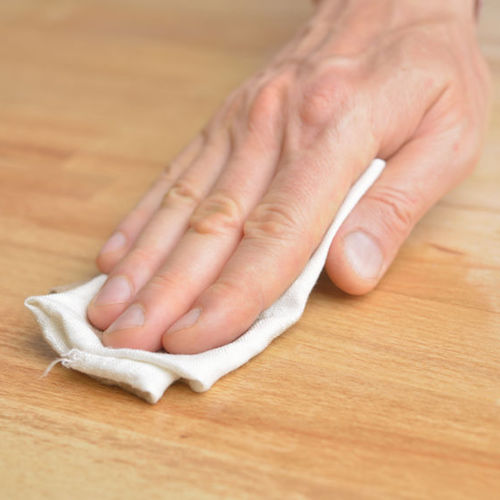
Once you’re done sanding, make sure you’ve gotten rid of ALL the sanding dust before you do anything else. Use a good vacuum and then a tack rag to wipe the surface clean of any contaminants.
The next step is the trick here. Wipe the surface thoroughly with a a wet cloth. Not damp and not dripping, but somewhere in the middle so that every inch of the wood is wet, but with no puddles.
“Popping” the Grain
The technique of wetting the wood down before staining is called “popping” the grain. What it does is open the pores of the wood to allow it to take the stain evenly and deeply.
When you water pop wood, you won’t have to do multiple coats of stain either. The wood grain is so open that in one coat you should be able to get the look you want.
Even with difficult woods like pine, I have had great success in getting even stain coverage without the common blotchiness that happens so often. If you are working on a pine project that you plan to stain, this is the only way to go.
The Biggest Mistakes to Avoid
The biggest mistake I see when water popping wood is that people either leave puddles or missed spots. When you miss areas those areas will not take the stain as deeply and look much paler, so make ABSOLUTELY SURE that you hit every area equally.
Applying Stain
Once the water has completely dried, you are ready to apply your stain. Don’t rush this! Wait until every trace of water has evaporated before putting any stain down.
As for how to apply stain properly, it’s pretty easy. You wipe it on and wipe it right off. Apply a generous amount of stain to the floor or project and work it into the grain and then wipe it right off. Don’t leave any puddles or wet spots. Wipe it with a clean rag until the surface is relatively smooth.
If you do find you need a darker color, wait until everything has dried and then go back with another coat. Dried stain on wood should leave very minimal color rub off on a rag or socks if at all. That’s how you know it’s ready for finishing.
Make sure when you are applying stain that you have plenty of lint free rags like old cotton shirts. You don’t want to run out halfway through and have nothing to wipe off your excess stain.
That’s the whole enchilada when it comes to stain as far as I’m concerned. Stain is a great way to make creative projects. You can mix and match as many different colors as you want to make your own custom colors. Just make sure you keep water-based stains with water and oil-based stains with oil. I personally prefer oil-based stain.
What about wood conditioner?
I’m sure some folks will ask this and for them I’d say that wood conditioner works much the same way as water except that you pay a whole bunch of money for something that just as easily could have come out of the tap for pennies.
Save your money for the big projects and don’t waste it on wood conditioner. And that’s my 2 cents.


Founder & Editor-in-Chief
I love old houses, working with my hands, and teaching others the excitment of doing it yourself! Everything is teachable if you only give it the chance.
I have to tell you that I read this and later thought about putting it to the test with my ash wood planks I am putting up on my study wall. I just worked from memory and I was doing a bit of degreasing of some nail gun holes in the wood with a full strength white vinegar solution. I took a two foot left over ash board and sanded it, then I wiped down the left half with vinegar and left the right half natural. I only waited a few minutes, I did not let the vinegar solution dry at all. You could easily see and feel the moist raised grain. Then I stained both with a brush. Again, the vinegar side was still damp to the touch. At first, with the wet stain, both sides looked the same. After a few minutes, I wiped the stain off both sides. It was incredible the difference. On the natural side the stain was darker and the grain was muted. On the vinegar side, the grain had a deep contrast and was stunningly beautiful compared to the muted grain natural side. I wish I could upload a picture to you to show the difference. We’ll try another test comparing a fully dry (after wetting) and a still wet side stain also. I’m not sure if the vinegar in the solution had anything to do with it, but we’ll find out. Thanks for the tip, you totally changed the way I am going to stain my wall.
Any tips for staining a birch desk I built? Any different than staining Maple?
Birch tales stain pretty well. Maple is very difficult to stain. Follow the steps in this post and you should e good to go.
Clarification for previous post. The floors are Red Oak sanded to 120 grit. The stain is a darker Dura seal color. Thanking you for any help you have to offer.
know its been a minute since the last post but hoping you can still help. Guys redoing the floors didn’t pop the grain before staining, now the stain is not taking, very dark stain, very light floors. Is there any way to pop the grain through first coat of stain.
I have acquired a few wood doors (fir) that have never been stained. They are marked with dirty fingerprints and wear, mostly around the door edge and handles. I would like to use these doors in a renovation. Is it possible to clean this wood up, enough to use a light or clear stain that would reveal the original Fir wood
I would start with some TSP and scrubbing then give the wood a light sanding until you get back to clean wood.
Hi
I am redoing my dining table and am ready to stain. After applying water and wood popping up it feels rough. Do I ignore the roughness after applying water. No one has told me to resand it to a smoothness after.
Jasmine
Having problems with black spotchey marks on maple cabinets and crown molding that is being retained. We have sanded and applied conditioner but the black mark are still coming through. What are we doing wrong? It’s not happening on all of the cabinet just some. But the new piece of maple crown molding is black spotchey.
Susan, even with a conditioner maple is really difficult to stain. It’s likely the wood taking the stain irregularly.
Hi! I’m wondering if I should apply the stain with a dry rag or a damp rag? And when I apply it am I going in rounded motions and the using a second cloth towipe down the excess going with the grain of the wood? Thank so much !
Samantha
Hi! I’m wondering if I should apply the stain with a dry rag or a damp rag? And when I apply it am I going in rounded motions and the using a second cloth towipe down the excess going with the grain of the wood? Thank so much !
Samantha
Scott, great article, thanks for the information. I’m curious, have you ever stained cherry? I know in some circles that is blasphemy, but I have a cherry tabletop and my wife is looking for something darker than the natural aged cherry look. I’ve read cherry can blotch easily…think these tips will help avoid that?
Hi Scott,
To get a smooth as possible finish I always use water to “pop” the grain in the final sanding process. Should I start popping it again before applying stain?
Before staining you get much better absorption and a more even color. I would.
Hi Scott! Thanks for the info. So on a birch butcher block piece – if you sand thoroughly, remove all dust, pop the grain and apply finish (bees wax base), you do want to go over the piece again with a very fine grit paper right? I mean once you pop the grain then you compromised a nice 220 sanding job correct?
Any input is appreciated! Happy Memorial Day Weekend!
Agreed.
If I use water to pop the grain won’t that affect using an oil stain?
Sue, not at all. Just let the water dry completely before staining. That is exactly what we do every day.
Hello
Great blogs and how too’s.
I’m redoing s stair rail and banister. I have sanded the oak handrails down a started applying stain. It’s seem like dust partials are getting into it and the little bluster looking bubbles. How to stop that?
Also the wood isn’t soaking up the stain very well. I stripped the polyurethane off and sanded it. I think I sanded it to fine with 220. Do you think that could be a issue.
The owners are starting to get upset because it’s taking to long.
Could you please give me some pointers ?
Thanks
220 is too fine. Sand it back down to 120 and make sure you remove ALL the dust from the surface. Then pop the grain by wetting the wood and letting it dry. It should take the stain just fine after that.
I just finished staining with oil base stain. I followed all the steps and everything looked good until a couple hours passed, now there are tiny freckles (pimple like) of stain popping up through out the color. Why is that happening and what can I do to fix this? Thanks!
I’m not sure why it’s happening honestly. Did you wipe the stain off thoroughly after application? If the “freckles” are liquid stain then I would likely wipe them off. Give it a while before clear coating and make sure it is truly dry.
We attempted to redo our wood floor and part of it looks good and most of it looks bad. Wish we would have read your article first. After we were done sanding we wiped the walls down with a wet rag and must of dropped water on the floor. Everything was fine till we put the first coat of polyurethane on. It appears every place we dropped water, there is a dark spot. Why did it only do it then, we didn’t notice it after it was stained. Thank uou
I’ve been refinishing my Kitchen cabinets . We first did gel stain and I sanded it off because even after use foam brush I seen lint particles, I resanded and tried again, still didn’t look right and I chemically stripped it and sanded rest off and used a wood conditioner before applying a minwax stain this time. It seemed as if the wood wouldn’t absorb the mahagony color on the oak cabinets . They didn’t seem to dry and looked more orange. Is the grain closed? What can I do? Thank you
This is a great post! I’m really glad you mentioned the sand grain. This can have such a drastic effect on what your overall turn out is when you’re redoing your hardwood floors. And cleaning up every minute piece of dust is super important. It’s also important to pay attention to the walls as well. Don’t be afraid to wipe them down. Just make sure if you’re going to wipe down other surfaces, you start with the highest and work your way down. I know this is common sense, but it’s also easy to get so involved in the project you don’t even think about it.
This much I understand: after popping the wood to raise the grain for optimal staining, you let dry, then apply stain. What I’m not sure about is the next step. FYI I’ll be using a natural oil finish (choices are Polyx, Fiddes or Rubio MC) on my wood floor. The question is how to deal with the now-raised grain of the wood before applying the oil finish.
Perhaps, using polyurethane you can leave the wood at that, but I think I’d have to remove the ‘fuzz’ of the wood surface first before applying oil. How, if not by light resanding?
Once the floor is stained your best bet is to buff on the oil finish. I haven’t done a lot of oil finishes on wood floors, but using an orbital polisher to apply the oil is a good way to smooth out any raised grain. The wood will not be glassy smooth but will have some character to it. I would try it in a closet first to see if it gives you the look and feel you want. Best of luck!
I like the out-of-the-box thinking you had here. I’m going to try different polishing pads and finishes (on a variable speed drill bit) to see what the results are. There are certainly new methods to this madness out there….we just need to discover em’
A must-to-have step that one should have before approaching the superb piece of staining! Sort of wood applied within different stains may also go with accurate prepping technique. Deepening of the surface matters and how smoothly the dyes can reach into is another level of skills.
I like your tip about using a vacuum before using a damp cloth to clean up the shavings. We use a damp cloth, but have never included the vacuum. It sounds like it would be easier and faster than sweeping. Thanks for sharing!
Hi, I was curious if there is a maximum time that you need to apply the stain on after wetting down the wood. I understand that you need to wait until it is dry, but can you wait too long? For example, if I wet it and then don’t get to it for a while, should I re-wet it? Love your website!
Lindsay, I’m not sure if there is a maximum time but I would definitely try to stain within a couple days. You don’t want the bare wood exposed for too long before staining and finishing.