As I write this post about oil-based paint, I realize that the information is quickly disappearing from both common knowledge and usefulness today. If you live in California, I don’t even think you’re allowed to buy oil-based paint anymore (at least not in any significant quantities).
The landscape of house painting has been changing ever since water-based paints were first introduced by Sherwin-Williams in 1941. Kem-Tone, as it was called proved that water-based paints were a possibility. And it’s no secret that water-based, or latex paints, are easier to work with, better for the environment, and longer lasting than most oil paints. But there is still a place for them paint today. And if you live in an old house, knowing how to work with oil is almost a requirement.
What You Need To Know About Oil-Based Paint
Slow-Drying – This paint is notoriously slow drying and the reason we have the saying “It’s like waiting for paint to dry.” Most oil paints takes about 8 hrs to dry enough to recoat, as opposed to latex paint which takes around 4 hrs to recoat. This may sound like a problem at first, as it definitely slows down the whole process. But this slow drying allows the paint to flow out better and provide a smoother finish than latex paint. This slow process allows brush marks to level out remarkably well.
Good Ventilation – If you’re working with oil-based paint you need better ventilation than you do with latex paint. Make sure to open windows and put a fan in the doorway to pull in fresh air. They usually have a much higher VOC content than latex paints, which is why the extra ventilation is needed.
Yellows in Dark Areas – If you have old oil-based paint on your closet’s baseboards, chances are it’s pretty yellow. Light colored oil paints are notorious for yellowing with age and in dark areas. The more sunlight it gets, the less it yellows. If exposed to more sunlight, the yellowing will fade away though, and though today’s paints have gotten better about holding their color, it’s still a problem.
Can Be Mildew Prone – When used outside, oil-based paint has a tendency to mildew. This is especially prevalent in varieties that contain larger quantities of linseed oil.
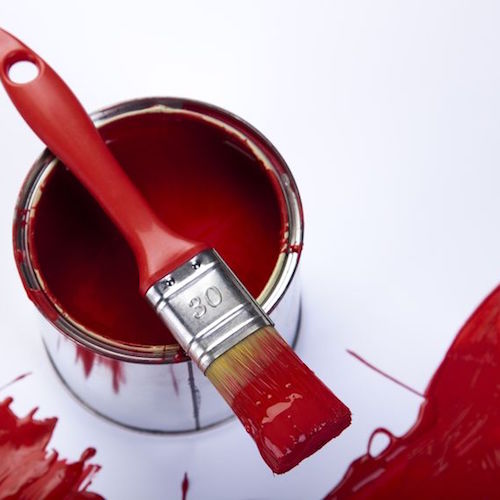
You Need a Specific Brush – Different paints require a different brush. There are some brushes that work with both latex and oil, but natural bristle brushes work much better with oil-based paints. It’s important to pick the right paint brush. They will usually say “For Oil-based Paints” on the brush holder.
Hard Finish – One of the qualities of oil paints that manufacturers have struggled to create with latex paint is a hard durable finish on enamel paints. Nothing beats the hard, durable finish of an oil-based enamel paint. And that hard finish makes it an excellent choice for doors and windows because that hard finish eliminates the sticking that often happens with latex paints. The hard finish also unfortunately prevents the paint from being as flexible as latex, which is why old oil-based paints begin to crack and chip off. Temperature swings and expansion of the surface eventually breaks the harder paint film of an oil-based paint.
Difficult Clean Up – If you’re painting with an oil-based paint, the clean up is a bit more involved. Oil-based paint is pretty much impervious to water, so you’ll have to use paint thinner or mineral spirits to clean your brushes. Here’s some tips for using mineral spirits:
- Make sure the area is well-ventilated.
- Pour some into a bowl and vigorously mix your brush for about a minute.
- Pour the used portion into a sealable metal container.
- Repeat this process until the mineral spirits comes out clear and the brush is clean.
- Dispose of the used thinner or mineral spirits at your landfill’s hazardous waste drop off.

And there is one last thing you need to know about oil vs water based paints . . .They don’t mix! I would think it’s obvious to most people that mixing a can of oil-based paint with a can of water-based paint wouldn’t be a good idea, but I’m talking about something else here.
If you are painting oil-based paint on top of latex paint then you have to prime the latex first. Latex paint and oil-based paint expand and contract at two different rates. So, if you paint oil-based paint on top of a latex paint without priming first, the latex will flex so much underneath that the oil-paint will quickly fail.
You can get away with painting a latex paint on top of an oil-based paint without primer, but just to be safe, it’s always a good idea to prime first when you are switching from one type of paint to the other.
Hopefully, this has been a good “primer” (<—Sorry, I couldn’t resist the painter humor) for working with oil-based paint. If you have any tips I may have forgotten, please share them in the comments below.


Founder & Editor-in-Chief
I love old houses, working with my hands, and teaching others the excitment of doing it yourself! Everything is teachable if you only give it the chance.
Hi Scott,
We moved into a house in the Northeast that has oil based paint on exterior trim. Not sure when last painted but lots of cracking and chipping of the paint. Painter suggested putting oil based primer and then switching to latex paint as feels will easier to deal with and will weather better. Seems from your blog that once you put the latex on, would be difficult to go back to oil in future. I do like the smoothness of the oil and do not want my windows and doors to ‘stick’ after they are painted. For exterior trim, what would you suggest? If go with latex, is there a better quality exterior paint that will mimick oil based?
Sorry I meant to say the climate is hot as being in Jamaica
I have brand new pressure treated wood can I use water paint as primer then use oil as top coat? This is in a climate. Looking forward in hearing from you. Thanks. By the way what will be the long effect on the wood? The oil primer would get into the board better than the water base is not so.
Walter, you can prime or paint pressure treated wood for several weeks until it dries out. A moisture content below 16% is best before painting. And you can only coat latex primer with latex paint. If you use an oil primer you can top coat with latex or oil based paint.
Pressure treated wood…not sure what your doing with it but I’d consider “not” to paint but to “stain”…you won’t have to paint again…just a thought, Ben.
Hi Scott,
I need your advice. We bought a house and my painter used 1 coat of latex paint over oil-based paint on the trim and doors without any primer/prepping. The latex paint comes off/peels off very easily when you touch it. I have fired the painter and hired a new one. The new painter says to paint oil-based on top of latex now. Should I do latex now as we already have one coat of latex paint? How to avoid further peeling? Thanks so much!
Olga, first you’ll need to remove the latex paint if it is peeling and has bonding issues before you do anything else. Then prime with an oil-based primer and paint with your choice of oil or latex paint.
Thank you, Scott! That was fast :).
The latex paint is not actively peeling. It was painted only about a week ago. But if I brush my finger against it just once(finger, not even nail), it comes off so easily. Do you think it is still best to go through the steps you listed above? Thanks a bunch!
Definitely remove it otherwise your new paint job will fail prematurely. I hate it when that happens but doing it right now will save you the headache later.
Thanks so much!
I have an okd farm house built in1893 with plaster walls coated with layers of wallpaper. I do not want to strip the wallpaper, which is adhered very well. The Home Depot workers reconmended oil based primer followed by latex. also what do you mean by prepping?
Oil based primer would be the way to go over wallpaper.
Hi Scott,
I stumbled upon your blog while looking for good info on oil based paints. I have ugly yellow laminate cabinetry that is in great condition (installed in 1973) and am looking forward to repainting it. I am going to go with a navy-black for the lowers and white for the uppers. I am wondering if i need to sand prior to priming (planning on zinsser for the primer). If i prime with the white zinsser, is it helpful to get a darker tinted primer for the lower cabinets? my kitchen is a typical L-shaped with only one small window–is this sufficient ventilation? I have painted many many things but never used oil based paints. I am worried my two small dogs might have some issues with the fumes considering the lengthened dry time with oil based products. Any help you could offer is appreciated. Thanks!
Emily, tinting the primer for the darker paints will help you cover in fewer coats. For ventilation try putting a fan in the window to help pull the air out. At least some sanding will help greatly with adhesion. Try using a 220-grit paper before priming.
Scott, I have to agree with Kerri on Nov, 19, 2014 regarding painting water-based paint over oil-based painted surfaces. I have seen too many disasters when this method was used. Terrible mistake.
I have painted oil over oil on trims etc many times and never felt I needed to prime first. Maybe I’ll try priming next time, just to see If it makes a difference.
Thank you for your blog!
Patti
Hi I’m looking into repainting an old swing sign for a pub. I believe that it is a aluminium sign I know I have to sand and scrape all the old paint then prime at least 2 coats and sand in between but where do I go after that what paints should I use.
Ive HerD One Shot enamel Will Be The Best For The Lettering But It’s The Point From Priming To Lettering That Im Stuck On As Well As Finishing.
Victoria, here’s a good description of how to properly paint aluminum.
Thanks for these tips. I just used an oil-based black paint on ceramic tile…so far, so good (waiting for it to fully dry). But I have another question. We have a steel door to our garage that our dog has scratched down to the metal. We decided to repaint it black and not knowing any better, applied latex paint (we were told it would act as its own primer and applied 2 coats). Within one day, the dog had scratched it down to metal again. Now I would like to try the black oil-based, Benjamin Moore “Direct-To-Metal” paint I used on the tile. Most of the door is still covered with the black latex. Can we just paint it all with the oil-based? This paint also says it can be used as primer. Will it matter that some is applied to the latex and some directly to the metal? Sorry for this long, long question! I appreciate your help!
To make sure re paint job lasts I would make sure to remove all the latex paint first. Oil on top of latex is a bad combination.
I just moved into a house where a smoker had been living. Nothing extreme, but there were some nicotine stains on the wall. My painter said that to properly cover the stains, he’d need to use an oil-based primer under the no-VOC latex paint we chose. That was about 2.5 weeks ago and the room still has a very strong smell despite daily ventilation. I should note that I live in a cold region of the US, so the air has been cold. Any advice on how to hurry up the curing/dying process? This is of special concern given that it’s my 2-year-old’s bedroom.
Tony, that’s extremely unusual. The primer should have cured within days and the 0-VOC paint shouldn’t have any fumes. I’d call in another painter for a consult.
Try keeping the room warm to help the drying process.
After applying a coat of oil-based semi-gloss, I realized that some spots needed some caulking which I did and now want to add a 2nd coat in some spots. It has been a few days since it was painted so the paint is fully hardened and smooth. Should I prep by sanding or cleaning before applying the 2nd coat?
Tim, it never hurts to lightly sand between coats of semi-gloss or high gloss oil paint. I like the extra insurance it provides.
Can I use a can I use a latex primer under an oil paint?
Jennifer, for the best results use a oil-based primer with oil-based finish coat. I wouldn’t put oil on top of latex primer or latex paint.
I have enjoyed reading your blog. Thanks for all the good information. I need to give our baseboards and picture frame molding a fresh coat of paint. It was originally done in oil based paint and planning to recover with oil. My question is do I have to sand all the baseboards and molding before giving a new coat? It is good condition no chips or anything.
Sanding is probably not necessary, but I would always prime trim especially glossy trim to make sure you get good adhesion of the new paint.
Have done lots of painting and actually follow the reverse … oil over prepped latex ok, NOT latex over oil.
You may be able to get away with either for a while, but latex is more flexible than oil. As oil ages it gets harder and won’t be able to withstand the movement of the latex paint underneath it. Causing it to crack and fail prematurely.
For easel painting, the gesso medium for canvas or panels is acrylic based and then the oil or oil paint plus a synthetic medium can go on top. Or you can do an underpainting of acrylic paint and glaze on top with oil for richer color or an “old master’s” effect. I guess artist painting is totally different from house painting, especially outside.
I have also read the cold-pressed boiled linseed oil resists mildew much better than the type you get at the hardware store. And that the artic-grown flax (the source of linseed) protects better than flax grown at lower latitudes. Of course what works in the North may not work in humid Orlando.
There is a Swedish manufacturer (Alback and others) of very traditional varnishes, paints, waxes and soaps using this sort of oil. Very expensive, but suitable for the finest preservation projects. And there is an American-made version as well.
Check it out at:
http://www.solventfreepaint.com/i/PDF/allback_paper_part_two_2004.pdf
https://stevemaxwell.ca/allback-linseed-oil-paint/ (with video)
http://www.solventfreepaint.com/cleaned_linseed_oil.htm (American Distributor)
Pros and Cons of Allback paint–long discussion http://historichomeworks.com/forum/viewtopic.php?t=1625&postdays=0&postorder=asc&start=0
For a discussion of different linseed oils for artist paints and how to make your own mediums:
http://www.realcolorwheel.com/mediatable.htm
Scott,
I have read through all of these questions and your responses and I must say…you have been VERY helpful! I am in the process as we speak of refurbishing my bathroom wood vanity (oak). I am using an oil based primer (Zinsser) and I will allow that to dry before using an oil based dark brown paint (Glidden). I had the primer tinted to a darker color because I was told that it helps with the coverage of your paint (less paint required). So far it is covering quite well and I am excited about the seeing the finished product. My question is, should I lightly sand the primer before applying the top coat of paint? Or is it ok to go ahead and paint right on top of the primer? Also, how long should I wait before putting the doors back on the vanity and do I need to apply a sealer on top of the dried paint? Thank you again for your helpful tips!
I would always give primer a light sanding with 220 grit paper for a super smooth finish.
Painted my kitchen with BEHRS sandwash paint in 2007,the paint is no longer available at Home Depot.Need to repaint some walls and heard that the sandwash paint needs to be repainted with a oil based primer and paint.Any advice
Chris, sandwash paints can fail if they are coated with a water-based paint. I would prime with an oil-based primer and then you can top coat with standard water-based paint afterward.
What are your thoughts on using liquid sander products on oil based paint? All the trim and doors in our 1970 house is painted and it is lead based so don’t want to sand it but want to repaint it
Sarah, I dont have a lot of experience with them, but usually a good oil primer will be sufficient to give your topcoat good adhesion. I’d try a test in an inconspicuous area first.
In art class, I learned some neat tricks to dealing with oil paint that might work here too. Take a large peanut butter jar and clean out well. Put a tuna or other flat can with holes punched in the bottom with the holes facing up (can use an 8-penny nail to punch holes and be generous). Pour odorless mineral spirits to about an inch or two above the can. Then when you clean your brush (like a small sash brush)dab the brush against the top of the can to work most of the paint out, and then finish off in another (similar) container. For artist style brushes, you can use the thinner almost indefinitely, just pouring out the sludge once in a while and topping off the mineral spirits. The can separates the good thinner from the bad.
I bet a similar set-up can be made with a larger sealable container and galvanized hardware cloth for larger brushes.
Artist grade brush soap can help keep natural bristle brushes in good condition. Plus always hand shape the brush after cleaning and hang to dry.
Paint brushes left for just a short time (at most overnight) can be wrapped in plastic and put in the freezer or fridge.
Hi, i used Sherwin Williams primer and then a Purdy brush to apply Sherwin Williams pro classic enamel. Not sure wut went wrong but I have drips and brush marks. When I only used a light coat, the brush strokes were worse. When I used a heavier coat, i got drips. Please help!
Barb, a thin coat dries out too fast and leaves brush marks whereas a thick coat tends to run. Add some Penetrol if you’re using the oil-based version (floetrol for water-based) to help slow the drying time and eliminate brush marks. And then find the sweet spot of how much paint to load on your brush. Practice makes perfect!
Hi Scott! So glad I found your blog. Lots of useful information here!
I need to repaint a wood desk chair. About thirty years ago, I stripped it down and applied high-gloss oil-base enamel. I must have done ok, because the only reason I want to repaint is to change the color. I’d like to use another high-gloss enamel when I redo it. So … scuff, prime, paint? What kind of primer and paint would you recommend (going from a medium blue to grayish-green)? I like the look of the oil-base enamel, but don’t really like working with oil-base paints. I’ll do either, though. Whichever is likely to work best. Many thanks for any advice you could give! 🙂
Sheryl, I’d go with a fast dry oil-based primer and then use another oil-base enamel to stand up to the punishment of daily use. Take a look at Ben Moore Impervo which is absolutely incredible and super hard finish.