I don’t always like doing things like the rest of the world, and so when my wife suggested we get a new doormat I thought, “I can make a doormat!” Thus started my crazy idea to make a wooden doormat for our house.
I honestly had no idea what I was going to build when I proposed this idea, but I knew it had to be something good or my wife would scoff and tell me how much quicker and cheaper we could have gotten something at Hobby Lobby. It was then that I decided it needed to be made from scrap wood at my shop and had to have a “wow” design, which is not my strong suit, but I was ready to stretch myself.
This post was sponsored by Cabot stains. They make great products for outdoor wood projects, and I can always find the right finish for whatever I’m working on amongst their products.
Check out the video below to see how I built and finished the doormat.
Making a Wooden Doormat
I grabbed some scraps of heart pine, and walnut from my scrap pile and started milling them down on the jointer and planer to get them down to ¾” so the doormat wouldn’t be a trip hazard.
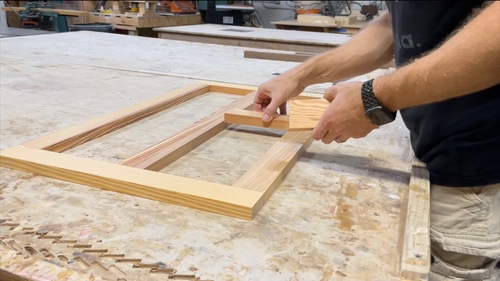
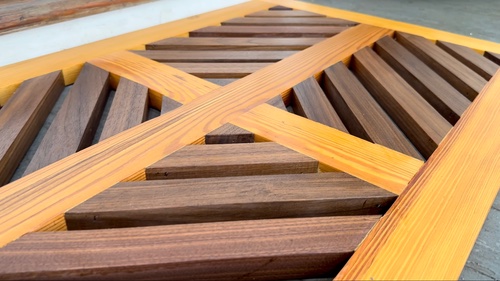
I liked the idea of having two different wood colors and grains to contrast each other in a pattern that popped, but what was that pattern going to be? I built a simple frame out of heart pine that was 36” wide and 20” deep to fit my door with simple butt joints. I fastened everything together using polyurethane glue and corrugated fasteners, which are a great way to build frames like this for cabinets and picture frames as well.

I inlaid some more heart pine in a cross design to split the doormat into 4 sections and then it was crunch time. Time to figure what on earth I was going to do with that walnut!
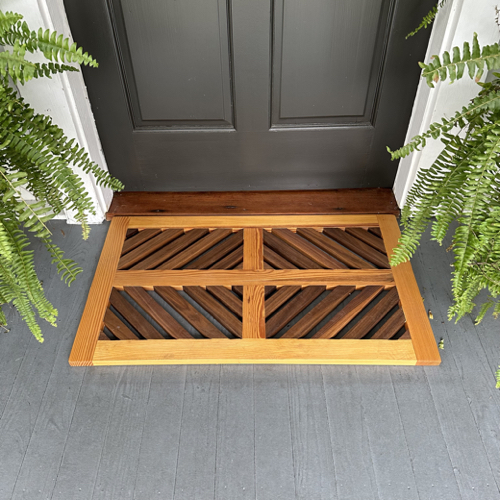
I tried laying it out a bunch of different ways and finally stumbled on a pattern that would not only tie the whole design together, but it would also be functional for wiping dirt off your feet when you come into the house thanks to the alternating design of the walnut in each of the 4 sections.
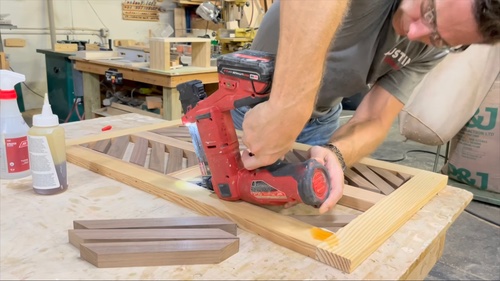
It took some time to get the pieces cut for one of the sections, but once everything fit the way I wanted I could just make 3 copies of the walnut pieces for each of the remaining sections. Boom!
I attached these pieces using polyurethane glue and 1” 18 ga. nails which was extremely time consuming, but in the end the pattern was exactly what I’d hoped for.
Then it was time for a little bit of stainable wood filler in the small joints where needed and a lot of sanding. I sanded everything with 60-grit to make sure all the pieces of wood were completely level then stepped up to 80-grit and finally 120-grit sandpaper softening the edges of the doormat as well.
After sanding I blew off the dust with compressed air and wiped everything down with a mineral spirits moistened rag to get it completely clean.
What Kind of Finish?
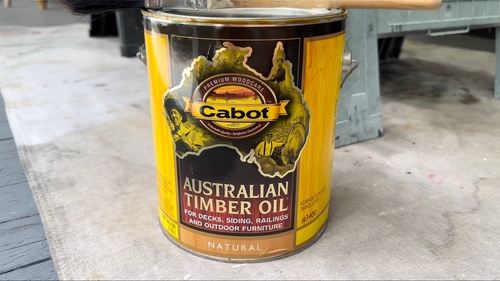
I went with a tried and true exterior wood finish that I’ve used on exterior projects before called Cabot Australian Timber Oil. I’m not sure what makes it Australian, but those folks down under sure lent their name to a great outdoor wood product.
You can check out my other outdoor projects where I used this finish in my DIY Adirondack Chair and DIY Garden Planter projects.
Since I had a couple woods that are naturally beautiful I didn’t need to add any color to this wooden doormat so I chose the natural color Timber Oil though they have other colors if you need. It only takes one coat of this product to really bring out the richness of the wood and it provides a film forming finish that repels water and can withstand the elements.
Like any outdoor finish it does need to be renewed every couple years depending on the exposure it gets to the elements, and for something like this that is designed to be walked all over it will likely need an annual refinishing.
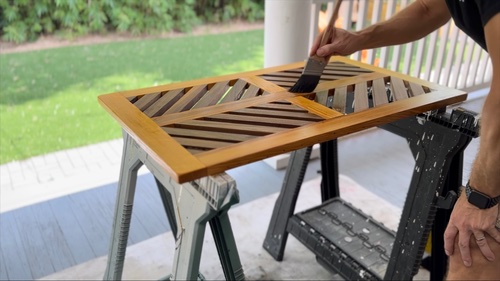
Australian Timber Oil is an oil-based product so I applied it with a natural bristle brush in the direction of the wood grain and tipped off the finish being sure not to overwork it. Clean up requires mineral spirits for those of you unfamiliar with oil-based finishes. Cabot recommends only one coat of finish for this product and I was happy to oblige.
24 hrs later the wooden doormat was in place and ready to show off! It’s simple little projects like this that make homeownership fun. There is always something broken or worn out that needs fixing, but you have to mix those necessary projects in with a sprinkling of creative fun projects that make you love coming home. And that’s exactly what this project was for me.


Founder & Editor-in-Chief
I love old houses, working with my hands, and teaching others the excitment of doing it yourself! Everything is teachable if you only give it the chance.
It looks great Scott! Really. A beautiful accent to your entryway. I have to say though, I’m curious about it’s functionality. Will it really help to wipe the excess dirt or moisture off you or your guests’ shoes?
Regards,
Russ H.
Scott that is just beautiful!!
Thank you!
Linda
Looks good:)
Please post an update after a few weeks of use – I’m curious if you’d make any changes after living with it for a while.
Best regards and thank you for these blogposts.
John