If you have an old house the chances are good that it was constructed before the modern construction codes that demand wind mitigation measures to keep your house protected during serious storms like tornados and hurricanes. The good news is that most homes can be upgraded in simple ways to make them safer and take advantage of HUGE discounts on your homeowner’s insurance. I’m talking discounts of 37% to 60% off your homeowner’s insurance!
If you house is older than 10 years chances are good that you aren’t upgraded as much as you could be. Even new houses don’t have to be built to take advantage of the maximum savings so there is almost always options to increase your insurance savings. In the post, I’ll walk you through how to get the biggest discounts and what portions you can do yourself to start saving today.
Remember, these are discounts that you get every year on your insurance bill so the sooner you make the upgrades the sooner you can start saving. Most upgrades pay for themselves in the first year.
What is Wind Mitigation?
Wind mitigation is the practice of hardening structures against the devastating effects of high wind events and the damage they can produce. It largely involves strengthening roof to wall connections and protecting openings from impact to protect from catastrophic damage.
When the high winds typical to hurricanes and tornados hit your house they can do significant damage and there are two areas where they are particularly vulnerable, the roof and the openings (windows and doors). Roofs that aren’t connected well can blow right off causing a total loss to the house.
Openings like windows and doors are also at risk because, in the case of impact, they can be damaged or blown out which causes depressurization of the house which can again result in the roof literally being sucked off the house.
What is a Wind Mitigation Inspection?
A wind mitigation inspection is a form called the Uniform Mitigation Verification Inspection Form that a licensed inspector can fill out for you based on an in person inspection of several elements of your home we’ll cover below. Insurance companies then use the information on that form to determine what kind of discount you qualify for. The reason insurers give big discounts for a wind mitigation inspection is because it protects them from the risk of the major claims that can put them out of business.
In order to get the discounts you’ll need to either complete the upgrades yourself or have a company do the work for you and then provide an updated wind mitigation inspection. In most states, home inspectors and general contractors can perform the inspection. There are companies that provide the inspection report as a part of the upgrades which can save you the $125 to $200 fee that is typical for inspection.
Let’s look at the major points that are covered in the wind mitigation inspection and how you can get the most bang for your buck.
1. Roof Deck Attachment
The first thing your wind mitigation inspection will look at is the roof deck attachment. Unless you are having a new roof put on they will have to crawl around in the attic to take a look at the underside of the roof. Your roof deck attachment will fall into one of three options.
Option 1 is basic and usually provides no discount, but Options 2 and 3 provide additional protection and therefore you get the discount you are looking for.
- Option 1: Plywood/Oriented strand board (OSB) roof sheathing attached to the roof truss/rafter (spaced a maximum of 24” inches o.c.) by staples or 6d nails spaced at 6” along the edge and 12” in the field. -OR- Batten decking supporting wood shakes or wood shingles.
- Option 2: Plywood/OSB roof sheathing with a minimum thickness of 7/16”inch attached to the roof truss/rafter (spaced a maximum of 24”inches o.c.) by 8d common nails spaced a maximum of 12” inches in the field.
- Option 3: Plywood/OSB roof sheathing with a minimum thickness of 7/16”inch attached to the roof truss/rafter (spaced a maximum of 24”inches o.c.) by 8d common nails spaced a maximum of 6” inches in the field. -OR- Dimensional lumber/Tongue & Groove decking with a minimum of 2 nails per board (or 1 nail per board if each board is equal to or less than 6 inches in width).
You can notice that with each increasing option you are either using thicker decking, larger fasteners, or more fasteners or some combination of the three. This provides more uplift protection for your roof deck and keeps you and your house safer.
If your roof deck is not sufficient to get the upgrade then there isn’t much you can do other than wait for the next time you need a new roof and communicate with your roofer that you want the decking upgraded to meet these requirements.
For those of you with houses built before plywood was a common sheathing the only change you need to make is to make sure your roofer uses 8d nails and spaces them appropriately. You don’t need to tear off the solid wood roof decking for plywood or OSB. In fact please don’t! Solid old-growth wood decking is a much better option.
2. Roof to Wall Connection
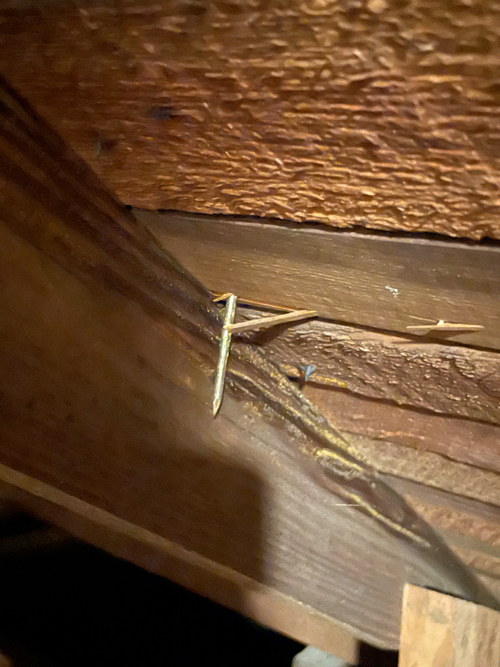
Whether you have a 200-year old balloon frame house or a house from the 2000’s you can upgrade your roof to wall connections without tearing things apart unlike the roof deck attachment. For years, standard construction practices, with or without roof trusses, was to attach the rafters or trusses to the top of the wall with toe nails.
This method provides very little uplift support which makes for a roof that is not as secure as it could be especially when facing 130+ MPH winds. Wind mitigation forms give you four options that you can choose in order of least secure to most secure and your insurance company will provide you with a form that shows what the percentage discount will be for each.
- Toe Nails (No discount)
- Clips (Metal connectors that do not wrap over the top of the truss/rafter with a minimum of 3 nails in each)
- Single Wraps (Metal connectors consisting of a single strap that wraps over the top of the truss/rafter and is secured with a minimum of 2 nails on the front side and a minimum of 1 nail on the opposing side.
- Double Wraps (Metal connectors consisting of 2 separate straps that are attached to the wall frame, or embedded in the bond beam, on either side of the truss/rafter where each strap wraps over the top of the truss/rafter and is secured with a minimum of 2 nails on the front side, and a minimum of 1 nail on the opposing side)
In most cases, the only type that be retrofit are the clips because the others require wrapping over framing members that are already installed and covered by a roof deck. The discount for clips, single wraps, and double wraps are usually about the same so simply adding clips is the best option in my opinion.
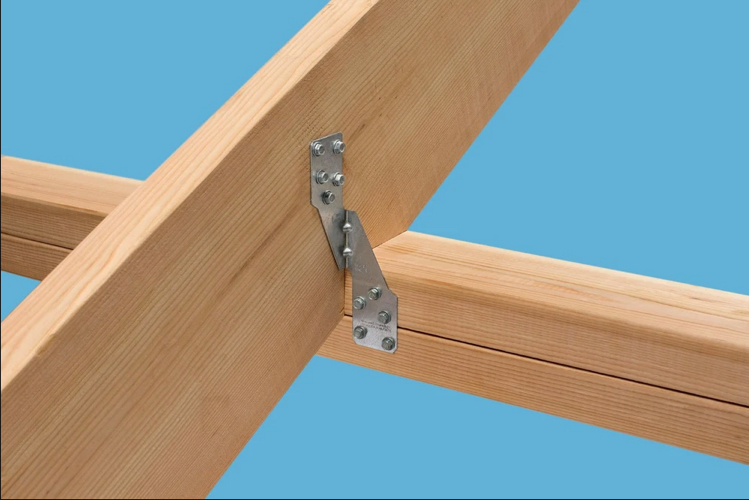
Which Hurricane Clips to Choose
I prefer Simpson Strong-Tie hurricane clips and you can use either the H3 or H2.5AZ for most of my installations, but there are other options to consider. You can find a helpful guide here to help determine the type of clip you should use depending on your unique framing setup and access that you have. Every home is framed with slight differences and you’ll need to look at your framing to see what will fit the bill.
You’ll also need to use Simpson’s nails that fit perfectly within the clips. For this application you’ll need 8d 1 1/2” nails to secure the hurricane clips.
One of the most important things to remember when installing hurricane clips is that you should put a nail in every hole. In order to get the uplift protection that the manufacturer claims you must follow the nailing pattern as prescribed by the pre-punched holes.
Check out the video below to see how I installed these on my 1918 home throughout the attic. It’s cramped and uncomfortable, but worth the half day sacrifice for the discount.
3. Roof Geometry
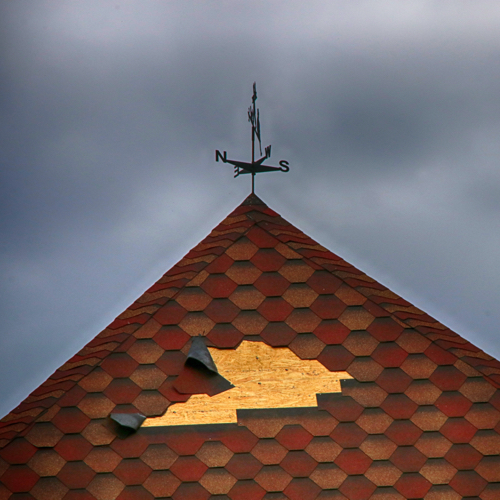
This is another one you can’t do much about unless you are building or buying a house, but you can get a significant discount based on the geometry of your roof. The only roofs that qualify for the discount are a flat roof or a hip roof. Gable, jerkin-head, or any other roof shape is more subject to heavy uplift forces during strong winds unlike hip roofs and flat roofs that suffer very little uplift comparatively.
Make sure your insurer knows which type of roof you have so that you can get the discount if it applies. With this you either have the discount or you don’t, but it’s not the end of the world if you have a gable roof. There are more ways to save in the following areas.
4. Secondary Water Resistance (SWR)
A Secondary Water Resistance layer or SWR refers to what you have beneath your roof covering. This is a small discount compared to the roof decking attachment and roof to wall connection yielding only about $27-50 for a typical 1500 SF home so it may not be worth the expense if you are looking at payback only, though it protects against water intrusion.
Do you have a peel and stick membrane or just a layer of 30# roofing felt? One will get you a discount and the other will not. In case your shingles blow off in a storm the SWR still protects your house from water and wind penetration. It’s not perfect, but it’s a lot better than nothing.
Having this extra layer of protection gets you a discount and that can save you some money. You may be able to see if you have by checking around flashing penetrations on the underside of the roof. If you feel a thick black sticky underlayment then that likely indicates a SWR. Whereas if you feel smooth black felt paper or building wrap then the chances are good that you do not have a SWR.
Another option to achieve this discount is to install closed cell spray foam along the joints of the plywood or underneath the roof deck as this counts as a SWR. Keep in mind that it must be closed cell insulation and NOT open cell insulation since that does not function in the same water resistant ways.
I personally have some issues about using spray foam on older buildings that you can read more about in this post, but depending on your situation it may or may not be a good idea for your house.
5. Opening Protection
This section is has a lot of variables but essentially the inspector looks at what kind of protection you have on windows and doors and fills in whichever is the weakest. Maybe you have impact rated windows and doors except for that one window in the garage. Well that one sub-standard window means that you don’t qualify. Get that one opening upgraded and you suddenly qualify.
The cost of impact windows and doors can easily be in the high tens of thousands of dollars and the payback is very limited on this due to the high cost compared to the hurricane clips so I don’t recommend going this route if your main concern is financial.
One option that does qualify you for the discount is actually rather inexpensive and simple. Plywood. If you have 1/2″ plywood cut and fit for every opening in your house with hardware ready for mounting then you can get a significant discount. You have to have storm panels ready to mount and at hand though. Storing your plywood at Home Depot doesn’t count. Ha!
What States Offer Discounts
Insurers have the option to provide a discount in any state but there are some states that have laws on the books that require insurers to offer discounts for wind mitigation upgrades.
The following states have passed wind mitigation laws. These laws mandate insurers to provide wind mitigation credits and discounts to homeowners:
- Alabama
- Florida
- Georgia
- Louisiana
- Oklahoma
- Mississippi
- North Carolina
- Rhode Island
- South Carolina
If you haven’t gotten a wind mitigation inspection you should do it today. You can request from your insurance company a form that shows what your discounts will be for each upgrade you make and that will help you determine if it’s worth it.
Insurers won’t provide the discounts even if you qualify though unless you submit that wind mitigation report to them so the sooner you submit the sooner you start saving.


Founder & Editor-in-Chief
I love old houses, working with my hands, and teaching others the excitment of doing it yourself! Everything is teachable if you only give it the chance.