

What is brown and white and gray all over? Or I could ask what is red and green and pink all over? The answer would be the same. It’s a terrazzo floor! In fact, the blends of terrazzo floors could be any color combination your creative mind can think of. If you don’t know what I’m talking about, just think back to many of the stores you’ve walked through. Those smooth and speckled surfaces, that’s probably them, especially if the store has been around for some time.
I’ve not always liked them, or rather I didn’t pay much attention to them as a kid, but now I have a new appreciation for them. My house has original terrazzo floors from 1959 and I have been living on them with my wife and two active kids, including their paint, playdoh, scooters, skates, and hoverboards, for 6 years now.
It is not my favorite color blend, and it has cracks, but I still love them. They are by far the most user-friendly floors I have had. After a good sweep and clean, they pretty much look the same thanks to the dense layer of marble aggregate hiding the crumbs, dirt, and smashed fruit snacks.
History of Terrazzo Flooring
The name terrazzo is “terrace” in Italian, and according to the National Terrazzo and Mosaic Association, Inc (NTMA), was a creation of the Venetians over 500 years ago. During this time mosaic workers primarily used marble to create magnificent structures, floors, and mosaics for the wealthy.
These craftsmen had an excellent idea. They saved the leftover marble chips from these projects, and what was planned for the trash became a beautiful and durable floor for their own homes. While the first terrazzo floors were not as polished as the midcentury versions we are used to in our old banks and grocery stores, they still used marble, along with other aggregates found in the area, similar ratios of aggregates to binders, and use of grinding stones to level the floors.
The first Venetian versions were marble chips mixed with clay and were leveled and smoothed over, but were rough to walk on after they cured. To smooth over the surface, craftsmen used stones by hand to grind down the texture. Later, they created the “galera” which was a heavy grinding stone at the end of a pole that allowed them to stand and work the floors much faster. However, after all of the grinding, the marble was hidden under a haze unless wet. Fortunately, the discovery of goat’s milk as a sealer allowed the inner beauty to show through.
According to the NTMA, the first terrazzo floors installed in the US by Italian craftsmen were in the Vanderbilt residence on Fifth Avenue in New York in 1890. However, terrazzo first made its appearance in the United States in the late 1700s when it was used in many structures including Mount Vernon. In the 1770s, President Washington, who served as his own architect, chose terrazzo for some of his floors during the expansion of his house inherited from his father.
If it wasn’t for the mass immigration of 3 million Italians from 1900 to 1915, it’s quite possible we wouldn’t see such an extensive use of terrazzo flooring.
The 1920s was a busy decade for advancement for the terrazzo trade. It was during this Art Deco period that terrazzo began its steep ascent in popularity.
Many of the first terrazzo floors were one blend of colors and one slab, used in small spaces, but the creation of brass divider strips in the 1920s brought a whole new world of reliability, creativity, and scale. The strips helped prevent cracking from expansion and contraction, and allowed for very large scale installations. These combined with different color combinations, shapes, and patterns, you have a perfect product for large commercial building projects.
But if it wasn’t for the invention of the electric floor grinder in the 1920s, terrazzo would not have been a cost-efficient application for large buildings. Not only did it make short work of grinding the floors, but it rendered a finer finish in the end.
A short time after these great advancements, white portland cement was introduced to the trade. It replaced clay as the binder, and using pigment, it opened up a world of color and durability.

Some examples of terrazzo floors can be found in many famous U.S. buildings such as the Hollywood Walk of Fame, Empire State Building, Chrysler Building, Hoover Dam, and the John Adams Building.
By the 1970s in the U.S., terrazzo floors could be found in banks, hospitals, government buildings, schools, airports, post offices, libraries, and many homes.
Different Types of Terrazzo Flooring
If terrazzo is a look you dig, it is a flooring option you should seriously consider for your new construction project. At $12-$35 per SF, the cost is higher than other flooring options such as wood, tile, laminate, and carpeting, but if you are looking for a forever floor that can take a serious beating, the price may be something you can bear.
The price range for terrazzo flooring is so broad because there are many material and installation options out there. It all depends on the design you want and where it is going to be installed.
Here is a comparison of different types of terrazzo floors to help you decide.
Traditional
Usually the most expensive option depending on which system used, breathable (will not delaminate like epoxy in the presence of moisture), needs sealer, heaviest terrazzo option, most durable indoors and outdoors, large color and combination selection, requires a concrete foundation, bonded and unbonded options to suit specific construction requirements
Polyacrylate
Less expensive, breathable, needs sealer, faster installation, requires a concrete foundation, small chip size required
Epoxy resin
Least expensive, almost limitless color combinations, indoor use only (fades in sunlight and could peel from moisture from lack of breathability), repels moisture which means no staining, does not require a concrete foundation and can be installed on wood subfloors
How To Install New Terrazzo Floors
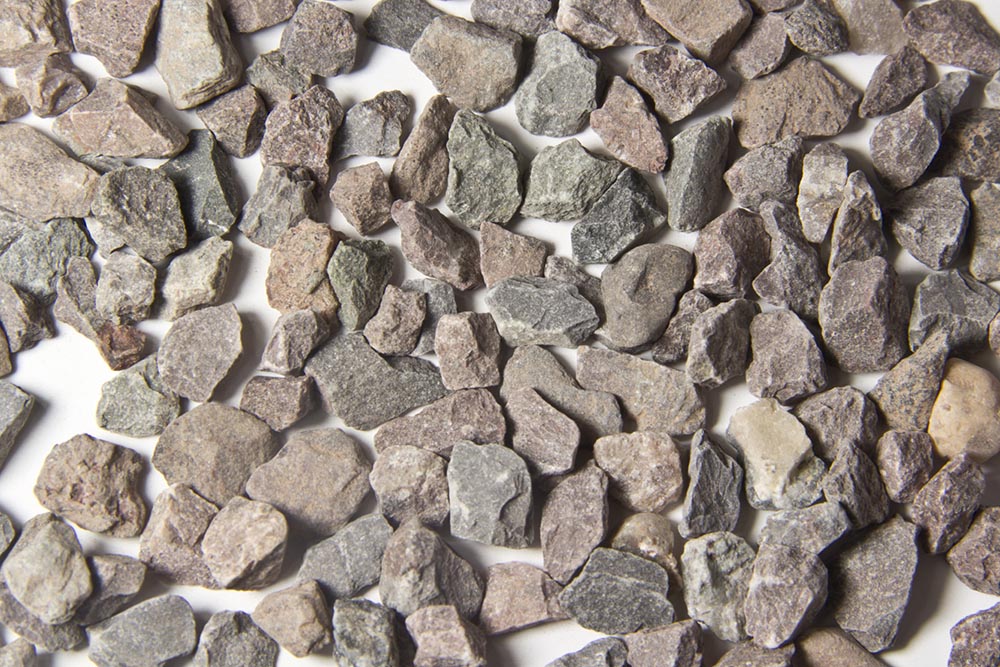
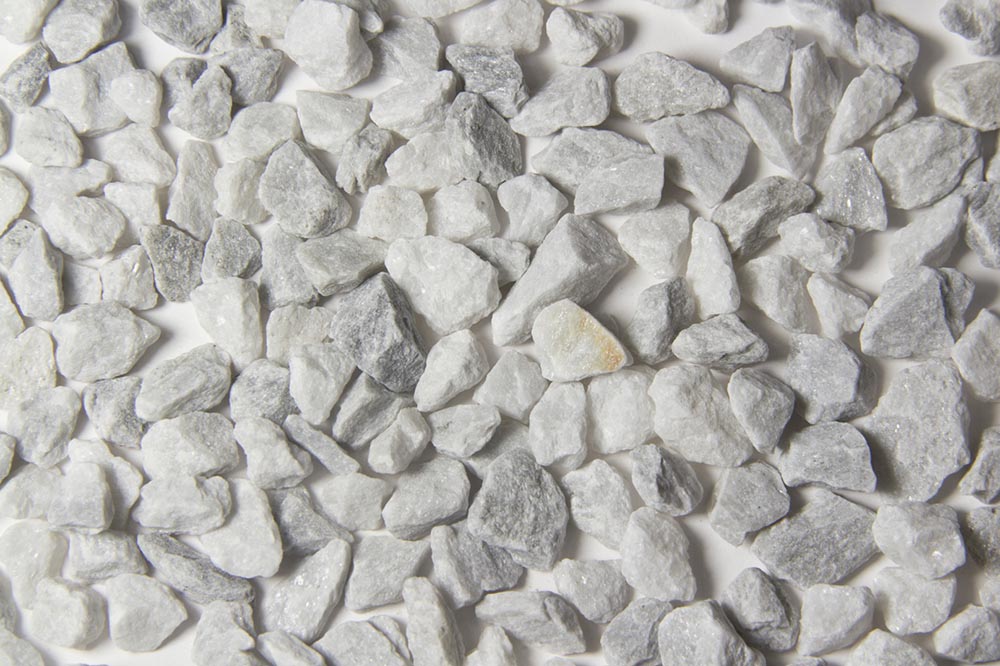
Let’s get into the mix and mode of traditional terrazzo floors. The most common ratio for a terrazzo mix is 2 parts aggregate to 1 part cement. Marble chips are primarily used because it offers the largest variety of colors such as black, white, grays, blues, greens, reds, browns, yellows, and even pink.
For more information on other types of aggregates used in concrete check out Concrete Construction’s article and see the NTMA’s cement series for a look at a variety of traditional marble aggregates.
While the aggregate is most of what you see in terrazzo floors, the cementitious binder can add a color accent to your floor by adding pigments. There are many colors to choose from. They come in both liquid and powder forms and are added during the mixing process. Here is a look at some of the options for color.
Today’s process for traditional terrazzo floor installations shares many of the same steps used long ago. You can check out the video below showing a glimpse of a new terrazzo floor installation in Venice using old techniques.
There are many systems that can be used in the construction of terrazzo floors, but the basic makeup of a traditional cementitious terrazzo floor is usually in three layers. The concrete slab, an underbed, and the terrazzo layer. In some cases, the underbed layer is not used and the top terrazzo layer is applied as a veneer directly to the concrete slab. This is called Monolithic Terrazzo.
In other cases, a layer of sand and/or a membrane is added between the concrete slab and top layer of terrazzo depending on if the design is bonded or unbonded. Bonded designs are where all layers are bonded together. Unbonded means that some layers are separated by a sandy layer or membrane to absorb movement and protect the terrazzo from cracking. For a more detailed look, check out the NTMA’s types and systems.
Here are the steps for a basic 3-layer installation.
- First, a thick concrete slab is poured for the base.
- Next, a layer of sand and cement mix is poured and leveled smooth. This is the underbed. Before the underbed cures, divider strips would be placed if more than one color is used or to follow joints in the base to prevent cracking.
- Then, a thick, wet terrazzo mix is combined in a mixer. This mix gets poured and spread out over the underbed using trowels. Using heavy rollers, the terrazzo mix is compacted and flattened down.
- Another layer of the terrazzo mix, but this time dry, is sprinkled over the wet surface. Once again, the surface is compacted down, pressing out any air and getting a good bond between all of the components.
- After the surface has cured, a large electric floor grinder with grinding stones is used to bring down the lumps and level the floor. After many passes with the grinder at ever-increasing grits, one final step is taken to fill any tiny voids left from trapped air by applying a thin cement slurry to the surface. Once cured, the final passes are made using very high grit stones on a lighter grinder or polisher until you have that reflective polished look.
- The final step is applying a penetrating sealer or buffing in a floor coating. Both produce a great shine, but using a breathable penetrating sealer gives you a longer-lasting finish. The Terrazzo Guy gives a great comparison and argument for using penetrating sealers over floor coatings.
I have simplified the traditional installation process considerably, but installing a terrazzo floor is both art and science. There are many different aspects of the design and installation that are considered. The foundation under the terrazzo floor must be checked and prepared properly to prevent cracking on the surface.
Humidity and temperature must be considered while curing to promote longevity of your terrazzo floor and your mix ratios must be correct for the same reason. It takes great skill to wield a large spinning grinder or polisher and produce a smooth and consistent shine across the entire floor. All terrazzo standards, specifications, and general information can be found in detail at the National Terrazzo and Mosaic Association, Inc. (NTMA)
How To Repair Terrazzo Floors
You could be standing on terrazzo floors through your tile, laminate or carpet right now if your home has a concrete foundation and was built sometime before 1970. It’s worth some investigation. It is highly likely they could be repaired and polished back to their former glory.
If you want to patch small holes, fill large damaged areas, hide cracks, and/or do a full restoration check out these methods below.
Repairing Pits & Large Holes
While it’s not easy to match marble aggregates and repair 50-year-old terrazzo floors, it can be done pretty well, and in some cases, the repair is practically invisible. It is part aggregate availability and part skill. Matching the ratio of colored aggregate and binder color is important, otherwise, it will be obvious. Below is an example of a poorly matched cementitious terrazzo repair.
Notice the crack that runs through the repair. We will talk about that later.
First, decide what type of repair method you will use; Cement or epoxy. If it’s a large repair in your cementitious terrazzo floor, use white portland cement for the binder. Smaller pits such as damage from carpet tacks can use tintable epoxy resin in place of the cement. Both are durable, but the epoxy is more expensive per square inch.
What you’ll need:
- White cement or epoxy resin system
- Pigment if necessary
- Aggregate
- Stone chisel
- Hammer
- Safety glasses
- Mixing pail
- Mixer paddle with drill or mix by hand
- Trowel or putty knife
- Brick or piece of wood for tamping down the thick mix
- Grinder
- Diamond grinding pads
- ph-neutral penetrating sealer
Step 1: Prepare the Damaged Area
Check to see if the pit in the surface is large enough to accept a wet mix of your specific sized aggregates. You may need to increase the depth and diameter of the damage to get a good aggregate match and bond to your floor. Use a hammer and stone chisel to open up the hole. Don’t forget your safety glasses. If there is a coating on the floor around the hole, use a sander or sealer remover to remove the coating. After you’re done chiseling and sanding, vacuum it out so no dust or chips are left.
Step 2: Plan Your Mix.
Start by determining what types, usually marble, what sizes, and what ratio of the aggregates you will need. If you have a common terrazzo floor, one way is to visit the NTMA website and try to find a match. Just remember, every floor will be different and the match may not be exact.
The other method takes some measuring and math. Look at your floor around the hole you are repairing and tape off a 2-4” square. Make sure the square is a good representation of the floor in that area. If the aggregate is very small overall, you can get away with a smaller square which means less counting.
Next, determine the parts and their respective sizes. Standard terrazzo chip sizes are graded by number and use sizes #0 through #2 (1/16”-⅜”). Venetian terrazzo chip sizes range from #3 to #8 (⅜”-1 ⅛”) For example, the image below shows a range in sizing from #0 to #3. You can learn more about chip sizing on Terrazco’s website.
The recipe I would need to match this floor would use the following aggregate from Terrazzo and Marble Supply Companies:
- 1 part Forest Green in size #2
- 2 parts Italian Yellow Verona in size #2
- 3 parts Dusty Rose in size #2
- 12 parts Georgian White sizes #0, #1, and #2
If you don’t have a local supplier of marble aggregate, there are several large specialized suppliers such as Terrazzco and Terrazzo & Marble Supply Companies.
You will also want to look at the cement binder between the aggregate to determine what color the cement is. White, gray, or other? The other will require a pigment additive that can be purchased at your local home improvement store, Amazon or other specialized online stores.
Step 3: Make Your Mix
For a large repair, first, combine the correct ratio of aggregate together that was determined in step 2 above. Pour the aggregate into the mixer or pail. Next, add in the cement to the mixer, and pigment as well if necessary. If adding pigment, it would be wise to make some cement-pigment samples and compare them to the floor after they cure to get the correct color. Remember that the ratio should be 2 parts aggregate to 1 part cement. Give the dry components a good mix, then start slowly adding and mixing water in until you get a clumpy, thick consistency. The mix should not be runny when you scoop it into the hole in the floor, but rather heap up like a rocky mud pie.
For less damaged areas such as pits created from carpet tacks, mix up a batch of resin and hardener and add tint as necessary to match your floor. After the resin has been thoroughly mixed, drop in the aggregate, and mix it all together. Remember that you want a thick clumpy mix.
Step 4: Apply Patch
For large repairs, scoop the wet cementitious mix into the hole. Trowel it over and tamp it down using a brick or flat piece of wood and hammer. The idea is to compact it down into the hole to get a good bond and remove any air pockets. Be sure to leave a portion of the wet mix above the surface of the floor to be ground down after curing.
For small repairs, pour the epoxy mixture into the hole and press it down with a putty knife. Be sure to press it into the hole, leaving a small portion above the surface of the floor. Add more aggregate directly to the patch if necessary.
Allow cementitious repairs to cure for a minimum of 48 hours and epoxy repairs to cure for 24 hours before the grinding process starts. However, be sure to follow the instructions provided by the manufacturer of the epoxy resin system for cure times.
Step 5: Grind & Polish
Using a variable speed angle grinder or polisher with diamond polishing pads, grind with 30-60 grit to bring down the cured patch of terrazzo closer to the surface of the floor. Depending on the final terrazzo finish needed, a polishing kit like this one on Amazon may be useful.
Remember to follow the manufacturer’s instructions for use such as RPMS and wet or dry grinding recommendations. New terrazzo or newly restored terrazzo use upwards of 3500 grit to polish the floors. Your floor may not be that reflective. You will have to decide when to stop between each change of grit by cleaning with water, drying, and comparing the patch to the rest of the floors. Stop polishing when a matching shine is achieved.
Once your patch is level with the floor and before polishing with the higher grit pads, check for small holes in the patch. Small holes should be filled with a matching cement slurry or epoxy. Allow it to cure and finish polishing your floor to the desired shine.
Step 6: Seal Repair
After the floor has been polished, clean it with water, and dry it thoroughly. Apply a penetrating sealer. There are many penetrating stone sealers to choose from companies like Miracle Sealants Company and Stonetech. Follow the manufacturer’s directions for application.
Repairing Cracks in Terrazzo
Remember the image above with the crack running through the repair? That tells me something important. There is a dynamic movement issue going on under there and that caused the repair to crack again in the same place. You can see where it connects from the original terrazzo on the left side and into the repair. I have decided, for now, that I can live with the crack.
At some point, I may decide to investigate by cutting out that portion around the crack and applying an appropriate repair. It could mean fixing the slab below the terrazzo and then applying divider strips in the terrazzo repair to deal with movement in that area. It is highly recommended to hire a professional contractor of terrazzo floors if you want to try and permanently repair cracks.
Repairing a cracked terrazzo floor can be a frustrating process after spending time on the repair to hide the crack so well, only to have the crack return. Unfortunately, this can happen. See what the NTMA has to say about crack repair here to help you decide.
However, if you want to try and hide the crack and hope for the best try these steps below.
What you’ll need:
- Angle grinder or orbital sander
- Diamond polishing pads or wet/dry sanding pads (grits ranging from 40 to 3500 depending on your floor)
- Shop vacuum
- Awl
- Stiff bristle brush (Not metal)
- White portland cement and/or tintable epoxy depending on the size of cracks
- Penetrating sealer (for cement repair)
Step 1: Plan Your Repair
What size crack do you have? Large enough for aggregate? If yes, you will need to determine what aggregate you’ll need as mentioned above for patching holes. If no aggregate is needed, just a cement grout mix or epoxy can be tinted to match the binder in the terrazzo.
If you want to try to fill the crack without having to sand and seal, epoxy may be the way to go, just be careful not to get it on the surface of the floor. Epoxy may also hold longer than a cement patch if the floor continues to move and a crack tries to return.
Step 2: Prepare the Crack
Clean out the crack with a brush and awl to remove any loose pieces and dirt. Sand away any floor coatings around the crack if applying a cement grout repair. Use a vacuum to clean out any remaining dust and chips.
Step 3: Make Your Mix
You can either use a white portland cement grout with pigment or a tintable epoxy to fill the crack. The cement grout will require a diamond polishing pad or wet/dry sandpaper. If the cracks are small, mix together the white portland cement and color-matched pigment if needed, with a little bit of water. The mixture should be the consistency of paste. If the crack is large and requires aggregate, create a mix the same as the hole repair above. Additional aggregate can be added to the patch while it is wet if needed.
If using epoxy, mix epoxy, hardener, and pigment according to manufacturer’s instructions.
Step 4: Apply the Patch
Using a putty knife or small trowel, press the cement grout into the crack, leaving a bit just above the surface of the floor. If the crack is large and requires a mix with matching aggregate, pour the mix into the crack and compact down to remove any air.
If your choice is epoxy, carefully apply to the cracks by pouring from a small cup or using a syringe. Stop filling before the epoxy overflows the crack. Wipe away any overspill on the surface with a rag and alcohol as needed while the epoxy is still wet.
Step 5: Polish the repair
After your cement grout has cured for about 12 hours, start to level the patch down using a 30-80 grit diamond polishing pad on a grinder or polisher. Start with a lower grit pad like 30-40 if your patch has aggregate in the mix. Continue making passes over the patch with increasing grits until the finish matches your surrounding floor.
If you used epoxy to fill the cracks then you’re all done! Just allow the epoxy to fully cure according to the manufacturer’s recommendation before walking on the repair.
Step 6: Seal Repair
After the floor has been polished, clean it with water, and dry it thoroughly. Apply a penetrating sealer according to the manufacturer’s instructions.
How to Clean Terrazzo Floors
The key to keeping your terrazzo floors looking like new is regular cleaning. Simple things like sweeping often will keep them shining for a long time. Walking on dirt or sand will dull the finish over time and you’ll loose that great shine you paid so much to get.
Do not use solvent-based cleaners, vinegar, or other acidic compounds to clean your cementitious terrazzo floors. These cleaners can damage the floors by etching away at the cement binder. Find a ph-neutral cleaner to clean dirty floors after a good dry mop or sweep.
Often just a damp mop for light cleaning will do. To clean greasy spills or food from the floor adding a mild dish soap to the mop water can help greatly.
How To Restore Terrazzo Floors
Are your floors dull, stained, and ready for a full restoration? There are several methods of restoration such as light floor grinding and/or heavy cleaning combined with a buffed floor coating, but we are going to look at the most thorough terrazzo floor restoration process that results in durable, reflective, long-lasting floors. The process is similar to refinishing wood floors but much more thorough.
A team of skilled terrazzo craftsmen with specialized grinding and polishing tools begins by wet or dry grinding the floor using 30-40 grit grinding pads on a floor grinding machine. This grinds away any coatings on the floor, removes stains, and shallow scrapes on the surface. After this first step is complete a fresh layer of terrazzo appears. Grinding the floor typically takes 9 or more passes after this in increasing grits upwards of 3000 grit. Smaller grinders are used at the same grit to grind down hard to reach areas in corners and along the walls.
Next is polishing with a floor polisher, but first, damage to the floor is assessed and repairs are made. If the damage is large enough, a mixture of matching aggregate and a binder such as tinted cement or epoxy is mixed and applied. After the patches have cured, they are ground down to the surface of the floor and blended in. If any pinholes have been revealed in the repairs or floors during the grinding process, a cement slurry is mixed and applied to the floor to fill the holes and then a final pass of grinding takes place after curing. Major cracking should be discussed prior to the start of the project should major repairs be needed to stop future cracking from occurring.
A floor polisher, special compound, and water are used to polish the floor. This is the last step in the grinding and polishing process but takes several passes until the floor has a reflective finish.
After the floors have been cleaned and dried thoroughly, a penetrating sealer is applied to the newly polished terrazzo floor to help prevent staining.
It is a big job, and the costs could be anywhere from $2 to $10 per foot or more depending on the damage to your floors and the method used to restore them. Prices will go up with damage requiring demolition, investigation, and crack prevention solutions applied. Pricing will go down with less thorough grinding methods and topcoat buffing but will need restoring again sooner.
If you are not interested in doing terrazzo repairs or restoring yourself, the NTMA provides this handy map of contractors in the U.S. These craftsmen are highly skilled terrazzo specialists able to help you with all of your terrazzo needs.
Now that you have learned so much about terrazzo, you will see these floors everywhere you go and possibly as jewelry, or mugs, or even decorative pieces hanging on the wall of your local coffee shop.
Like it or not, Terrazzo is here to stay. Not just from evidence of its re-emerging popularity, but because it is a super durable product and one of the most resourceful and “green” products before “green” was even a thing. I hope you embrace them.


Founder & Editor-in-Chief
I love old houses, working with my hands, and teaching others the excitment of doing it yourself! Everything is teachable if you only give it the chance.
Marvellous article!
However, as a designer creating a digital image which may become a professional Terrazzo installation, I still have a handful of questions:
Is the base Terrazzo colour palette limited?
Is it possible to create with curves or are designs limited to straight lines?
Are colour regions always divided by grout or metal spacers?
Have I missed any considerations?
Thanks in advance for anyone why can point me in the direction of applicable information!
What dose 2:1 mean ? Is it by weight ?
Thanks !
This is such an informative, generous, beautiful article! Thank you so much for putting this out. My big question is; do you know where the brown terrazzo in the top picture is from? It is incredible, I really want to have it in my home. 🙂
Thank you
Hi
What depth of the Tile can be ground down to.meet existing floor finish level 10 15 mm ? Or is this too much?
Thanks Rmw
Mark,
Very insightful article however the Portland cement terrazzo floors are the least expensive of the terrazzo options. Epoxy terrazzo, is the most expensive terrazzo system as the resins are way more expensive than the Portland cement. And other than the floor rolling/curing time for the cement terrazzo, all of the steps are the same for both systems.
I always see cement terrazzo mix ratio of 1 part cement 2 part aggregate and no sand…why is that?
wouldnt adding about 1 part marble sand make the mix easier to spread/trowel and make an even stronger binder?
Whats the purpose of not having sand in the mix? More pin holes when grinding? More prone to shrinkage cracks when curing?
Thank you so much for this very informative article! We have a large terrazzo floor that we usually wash with vinegar and water. I’ll be stopping that now! The floor was put in back in 1969. It’s held up extremely well. I’ve never found a great article that explains terrazzo until now, thanks again!