
Spray paint is one of the most versatile products you can find for home improvement projects. It’s user friendly and powerful at the same time which is why homeowners and professionals both use it so much.
Whether I’m refinishing a vintage tool, changing the color of my couch legs, or creating a fun crafts project for our kids playroom decor I use spray paint in all kinds of ways I never would have expected.
Since we are in that getting back to school time right now I wanted to stick with that theme and have a little fun with some of my rules for successfully using spray paint on your project. Krylon has sponsored this post and they have a ton of resources and almost any color you can imagine. Go check out them out here to find a color and paint that is right for your project.
So, are you ready to go back to spray paint school? Let’s get started with the ABC’s of spray paint!
Always Prep – There is no substitute for good surface prep, but with Krylon Fusion All-in-One that prep is made much easier! You need to sand any loose finishes off and wipe your workpiece down to prepare for your glorious new color and that is about it! You can spray plastics, wood, metal, and other hard to adhere surfaces without any real prep other than a simple cleaning.

Be Creative – Spray paint is for way more than simple color changes. You can create whimsical projects like this alphabet wall my wife and I made for our kid’s playroom. We found simple letters and used different color spray paint on woods, metals, and plastics and then wrapped some with colored yarn or other things for extra texture and variety. The limits of what you can create are largely in your own mind.
Choose the Right Sheen – You’re not just picking out a color you’re picking out a sheen too. From flat to satin to gloss a different sheen can give you a completely different look within the same color. Check the cap to see what the sheen level is and make sure it agrees with your sensibilities.
Don’t Get Too Close – When spraying don’t get too close to your project or you’ll get drips and ripples caused by too much paint build up in that area. Keep the can about 8-12” away from your workpiece. Any closer and you risk runs, any further and you risk a rough texture as the paint dries so quickly it will feel like fine grit sandpaper. Stay in the green zone.
Evaluate Your Color – What will your color look like where your project is going to live? It doesn’t really matter if your color choice looks great on the hardware store shelf if it looks terrible on your porch. There is a world of difference between daylight, incandescent, and fluorescent light. Grab a can and spray a sample and put it in your intended location that way you can tell if it looks good during the day and at night. Test it first for that peace of mind.
Find a Well Ventilated Area – Spray paint is great for changing the look of things but not so great as an air freshener. Make sure wherever you intend to paint is well ventilated to keep you safe.
Get Good Lighting – This should go without saying, but if you try to paint by candlelight you’re gonna get bad results. Have excellent lighting when spraying so you can see if you have even coverage or need another coat. I prefer spraying outdoors on a calm day. The sunlight and fresh air let me see everything clearly.
Hold it Securely – Spray cans push a lot of air and paint out that little tip and if your work piece is lightweight or easily tipped you may end up with a mess on your hands. Make sure your workpiece is secured so it doesn’t shift when spraying.
Identify Dust Hazards – You may be working in an area with no dust blowing around but as soon as you start spraying you can whip up a whirlwind. Double check that the area you are working in is free of dust hazards now and during the drying period.
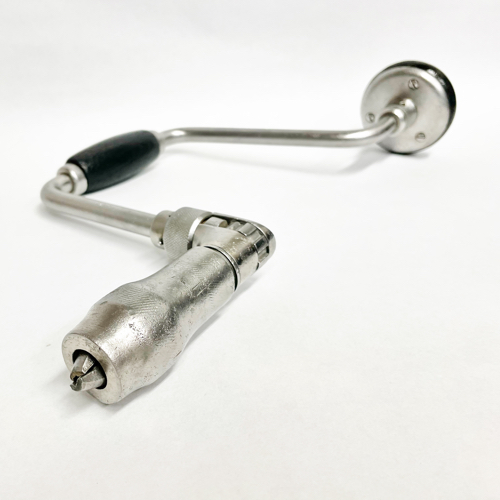
Just Wait a Sec – I’m just as excited as you are to use that newly restored tool like the these vintage glazing point drivers and hand braces I make but you have to give it some time to cure. Krylon’s Fusion All-In-One is dry to the touch in 20 mins and safe to handle in about 2 hours, but I usually wait overnight before really putting my spray painted projects into action.
Keep it Safe – Don’t leave your project in a high traffic area or a place where it will get bumped or scratched while drying. Those first couple hours are pivotal that the paint can rest and cure before you move or use it.
Lay Down Protection – Nobody wants a driveway with shadows off the project you just sprayed all over it. Lay down a drop cloth or some cardboard before you spray to make sure you don’t have a reminder of your lack of planning for years to come.
Mask the Area – Don’t protect just the floor, but also look around at other things in the area you spray to avoid getting overspray on things you don’t want. You can use some leftover cardboard or craft paper or even an old sheet to mask off objects you need protected. Overspray is a real pain and you want to avoid it.
Never Spray in Direct Sunlight – A general rule of thumb for painting is to never paint in direct sunlight. Workpieces can get really hot in the summer or dry too quickly or unevenly in the sun. Work in the shade for the best results.
Old Paint is Not Great – If you think you can reach deep into the garage and pull out a can of spray paint your dad used 20 years ago you are in for a rude surprise. Everything has a shelf life and that includes spray paint. If your can is older than 2-3 years you may want to think about picking up a new can. Especially, if it was stored in a hot shed or garage.
Protection Not Paint – Sometimes you don’t need a color change but rather protection from the elements. For this you can use clear coats in various sheens like Fusion All-in-One Clear. I use this in my shop all the time for clear coating old steel hardware to keep it from rusting, but you can use this on wood or other materials as well to keep that natural look lasting longer.
Quick Motions – When spraying don’t let your can linger in one spot. Keep it moving or you’ll get runs and drips from too much paint build up in one section.
Read the Instructions – Every spray paint is a little different even among the same brand so reading the instructions does matter (despite what us guys think). Are there special considerations for the material you’re painting? What is the drying time? Does it need priming? Read on and find out.
Shake, Shake, Shake – They are called rattle cans for a reason. You need to really shake that can to get that rattle going and mix the materials inside. Try painting with an unshaken can and see what happens. It’s not pretty. You can’t shake it too much.

Touch Ups Are Tough – Touching up spray paint is almost impossible for me. If you get scratches or chips then sanding the damaged area smooth with a fine grit sandpaper and repainting the whole thing for small projects is usually best in book. For large areas find a joint or breakpoint where you can mask off with tape and paper for a clean touch up.
Use Multiple Coats – Sometimes you can get one coat coverage and sometimes you can’t. Don’t force it. If you need another coat don’t cry just give it one more pass. You’ll be thankful you did in the end.
Valve Cleaning – When you’re done painting don’t leave all that paint in the valve to dry. To prevent the nozzle from becoming clogged in the future, always clear it of paint after each use by turning the can upside down and pressing the nozzle until the mist that comes out is clear. Then set it aside for storage knowing it will be of use again when you need it.
Watch the Flames – Cans of spray paint are flammable so avoid using them around open flames, cigarettes, or other ignition sources. Also don’t even think about puncturing the can while we’re at it. This is a pressurized aerosol spray that can explode if you don’t treat it with respect. Follow the instructions and you’ll be safe.
Xtra Help – I know that was a stretch since extra starts with a “E” but humor me won’t you? If you have a lot of spraying to do think about picking up a great add on tool like Krylon’s Snap & Spray attachment. It gives your finger some rest and allows for greater control of the spray paint which equates to a better looking project.
You Need a Mask – Can’t paint outside? Then consider using a dust mask like a P100. New paint looks great on your workpiece, but we don’t want to be inhaling it. This is one area where masking shouldn’t be controversial.
Zig Zag is the Goal – You didn’t think I’d find a “Z” tip did you? Ha! When spray painting I prefer to use a zig zag pattern starting my spray off the piece and then spraying across it until my spray pattern has passed off the other side and coming back across the piece again. Changing direction on top of the piece results in doubling up your paint in certain areas and gives an uneven finish.
So there you have it 26 tips, in alphabetical order to boot, to make you a better spray painter. You have officially been schooled on the ABC’s of spray paint and are now a graduate of The Craftsman Blog School of Painting.
If you have a paint project you are planning, go check out Krylon’s spray paints. I use them every week in my shop so I know you’ll find them useful for projects on your old house too.


Founder & Editor-in-Chief
I love old houses, working with my hands, and teaching others the excitment of doing it yourself! Everything is teachable if you only give it the chance.