Having worked in the restorations trades for more than 20 years I have constantly been on the search for the best wood filler. I have tried countless products that at first seemed like a winner only to find, just like my high school dating experiences, they wouldn’t go the distance.
The conclusion I have come to is that there isn’t just one product, but rather a group of products that can handle any wood patching task I need. The best wood filler is sometimes not a wood filler at all, but a wood epoxy or even a putty. In this post, I’ll give you my take on the best products to patch wood on the market today.
The first thing you need to consider when choosing the best wood filler is what its use will be. Is it outdoors or indoors, painted or varnished, structural or cosmetic? There is a product for any need listed below, and you’ve just got to find the right one from the list below.
You can also read the results of my 5-year field testing of most of these wood fillers and epoxies at The Wood Filler & Epoxy Test (Year 5) to see how these products performed in the real world as well as to watch the video below.
MH Ready Patch

Best for small cosmetic repairs and surface leveling – MH Ready Patch is a great patch for a myriad of little patches. It doesn’t work for structural patches like an epoxy, but it does work quite well for things like nail holes and surface imperfections in painted wood (it’s not stainable). It dries fast, 30-45 mins and it’s ready to sand.
It is an oil-based product, but it cleans up with soap and water, which I love. I use it to fill holes smaller than a dime in size, smooth out alligatoring paint, surface checks, fill surface gouges or almost anything else I may need. Its only weakness is when you try to fill large areas which causes it to sag and shrink. Keep it limited to very small areas and always make sure you paint it because it will not last if left exposed to the elements.
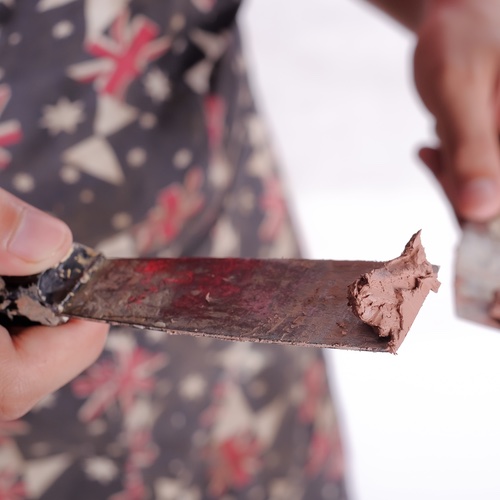
LiquidWood & WoodEpox
Best for structural repairs or rebuilding of big portions of wood – There are tons of different types of epoxies for wood, but this product is by far my favorite because of its ease of use and long performance.
We use this every single day and my rot repair franchise Preservan uses a similar product by the truckload. The two parts work together to stabilize “punky” wood and fill in the missing areas.
The repairs can be sanded, drilled, planed, and essentially you are left with a repair that performs just like wood but will never rot or fall out. Epoxy repairs are some of the strongest, most long-lasting ways to patch wood. They are structural, so they can be used anywhere and are usually not troubled by water issues like other wood fillers.
Got some serious rot? This is the stuff you need. For info on how to use this awesome product, read my tutorial How To Repair Rotted Wood With Abatron Epoxy.
KwikWood

Best for small structural repairs in a hurry – Anyone who occasionally needs to patch wood should have a tube of this sitting in their shop or garage. This is a very simple to use 2-part epoxy that you mix with your hands. It’s kind of like squishing a tootsie roll together to mix both parts. Once you mix it, you have about 10 minutes before it starts to set up, and in 20-30 mins it is hard as a rock.
I use it to fill screw holes that have stripped out so I can get a sagging door hung again quickly or other tasks like that. Its fast drying time and resistance to rot and mildew make it perfect for exterior repairs too. I have used it outdoors and left it unpainted for years (not on purpose) with no problem.
Minwax Wood Filler

Best all-purpose wood filler – You knew I’d get around to an actual wood filler soon, right? Minwax Wood filler is such an easy to use and great product I am constantly surprised by how good it does for how little it costs. In the video above you can see the incredible results I got after a 5 year test with this stuff. It outperformed some epoxies and more expensive products big time.
It’s simple to apply with a finger tip or putty knife, sand when it’s smooth and prime when you’re done. No mixing to screw up. The fact that it’s not structural just means it should not be used for larger applications like the Abatron products above. It’s also a great option for stained and varnished projects as well as paint grade repairs.
Sawdust & Wood Glue
Best for color matching and flooring joints – This is a weird little trick that an old floor refinisher taught me and it really has worked great in very specific circumstances. Here’s how it works:
To patch wood using this method, you’ll need sawdust from the specific wood you are patching. Mix it with enough wood glue to get the consistency you need. You can make this a wet slurry and trowel it into the joints between old floor boards or make a thick paste to fill spots on damaged furniture.
You have to work fast enough that the glue doesn’t begin to dry on you, but to match the color of a repair for something that will be stained and varnished there is nothing better. Once it’s dry, sand the surface thoroughly and you’re good to go.
Austin’s Glazier’s Putty
Best for flexible joint filling – Glazing putty isn’t a wood filler, right? Wrong. For filling nail holes or joints glazing putty is actually incredibly useful.
Some glazing putties are bright white (DAP 33) which can hide well for painted trim, but are hard to see if you’ve gotten good coverage plus they can take weeks to cure. That’s why I created my own glazing putty with the help of the folks at Sarco Putty Co. that is usually ready for painting within just 24 hrs. It is also available in a brown color to blend in better for varnished projects.
For a better option to filling joints and ease of application you can’t beat a glazing putty. I can often use this in place of caulk for certain circumstances where more body is required than caulk which tends to sag.
What to Avoid
You’ll notice that there is one product I specifically did not include here that a lot of people use…Bondo. There is a good reason why it is not included in a post about the best wood filler and I’ve outlined why you should absolutely avoid Bondo when it comes to patching wood in this more in-depth post.
I’d love to hear what your experience has been with these products and if you have other favorites that you’ve found over the years. Are these truly the best products to patch wood or is there some other product that deserves the title of best wood filler.


Founder & Editor-in-Chief
I love old houses, working with my hands, and teaching others the excitment of doing it yourself! Everything is teachable if you only give it the chance.
Hi. I am trying my hand at creating simple jewelry boxes, made with unfinished wood, which is already made up and makes half a box (two put together will make the whole box). In putting the four corners together the maker ran a metal staple down the length of the corner from top to bottom, approximately 3″. Obviously I cannot remove the staple because the box half would fall apart. So, can you tell me about a wood filler to cover the metal staples at each corner. There is no hole to fill, I just need to cover the staples so that I can stain the wood. I have tried using various wood fillers, but then when the rest of the box is stained the corners are darker that the rest of the box. Thanks for your help.
Hello Scott
We have hardwood flooring and there was a small knot hole that our dog decided to gnaw on its about the size of a dime now how can we fill and stain this so it won’t be so noticeable? The floors are oak
Thanks Chris
any wood fillers torchable? for subflooring?
Hi Scott, I’m painting the exterior of a 1922 Craftsman in the Pacific Northwest. The old paint is alligatored, checked, cratered, pocked, etc., but also extremely well adhered to the siding and rock-hard. I’m having trouble finding much info about the use of products like ReadyPatch and CrackShot as a filler for this purpose. The few bits of info I’ve found mostly just say you should NEVER use exterior spackle for this purpose – but specific products aren’t mentioned, and maybe some newer products are okay? The professional paint stores (and box stores) have all told me that there’s no product that will fill those imperfections and hold up for more than a year or two, and even the product info for ReadyPatch, CrackShot, and DryDex state that they shouldn’t be used for exterior skim-coating.
Above, you write: “I use it to fill holes up to a dime in size, smooth out alligatoring paint, surface checks, fill surface gouges or almost anything else I may need.”
I would be elated to find out that I can use a spackling compound rather than having to go through complete removal! Am I mistakenly calling the process of filling these imperfections with a thin, knifed-on layer of compound “skim-coating?” What I’m trying to figure out is: can I use ReadyPatch (or ANY product) to fill in alligatoring, checking, pocks, etc., on my exterior siding? Thanks!
Try Wood Wizard. It’s on Amazon. Even patches wrought iron outdoors!
Thanks J, PC Woody and WoodEpox are available near me and I use those to repair large cavities and rotted wood (very similar to Wood Wizard I believe) – but what I’m looking for is something to fill rough painted areas (alligatored, checked/crazed, surface areas) of old cedar clapboard siding and to smooth raised edges where paint has broken off. Those areas are in no danger of failing – they are absolutely adhered to the siding, just need to be smoothed. Obviously sanding/stripping would produce the very best results, but that’s not an option in this case. So after I scrape I’m looking for an exterior compound or spackle that can be spread to smooth the surface in the worst areas. So far I’ve been looking into Ready Patch (Rustoleum), Platinum Patch (DAP), Alex Flex (DAP), and exterior caulking – but I’ve gotten different answers from almost every person I’ve talked to. There seems to be no definitive answer, which is surprising considering how common a problem this must be. Most product reps consider what I’m doing to be “skim coating” and have to recommend against it because that’s what the product sheet says (though the rep for Ready Patch said it would be okay). But I’m still trying to gather info from experienced contractors to figure out what they use (and don’t) and why. If anyone here has ideas, I would be very grateful!
To follow up on what I’ve found: After some pretty deep searching that took me through virtually every exterior spackle available, I ended up talking to a couple of paint chemists and exterior compound product developers who suggested using elastomeric patching compounds for this application. The product I’ve found is Tower Category 5 Elastomeric Patching Compound – it’s a smooth knife-on grade compound. It can’t be sanded but it can be feathered on the surface with a putty knife and wet rag/sponge and it will flex with the movement of the wood without cracking or separating from the substrate.
I’m a little nervous that nobody on the internet seems to be talking about this, so if any of you have any thoughts – I’d love to hear them!
Hey Alex,
What did you end up using? Did you use the Tower Category 5 Elastomeric Patching Compound? How did it work? My painting contractor just used MH Ready Patch for the same purpose as you described above. Now I’m scared to death its going to fail within 6 years. Do I need to worry? It seems like the area he patched are so thin, but there are quite a lot of areas on the house. He primed both before and after the application of Ready Patch. Any advise on how to move forward? What should we do if it fails? Sounds like its super durable, so is sanding even an option? Or can we use at heat gun to take it all off? Any advise would be greatly appreciated!
Hi Scott,
I am going to paint my facia and soffits and don’t know what’s best to use as a filler. I mainly need it to fill the mitered corners of the trim, something to blend the soffitt boards together and fill to old nail holes. What do you recommend? Is it better to wash then repair or repair and then wash? Is there an exterior primer you recommend and should I primer all the trim or just repaired areas? Thank you as this is my first exterior painting adventure.
Hi Scott,
I am going to paint my facia and soffits and don’t know what’s best to use as a filler. I mainly need it to fill the mitered corners of the trim, something to blend the soffitt boards together and fill to old nail holes. What do you recommend? Is it better to wash then repair or repair and then wash? Is there an exterior primer you recommend and should I primer all the trim or juat repaired areas? Thank you as this is my first exterior painting adventure.
Auto body filler works for many things. Cures with a hardener in minutes, can be sanded and is waterproof. Two part spot putty is less porous and easier to use but pricey…
Hello Scott,
I just finished the interior of our 3 season lake cabin in NH with kiln dried ship lap. I nailed it with 8 penny nails that are sunk in pretty good (1/8 in to 3/16). The cabin has a wood stove and the temps will swing from 15 to 90 F.
My plan is to treat the knots with Zinser. Then fill in holes with an elmers type interior / exterior wood putty. Finally, I was going to apply water based stain and top coats of white latex. I am looking to minimize work (lots of holes) and am hoping to get away with a single application of filler.
Am I on the right track? Many thanks!!
Hi Scott – we are replacing a wrought iron interior railing and in two areas the pickets will not match up – so we will have to fill the holes. We had one recommendation to use dowels. What method/product would you recommend? We recently had the stairs refinished so we have leftover polyurethane stain that matches the floor. Thanks!
Wood dowels can match best if they are same species of wood or you can use filler and draw in the grain lines to help it blend with the surrounding wood.
Our front door frame has been severely scratched by a dog with separation anxiety. What could I use to fill in the scratches and paint over?
You could use”wall putty” mixed in paint (the color you intend to use for repainting). Let it dry for few hours. Sand it. Refill any left over gaps. Now it is ready for painting. Simpler, effective and low on cost.
Hi ,
I am from India, My home is very traditional with full of wood work and old building, so I don’t want to demolish it and done some repair in 1st floor; Now the wood pillar is getting small crack and its growing; And pillar is has balancing reasonable weight; In this case, wood filler could be suggest able or should I replace it. I am confusing, Please advise me.
Thanks,
Arun
Have a phone box outside my 200 yr. old house, they have about 1 1/2″ hole that was drilled behind it that needs to be filled, I had to put a new phone wire through and I suspect the vinyl siding is shedding the water down into the hole, as my insulation is damp in that area. (I have pulled it out) what should I use to make it watertight?
Hi Scott!
Excellent blog. Your answers and applications are great. Much appreciated . So.. to the point . I’ve got to patch the outside corner of detailed MDF baseboard. Yep, my dog chewed it. Your guidance is again , very much appreciated.
Greg
I had carpenters add trim to my kitchen cabinets to add some dimension. They primed and painted but when they delivered them I noticed that every nail hole is visible due to the filler shrinking. Is there a filler that will stick in the shallow hole that is remaining? Do I need to sand a bit first and repaint that area or what would you suggest? Thanks
Usually need to overfill and let dry then sand. I’d see if you can get the carpenters to do it since that is part of doing the job properly.
The MH Ready Patch shows that it’s for metal, and makes no mention of wood in the product description. Did you link to the correct product? I’m wondering if it’s more similar to bondo in that it doesn’t flex enough to work with wood’s shrinking and expanding (I’m particularly thinking of exterior purposes).
The description on Amazon is incorrect. On the can it specs for use on metal, wood, hardboard, plaster, drywall and more.
Hi there!
I purchased a wooden table a couple weeks ago that had an existing crack on the table top.
It didn’t bother me and I thought it added some character to it. However, while unloading the table, the crack grew and a couple new cracks formed. I am fearful that it will not survive the next move if I don’t fix them asap.
The table is already finished and I would prefer to fill the cracks without having to sand an re-stain it. What product would you suggest to fill the cracks?
Thanks!
Scott – love your website. I have two issues I’d like some help with.
1. I have stair posts that are Douglas Fir that have been used as scratching posts by a cat. Fortunately they are straight vertical with no carving. In reading this blog I am really not sure what I should use. In terms of blending I can faux finish them with artist oil paints. Could you suggest the best thing to use. Would I need to cover them with shellac or lacquer before I faux paint them.
2. I have an old chair that has had so many upholstery nails that the wood needs to be filled and smoothed before re-upholstery. Could you recommend what I should use for this that would accept being nailed again? Also there are some splits in the wood I’d like to fill as well. The chair is actually painted black with Japan black paint which is oil based and gold detailing. I will be re-painting it with Japan Black so I need something that will accept paint.
Thanks for your help.
Hi,
Great blog. I have log cabin and interlocking sections in corners in the outside let water in. Not server just damp I’m a couple of corners. It seems the cuts on logs are not great or they moved slightly showing gap around 1mm to 2mm.
What’s best to fill these gaps and then stain over filler?
Thanks
I’m by no means a specialist in log cabins but For gaps that size I would likely use a tinted siliconized acrylic caulk that matches the color of the logs.
Use a product called Permachink, it is made for logcabins. https://www.permachink.com/ They have a 800 number and are very helpful. I used their products for my log cabin.They have other products so they might recommend one of them.
Check out permachink, they have alllll kinds of products and advice for you about log cabins. They give free samples of their products too, might be enough to get the job done
I have a storm door that was caught by a wind gust causing the closer bracket to come ripping out of the wooden door jam. I need to patch the wood where it was and re-drill holes to set the closer bracket. Which of these products, or others, would you recommend?
Thanks.
Scott
Hi Scott,
If the jam is repaired the best prev nation for this happening in the future is to get rid of the tiny screws that are sent with the dampener and replace them with 3″ pan head screws into the framing. You can place these screws through the existing holes and there will be no patching required and you end up with a stronger bracket.
John, I have the same issue with a storm door; however I already have 3″ inch screws in the part into the wood trim. I bought a new storm door with a different type of closer and need to screw it back into the door frame, but need to repair the holes with some type of hardener that will make it like original wood.
Than kyou.
Hi l, so happy to have found this post/site! I’m currently painting the stained woodwork in my den and need a product to fill nail and tiny screw holes in my French doors. Which product would be best for this? I’ll be priming with oil based Kilz and painting with an Alkyd semi-gloss. Thanks for any advice you can give 🙂
Painting stained woodwork? Oh no! The minwax wood filler works great for nail holes, but I hope you leave that stained woodwork like it was.
Hi Scott, thanks for your response!! Hate to disappoint, but I did, in fact, paint over the stained woodwork in my den. :/ In my defense, the house is a 2-story colonial built in the 80’s (as in 1980’s!!) Nothing that special about the woodwork, but it sure looks fresh with white paint 🙂
We are painting our interior stairs. When removing the carpet, we discovered the two landings (our staircase turns 180 degrees) are chipboard. We painted all of the hardwood treads, and installed retrorisers and are struggling to find a solution for the landing (one has a bullnose edge, the other doesn’t). I would love to paint this chipboard, but obviously this isn’t a smooth surface. Is there a product you suggest that could smooth out the chip board, be durable to walk on and hold paint? There will be a runner over 90% of the landing, so that will protect it from most foot traffic.