What if I told you that you could make your own DIY window screen in just one day? Would you believe me? Well, you should, because with this post and accompanying video, it’s very doable for just about any DIYer!
This is a relatively similar process to my post about how to build DIY Storm Windows if you are looking to gain some energy efficiency out of your old windows.
You’ll need a few basic tools to get the job done and done well, and you can’t be afraid of using a few standard shop tools like a table saw and miter saw. Check out the list of tools and supplies I used below as well as the video for the step-by-step break down of the process.
You can also buy the full woodworking plans with a convenient measuring guide to really help you complete the project with ease in my store.
Tools
- Grizzly G1023RLWX 10″ Table Saw
- DeWalt Dual-Bevel 12″ Miter Saw
- Kreg K4 Pocket Hole Jig
- Makita LXT 18v Lithium Ion Compact Combo Kit
- Ridgid 18 ga. Brad Nailer
- Arrow T50 Heavy Duty Staple Gun
Supplies
- CRL 36″ Fiberglass Screen Mesh
- Screen & Storm Hangers
- Pocket Hole Screws
- Hook & Eye
- 3/4″ 18 ga. Stainless Brad Nails
- Arrow 1/4″ Stainless Staples
Step 1 Determine the Thickness
Screens were meant to fit on the outside of a double-hung window and rest up against the blind stop. They are usually between 3/4” and 1 1/8” thick. The 3/4” version is extremely common after 1910 and simple since you can just buy standard 1×4 and 1×6 materials to make the screens from, so that is what I’ll cover here.
For thicker screens, you have 3 options:
- Use a thicker stock to accommodate the size you need
- Fur out the blind stop a bit so as to leave 3/4” of an inch remaining
- Add furring strips to the perimeter of your 3/4” screen to accommodate the thickness
Step 2 Measure the Opening
The next thing you need to measure are the overall dimensions of the screen (width & height). I measure as tight as possible and then subtract an 1/8” from the overall size. If you make the screens too tight, then with the irregularities and paint build up on old windows, you will be doing a lot of planing and sanding to make it fit. If you measure and come up with 32” x 60” then plan to make your screens 31 7/8” x 59 7/8” to ensure a good fit.
Step 3 Cut to Length
You’ll need (1) 1×4 cut to the height of your window (the 59 7/8” length from our previous example) and (1) 1×6 cut to the width of the window (31 7/8”) minus 3 1/2”. There is a reason for the slight discrepancy and it has to do with the blade width on the table saw. For now, just trust that the rule is correct. You’ll see why soon!
You’ll also need enough screen molding to go around the perimeter of the screen and across the meeting rail of your screen. So, for a 32”x60” screen, you’d need approximately 18’.
Screen molding or half round is available at most home stores and that’s what you’ll use to give the screens their finished appearance.
Step 4 Rip the Rails
From these 2 pieces of wood, you’ll be able to make all the rails and stiles you need for one full screen. You’ll need the table saw for this next part to rip these pieces to the proper width. Here is the cut list you need:
- 1×4: 2 pieces @ 1 11/16” each. Accommodating for the width of the blade this should be cutting the 1×4 exactly down the center so you have two identical width boards.
- 1×6: 1 piece @ 1 11/16”, 1 piece at 1”, and remainder should be about 2 9/16”
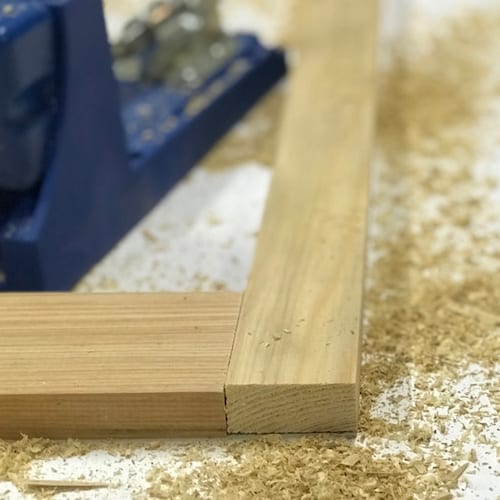
Step 5 Assemble
Assemble the screen frame and clamp everything together so that it is square. In the video, I use a Kreg K4 pocket hole jig and screws to attach the joints because it is one of the most DIY friendly ways to assemble a frame like this.
Step 6 Prime & Paint
It’s much easier to prime and paint screens before you apply the screening, so take this time to put a coat of oil-based primer on and coat the frame and screen molding with the high quality paint of your choice.
Step 7 Apply Screening
Pick the screen type you want and roll it out across the frame. Start in a corner and begin pulling and stapling the screening tight. You want to staple within the first 1/2” from the inside edge of the frame in order to hide the staples in the end.
Step 8 Apply Screen Molding
Cut pieces of screen mold to cover the areas stapled earlier and nail it on with 3/4” 18 ga. nails. Miter the corners for an attractive finish.
Step 9 Install Hardware
Touch up the paint on any nails holes and then apply the screen hardware. I use Stanley Screen & Storm Hangers for my screens and storms. You also need to install a couple simple hook and eyes to attach the bottom of the screen into place and secure it.
Enjoy the fresh air a huge sense of accomplishment that your DIY window screen is not only an attractive carpentry project, but one that is extremely practical!
If you think you’re ready to build your own screens download your copy of my DIY Window Screen Plans right now.


Founder & Editor-in-Chief
I love old houses, working with my hands, and teaching others the excitment of doing it yourself! Everything is teachable if you only give it the chance.
Hi, the written instructions are great but the video isn’t working, neither here nor on YouTube. I’ve tried several devices and browsers and it never plays. Thanks!
I know this is an old post but I’ll admit I’m stumped by something. I’ve helped someone build window screens a few times and I’ve looked at a lot of them and I honestly thought the molding went on the inside. Unfortunately, my house has “Eastern” casings (no blind stop) and I don’t like the look of the face mounted screens. After spending too long figuring out how to make a rabbited version of this I realized you have the molding on the outside, as do several other videos from reputable sources. However, I have noticed that all of the “fancy” screens with built in details appear to have the molding on the inside.
Is it normal or “okay” to put the molding on the outside? Does it matter? Is it one of those “whichever way is faster/easier”?
Hi!
For some silly reason I am having a hard time with the width measurements. I understand the center piece is 1” wide. Are the top and bottom pieces 2 9/16” or 1 11/16”? (The same as the side pieces?) your video and picture looks as though they are thicker but I’m having a hard time figuring out the cuts from a 6” piece. (When in reality it’s actually 5.5” silly lumber) thanks so much! I have so many to make. I hate the expanding screens that let bugs around
The sides and top are 1 11/16” and the bottom rail is 2 9/19” wide. Basically if you take a 1×4 and rip it in half that should yield your 2 side stiles and then the 1×6 will rip evenly into 3 pieces at 1’, 1 11/16”, 2 9/16” in widths.
What are specs for the pockets screws? Dia? Length? Thx
Kreg, has the specs on their site. It depends largely on the size wood you are joining.
Hi there, nice video. Actually trying to make one here in the Netherlands (so some stuff is not that easy to come by) let alone the names for it. I see on that you flip the wood but it has an extra cut in the wood which isn’t shown in the movie when you do that. Did you do that with an ontop mill or something?
It appears that way, but for the screens no there is no rabbet that needs to be there. I reused some o the footage from another video called DIY Storm Windows since the process is almost identical except for the rabbets that are cut in for a storm window to accept the glass.
What about casement type windows tgat ooen outwards? Can you do the same with thise but on the inside or would that look out of place?
Absolutely, there are interior screens on our swing casement windows. Usually they have a hole for the crank arm to fit in or are on hinges to allow you to access the window to open it.
If I use something like this CMPC-1-in-x-4-in-x-8-ft-Primed-Finger-Joint-Pine-Trim-Board and then primed it with exterior latex primer it would last quite a long time correct?
Finger-jointed material is notorious for premature failure at the joint. I’d try to find a longer run of continuous material, like dense pine available from may lumber yards or independent saw mills.