I often say that as a restorationist I’m a better editor than a writer, but this week I’m going full creator with a new DIY project to inspire you. I’ve got the coolest idea that doubles as a cooler for enjoying some frosty beverages on your front porch while at the same time serves as an auto-watering planter. Sound too good to be true? It’s not and I’ll show you how to build your very own DIY Plant Cooler below.
This post was sponsored by Cabot who always gets me thinking about fun outdoor projects like last year’s DIY Wooden Doormat I built. Their stains work great on exterior wood projects so check them out for your next project especially if you’re planning to follow along and build a Plant Cooler too.
The Inspiration
In Florida it’s ridiculously hot in the summer and all the plants on the porch don’t get the regular rain the garden does so they dry out if I’m not watering them everyday or two. Fact is with 3 kids and as many businesses I forget to water the plants more often than not.
I wanted a way to not have to remember and also enjoy a frosty beverage (or two) at the same time. Thus was born the DIY Plant Cooler.
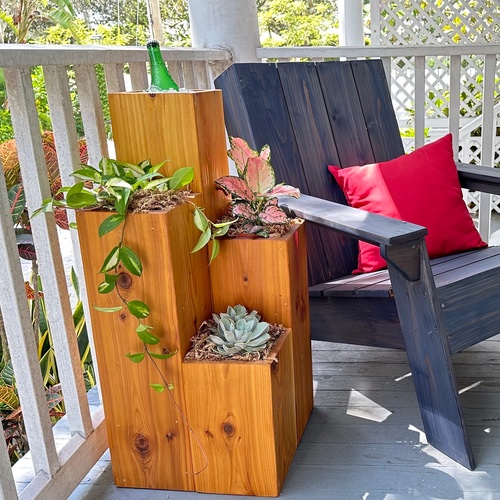
The design is basically a multi-tiered planter with a cooler in the center that feeds the melting ice water down into the planters below giving them all the water they need as long as I remember to have a drink after a hard day’s work, which is not difficult to do.
The Materials
The whole thing is made very simply of 1×8 cedars boards fastened together in a DIY friendly method. Anyone with even basic woodworking skills should be able to build this using the tools and materials list below.
- Cabot Australian Timber Oil Natural (1 quart)
- Four 1×8 Western Red Cedar (or your choice of wood) at 8’ long
- 18 ga. 1 1/4” stainless steel nails
- Titebond III wood glue
- Two 1/2” 45º copper pipe connectors
- Mitre saw
- Table saw
- Drill with 1/2” bit
- Tape measure
- Pencil
- 18 ga. nailer
- Random orbit sander
- 80-grit sandpaper
- 120-grit sandpaper
- Natural bristle 2” paint brush
- Mineral spirits
- Tinted wood filler
Building the Planter
The construction of this DIY plant cooler is essentially four pedestals of differing heights that are connected together. I selected my heights based on a comfortable height for me to reach while sitting in a chair.
The cooler tower is the only one that is a complete box whereas the shorter towers you will notice only need three sides. That’s because the fourth side will come from being attached to the cooler tower which will create the fourth side.
Step #1 Cut to Length
Cut the boards to length using a mitre saw according to the measurements below with the quantities listed.
- Cooler Tower: 32” (needs 4 pieces)
- Planter #1: 24” (needs 3 pieces)
- Planter #2: 20” (needs 3 pieces)
- Planter #3: 12” (needs 3 pieces)
Step #2 Rip Bevels
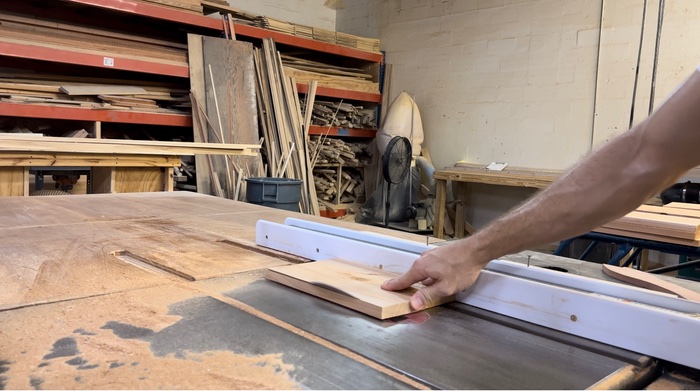
Using a table saw with the blade at a 45º angle you’re going to rip the side of the boards so that everything can be assembled with clean mitered corners. Not every side needs a mitre so follow the details below carefully.
- Cooler Tower: Bevel both sides of all 4 boards
- Planters 1-3: Bevel 2 sides of 1 board from each height and 1 side of the remaining boards of that height
Step #3 Glue Up
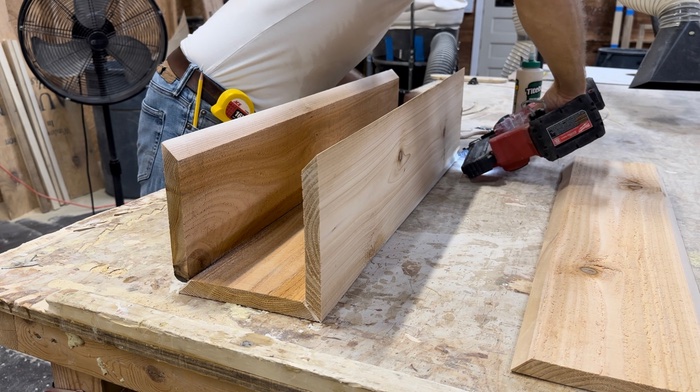
To attach everything I’m using Titebond III which is an exterior grade waterproof wood glue along with some 18 ga. nails. Could I make this fancy and stronger by using dowels, pocket holes, biscuits, or dominos? Absolutely! Did I need to? No. I wanted to keep this project approachable, like all my builds, and didn’t want to complicate it anymore than absolutely necessary.
If you want to fancy up my design feel free. I promise I won’t be offended.
Brush the wood glue on the bevels and fit one piece at a time by nailing every 6”-8” through the miter joint. Wipe off any excess glue and let it sit overnight before handling any further.
Step #4 Cut Platforms
Once everything was dry. I cut some small, square platform pieces that would fit inside each tower to support the plants. I fit each of these down about 6” from the top, but you can make these as shallow or deep as you want to fit your plants.
Cover the edges with glue and nail them in place with the same nails as before.
Step #5 Sanding
Since this will have a clear finish on it, sanding properly is a big deal. I hit everything with a random orbit sander using 80-grit paper. I was deliberate in rounding the corners a bit to take care of any inconsistencies in my glue joints (which of course there were).
Be sure to thoroughly sand any glue residue or it will show up when you apply your stain.
I next went through and filled all my nail holes with a tinted wood filler that matched my wood (as closely as possible) and after that was dry I sanded everything with 120-grit paper to get a nice smooth finish.
Step #6 Assembly
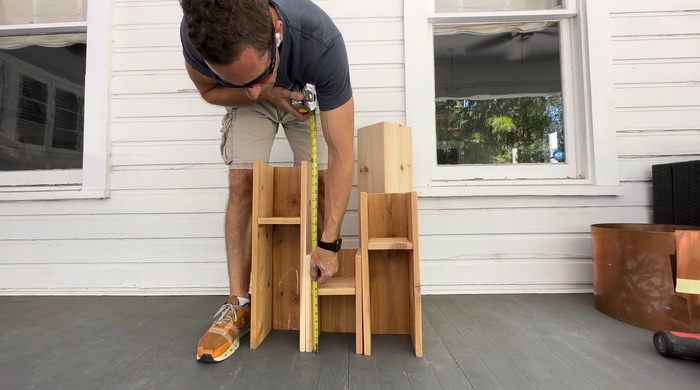
I assembled the towers in a diamond format for depth and visual interest. The way we’re going to attach the towers together is by using some hidden nailing strips. Rip two 3/4” x 3/4” strips for each tower from the leftover cedar boards on the table saw and then cut them to length so that they will fit below the platforms for each tower.
I then marked these on the cooler tower and nailed them in so that the tower would fit snuggly over top of the strips. Once the strips were in place I fit the tower over them and nailed the tower in place every 4”-6” on both sides.
One more round of wood filler and light sanding and then you’re almost ready for finishing.
Step #7 Install Drip Lines

In order for this design to feed the melting ice down into the planters below I needed to measure and drill a 1/2” hole on two sides of the cooler tower right at the base of the platform inside.
I then fit two 1/2” 45º copper bends into the holes to allow the melting ice to drain into the planters below. I did have to hog out the holes a bit to get the pipe to fit well so maybe a slightly larger drill bit would be recommended. You can simply press the fittings into the holes if you get a nice tight fit.
Step #8 Apply Stain
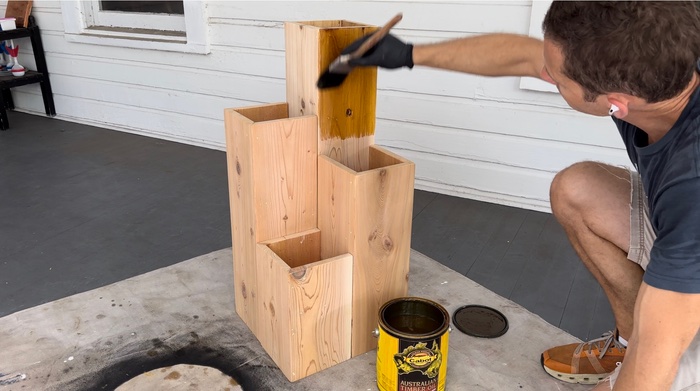
For an exterior project like this I trusted Cabot for the finishing. One of my favorites is Australian Timber Oil because it only takes one coat and provides great protection as well as adding a lot of warmth to the wood.
It’s available in different colors but I find that for woods like Western Red Cedar the Natural color is best because they don’t really need anything to cover their attractive wood grain.
After making sure the wood was clean of any dust I brushed one coat on, making sure to keep a wet edge and avoid drips. Since Australian Timber Oil is fairly thin compared to a paint you don’t have to worry about brushmarks.
Don’t go back over any areas as one coat is all that is recommended. Let it dry 24 hours and then you’re ready to roll.
Step #9 Add Plants & Ice
Since I’ve got two planters that will be fed by the melting ice water and one that will not, I decided to plant accordingly. The dry planter received a succulent that I won’t have to water as much and the other two got more water needy plants.
I didn’t bother to fill the towers will dirt, rather I just put the plants in their plastic containers in the tower and covered it with some moss to keep them wet.
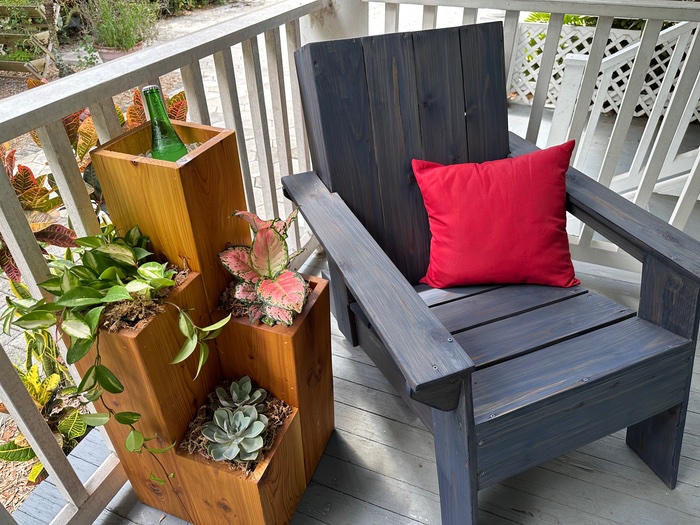
Then when I need come out for a drink in the evening I can fill the plant cooler with a couple scoops of ice to hold my drink of choice, which in the video is an amazing grapefruit soda. Alternatively, if I just want to give the plants some water then I can add some ice to the top before I head out to work rather than having to grab the hose from the other side of the house.
It’s amazing what you can build if you get creative! If you liked this project or you have another idea for an outdoor project you should definitely check out Cabot’s line of exterior stains because they’ve got something for almost every kind of exterior project you can imagine.


Founder & Editor-in-Chief
I love old houses, working with my hands, and teaching others the excitment of doing it yourself! Everything is teachable if you only give it the chance.