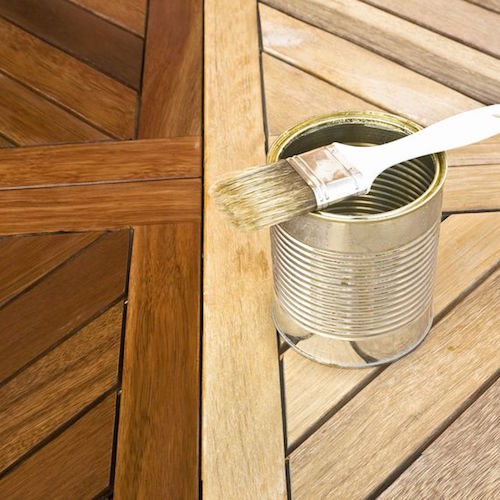
 You could fill a library with the different ways of finishing wood. There are oils and lacquers, urethanes and stains, sealers and varnishes. Some are wiped on, some are sprayed, while still others are brushed on. I could fill a book on just this subject alone so this post will be more of a primer to get you pointed in the right direction.
Finishing wood is as much of an art as it is a science. Each finish can come out completely different depending on a multitude of factors like the type of wood it is applied to, the ambient temperature and humidity, air flow or lack thereof, thickness of application, age of the finish.
Don’t be intimidated by all this. The best advice I can give you on the subject of finishing wood is to experiment. Get a piece of similar wood and try applying the treatment you are thinking about. If it doesn’t come out right, try tweaking your application and the conditions to see if you can make it work. If it’s beyond your abilities, then try a different technique.
Below is a list of the most typical types of wood finish used in old houses and some professional tips on how to work with each properly. Some are easier than others, so don’t get discouraged. There is a finish that will work for you!
Polyurethane (Varnish)
Polyurethane (a type of varnish) is one of the most commonly used wood finishes today. It excels in high traffic areas like floors where it forms an incredibly hard and resilient coating that can handle just about anything. There are exterior versions of polyurethane call “spar varnish” which are a bit softer than their interior cousins. This softness allows them to remain flexible in the large temperature swings that occur outdoors. A regular polyurethane will crack and fail after a couple short years in brutal exterior settings, whereas a spar urethane can last a decade or so with care.
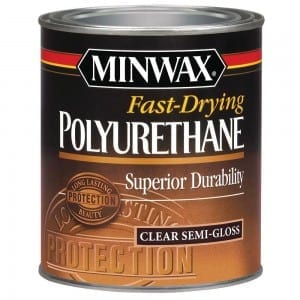
Polyurethane works best for floors though it also excels on doors and woodwork. The downside of this finish is that it leaves the wood feeling like it has a thick plastic coating on it. Good for hardwood floors that need the protection, but maybe not for furniture that you want to feel silky smooth. You can read more in my post All About Polyurethane.
Tips:
- Ease of Application: Moderate
- Clean up and Thinning: Mineral Spirits or Paint Thinner
- Solvent: None (once cured, it cannot be removed except with sanding or scraping)
- Sheen: Available in Satin, Semi-Gloss, Gloss
- Recommended Application: Never shake the can, stir only to avoid bubbles in the finish. Apply 3 coats with a natural bristle brush or lamb’s wool pad (refer to manufacturer’s recommendations for drying times but usually leave about 12-24 hrs between coats) with light sanding between each coat. Sanding between coats provides for a smooth finish and is imperative for the successive coats to adhere to each other.
Lacquer
Laquer is a quick drying finish that is most typical on commercial furniture and cabinets today. Lacquer paints (essentially a tinted, opaque lacquer) are a typical finish for most cabinetry. Lacquer goes on in very thin coats and is almost exclusively sprayed on with HVLP (High Volume Low Pressure) sprayers since it dries so quickly. Without spraying, you’d be stuck with brush marks everywhere.
While it is hard for the amateur to work with lacquers, they do provide an incredibly beautiful and rich finish that is worth the extra work, especially if you are looking to put the finishing touches on a furniture project. Lacquers do have a tendency to yellow over the years, which makes them a bit less desirable for light colored woods.
Tips:
- Easy of Application: Difficult
- Clean Up and Thinning: Lacquer Thinner
- Solvent: Lacquer Thinner (When applied to dried lacquer, Lacquer Thinner will dissolve the finish)
- Sheen: Matte, Low Satin, Satin, Semi-Gloss, High Gloss
- Recommended Application: Multiple coats, especially for clear coats (about 5 or 6 depending on the desired look). Coats dry and are sandable within an hour or two depending on conditions. Sand lightly between coats. Can be “rubbed out” to a silky smooth finish with high grit (400-800 grit) sandpaper.
Shellac
Shellac is an old school finish common on woodwork in old houses. It is a relatively similar product in application to polyurethane, but instead of being made of petrochemicals, it is made from a naturally found resin from the lac bug. Flakes of this resin are dissolved in denatured alcohol and poof you have Shellac. This one of the oldest wood finishes whose history stretches into antiquity.
 It is not quite as hard of a finish as oil based finishes like polyurethane and lacquer, but it is resilient enough for woodwork and trim. Floors are not a great place for this finish. One of the great things about Shellac is that is can be easily touched up without looking like it has been repaired. Applying new Shellac to a damaged area causes the old cured Shellac to re-emulsify (turn back into a liquid state). This great feature (along with the fact that Shellac doesn’t yellow over the years) allows Shellac touch ups to seamless blend in with the original finish.
Shellac was the wood finish of choice until being replaced by lacquer in the 1920s and 1930s.
Tips:
- Ease of Application: Easy
- Clean Up and Thinning: Denatured Alcohol
- Solvent: Denatured Alcohol (When applied to dried Shellac, Denatured Alcohol will dissolve the finish)
- Sheen: Available in multiple sheens, depending on how much of the lac bug flakes are mixed into the denatured alcohol. The more flakes, the more matte the finish.
- Recommended Application: Easy to apply with a brush, pad, sprayer, or wiping cloth. Dries within minutes and can be recoated within 30-60 minutes. Multiple coats are recommended.
Oil Finishes
Before Shellac became extremely popular in the 19th century, wood finishes were mainly oil and wax. There are several different types of oil finishes available today. Tung Oil, Teak Oil, Antique Oil. All of these are a combination of different oils, resins and solvents to give them faster drying characteristics and more or less protective qualities. Most of these work great, but I prefer to go to the source, and for me that is Boiled Linseed Oil.
Boiled Linseed Oil is a slow-drying penetrating oil finish. Oil finishes like this, penetrate deeply into the wood and require multiple coats applied over several days. While an oil finish doesn’t really add a protective coating on the wood like the other finishes we’ve been discussing it does protect the wood in other ways.
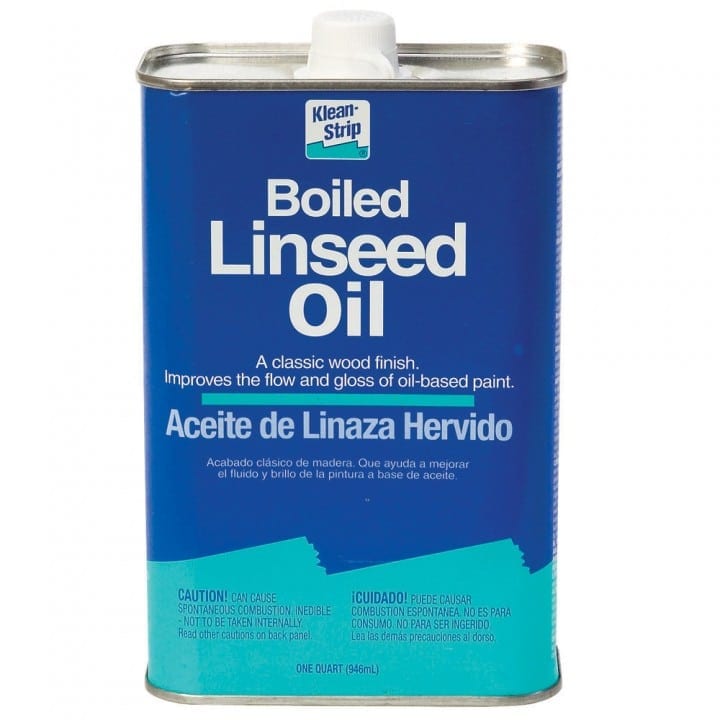 Oil finishes penetrate deeply into the wood and slowly harden and strengthen the wood from within, which provides protection from water and other spills. Oil finishes also bring out a true richness in certain woods and since they don’t leave a coating on top of the wood, they give a feeling a nearness to the wood that is desirable in pieces that will be handled often. Oil finishes can also be given a beautiful sheen by rubbing them out with very fine sandpaper or 0000 steel wool.
Tips:
- Ease of Application: Easy
- Clean Up and Thinning: Mineral Spirits or Paint Thinner
- Solvent: None
- Sheen: Usually a Satin sheen but the sheen can be altered by the amount it is rubbed out
- Recommended Application: Easiest to apply with a wiping cloth. Drying time can be days between coats depending on environmental conditions. Requires multiple coats until wood will no longer absorb anymore of the oil.
Wax
Popular around the same time as oil finishes, wax is best used as an addition to oil finishes. It provides minimal protection and should be reapplied occasionally to maintain its effectiveness. It’s fine when used in this way, but not recommended as a finish in and of itself.
Oil/Varnish Blend
You can read my earlier post on how to make this simple but effective finish at home. This finish really combines the best of both worlds. It gives you the deep penetrating protection of an oil finish with the protective coating of a varnish. Anything that is remarkably easy to use and effective will always keep a prominent place in my shop and this one is my go to finish for woodwork and antique furniture.
I use a 3 part mix of Boiled Linseed Oil, Polyurethane and Mineral Spirits. I can tailor this mixture to the needs of the project and often begin with a mix that is higher in Boiled Linseed Oil so that it can really penetrate the wood. Then slowly as I build up coats I switch to a mix that is heavier in Polyurethane.
Tips:
- Ease of Application: Very Easy
- Clean Up and Thinning: Mineral Spirits or Paint Thinner
- Solvent: None
- Sheen: The sheen is dependent on the sheen of the polyurethane you use in your mix. Also, more coats provides more sheen. One or two coats usually leaves you with a matte finish.
- Recommended Application: Easiest to apply with a wiping cloth. Wipe on and let sit for about 20 mins so that the finish can soak into the wood. Wipe off any excess and let dry. Drying time can be days between coats depending on environmental conditions. Requires multiple coats to achieve an even finish. Sand moderately with 000 or 0000 steel wool between coats.
Water-based Finishes
In recent years water based finishes like polycrylic and oil-modified polycrylics have been coming on the scene. These finishes, while they have come a long way since their introduction, are not quite ready for primetime if you ask me. While the clean up on these finishes is incredibly easy (wash and go), they do not provide the beauty and long lasting protection that oil-based finishes do.
I have no doubt that they will someday take over the market just as latex paint has pushed oil-based paint to the fringes of the painting industry. But that time has yet come.
Hopefully this has given you enough info to decide which wood finish is for you. There are so many options available to you for your old house that choosing the right finish may be the hardest part.


Founder & Editor-in-Chief
I love old houses, working with my hands, and teaching others the excitment of doing it yourself! Everything is teachable if you only give it the chance.
I am building a timberframe cabin and have installed windows with internal Douglas fir trim (external is fiberglass). I live in Alaska and several of the windows are south facing so will get lots of summer sun and also likely some condensation in the winter. I would like to finish the interior with something that is protective of water and sun but also looks good with the timbers in the framing which are oiled. I have been thinking of using Epifanes (thinned for first coats) and have been considering their Woodfinish so I don’t need to mess with fussy sanding on complex window frames. I’d build up with gloss and finish with one coat of Matte for a more natural look. Or should I use oil for ease of application? Would oil be protective enough? I’m torn between the two. Suggestions?
Kathy, Alaska is definitely an extreme climate to build in so I’m not sure if this will apply, but I would agree with you on using Epifanes. Great stuff! Matte finish for the final coat as well.
Been awhile since I’ve refinished anything but looking forward to using the products
I have 7/8″ x 8″ planks of jatoba I’m planning to use for a desktop. What is the best finish for natural wood look and durability? I was planning to use the polycrylic straight but now you have me second guessing.
Jerry, for exotics I prefer an oil finish like a danish oil or the oil-varnish blend I make.
https://thecraftsmanblog.com/how-to-make-your-own-wood-finish/
The wood is hard enough that it doesn’t need the poly coating and the oil will protect and bring out the natural beauty of the wood.
I am having a cabinet maker build outdoor kitchen cabinets out of teak. The home is located in the panhandle of Destin, FL on the bay. However, he is finding the glue joints on the cabinet doors are not holding, citing the oil in the teak wood is affecting the glue bond. The cabinet doors have a mortise and tenon joint. Any recommendations on how to make teak wood joints bond? Any alternative wood you can recommend?
Kevin, gluing tropical woods like teak is very difficult. This article has some good ideas to test http://www.wood-database.com/wood-articles/gluing-oily-tropical-hardwoods/
You’re best bet my be doing pegged mortise and tenon doors to hold everything together without glue.
Hi Scott,
We are in the middle of redoing an add-on that is approx 20+ years old (done by previous owner) The ceilings are Douglas Fir, there are beams and a tongue and groove that has a rough finish. The ceiling is stained, but we opened up an area of ceiling that they had ‘dropped’, and the ceiling in that area they didn’t stain, and we had to replace some of the rough tounge and groove, and replace two beams as they had used different smaller beams in that covered up ceiling area. Now I have to try and match the NEW tounge and groove to the original/stained tounge and groove, and match the unstained old tounge and groove to the old stained tounge and groove… And match the the new beams (new Douglas Fir) to the old stained beams. I have been testing Minwax colors and Varathane colors, and I get close but not exact. Then I have to wonder about newly stained areas keeping up the rate of change with already stained older Douglas Fir areas. I don’t know if I should doing certain prep with the unstained new and older wood. We have done nothing to the older stained wood other than dust it. The rough texture tounge and groove really can’t be attended to in the same manner of smooth wood… I’m almost at a loss and feeling defeated, yet I wont give up because it’s my house. I cannot afford a professional for this part of the redo. Any suggestions or guidance would so appreciated. One more thing, the older unstained tounge and groove is a golden color compared to the newly replaced tounge and groove… Both are Douglas Fir. Thank you
I have custom wood windows that were stained and varnished. They are now peeling. I stripped some down a few years ago and reapplied stain and varnish. This was a ton of work and needs a quick repeat each year. It was recently suggested to me to use an oil instead (Boiled Linseed Oil idea) or Thompson’s water seal. I like the idea of protecting and nourishing the wood. And it seems like a simpler project year after year once I strip all the windows and apply 7 coats or so! Alternatively, the mixture you mention: linseed oil, mineral spirits and varnish does sound like the best of both worlds….I live in So California…lots of dry heat and sun…occasional el nino winter. Thanks!
I’m curious, were these interior or exterior?
Thanks,
Diane
Hi Scott,
We purchased a craftsman door in Douglas Fir and would like to stain ourselves. We are amateurs but think that we can do it ourselves. Can you please advise on they type of stain to use?
Our contractor recommended a wipe on poly seal but don’t know if we should use oil or water. Also, how should we apply the stain? (cloth, or roller?) Any help or guidance is appreciated and thanks in advance.
Tim
Tim, check out this post first: https://thecraftsmanblog.com/how-to-prep-wood-for-stain/
When putting on stain I’d use a cotton rag and wipe it on using an oil based stain like Minwax. Then 3 coats of an oil-based spar urethane which is meant for outdoor wood. That will get you good protection.
Thank you Scott for your email. Your link is very helpful and gives good advice. A few more questions:
1) What I am reading behind the minwax oil stain can they recommend a 220 grit and you are suggesting 120…Please advise as I am unclear.
2) My door is an exterior front door so can I use an interior stain then seal it or do I need to use an exterior stain only?
Thank you Scott,
Tim
Tim, 120 or 220 is fine. I find that sanding to 220 is more time consuming and not entirely necessary. The Minwax rain is meant to be too coated with a polyurethane or spar urethane. Exterior stains like sikkens is something that is more for siding or fences and not for doors.
We’re refinishing the floor of our covered (not enclosed) porch with pine tongue and groove. Would a spar varnish be our best finish? We live in Eastern Oregon, we get a little of everything when it comes to weather.
Spar urethane is the way to go Meg!
I want to finish a wooden, double-door kitchen cabinet with medium, dark varnish I think, and tile the top. What kind of paint or varnish do I get?
I would use a simple minwax stain whatever color you prefer and then brush 3 coats of clear polyurethane in either semi-gloss or satin sheen.
We just installed a tongue and groove ceiling on a three season porch and we are unsure how to finish it. We live in New York with major temperature swings. Can you also suggest how to apply it since the boards are already installed. Thanks
Hello Scott, im trying to paint my wooden dresser, is there a certain brand you would recommend? I used regular wall paint and the paint comes off easily is it because its latex? Id rather not use oil based. Any advice is greatly appreciated thanks.
Violet, start with an oil based primer to give your paint good adhesion. Also before you prime make sure the surface isn’t dirty or oily and sand everything lightly with a 180-220 grit paper to help everything hold on tightly. Then paint with a good enamel paint. Not standard wall paint. Enamels are harder and more durable. Oil will be best for a dresser, but you can find good water-based enamels like Sherwin Williams ProClassic or Ben Moore’s Advanced that should do the job nicely.
Scott thanks for your advice and wisdom! I’m definetly glad i came across your site!
Hi Scott: We are installing a 5 1/2 inch pine tongue and groove ceiling on the exterior porch of our home. The ceiling is covered and protected by the roof. Would love to use a finish that gives the ceiling protection and some charachter. Can I use the boiled linseed without the poly?? We are located close to you in Ormond Beach Florida so humidity is always high here…
You’ll probably get mildew growth with just linseed oil in Florida’s climate unless you try Allback’s linseed oil which has the proteins removed. Protein is food for mildew.
Great synopsis, I’ve come back to it several times on different projects. I’m stripping paint off of the original interior douglas fir doors on our 1921 craftsman and am struggling with what finish to use after staining. Poly seems to be overdoing it, perhaps shellac instead?
I will also be staining and finishing two exterior doors, neither of which gets direct sun, and one of which is well protected by a deep porch. We’re in very temperate California, so swings in temperature are not a concern. I’m leaning towards poly for the exterior doors. Any thoughts would be greatly appreciated.
Jenna, for the exterior doors I would use a spar urethane which works better for exteriors. For the interior look at a product called Rubio Monocoat or you could try making your own wiping varnish that I outlined in this post: https://thecraftsmanblog.com/how-to-make-your-own-wood-finish/
Wonderful, thank you!
we have recently purchased a 1914 victorian home that has been 90% restored and we are going to finish it.all the windows are in need of restoration (either missing hardware of swelled shut)and we pulled up carpet on the 2nd floor and found hardwood. do you have advice for the windows and floors?
we have recently purchased a 1914 victorian home that has been 90% restored and we are going to finish it.all the windows are in need of restoration (either missing hardware of swelled shut)and we pulled up carpet on the 2nd floor and found hardwood. do you have advice for the windows and floors?
what would you suggest for a 1914 victorian wood floor
There are a few options for your floors. The standard for refinishing wood floors today is 3 coats of oil-based polyurethane. You can also use a water-based polycrylic but you’ll need 4 coats of that. The other option is to use a oil finish. There is a great product out today that I have used and really like called Rubio Monocoat.
I looked at the Rubio Monocoat. It almost seems to good to be true (except for the price, but if you get what you pay for…)
Have you had an opportunity to see how well it holds up?
It seems to be something more on the surface than penetrating, so if it didn’t turn out right (like trying a color and then deciding you didn’t want that after all), it could be sanded off, is that true?
Any previous posts or comments on wood trim being painted vs. a coating that shows the grain? Are some treatments “correct” for certain time periods, different types of wood?
The 3rd floor of our Queen Anne has pine woodwork with 1st coating (under paint) of some varnish-like finish. The 2nd floor has hardwood that has been painted, 1st floor hardwood with some clear finish that does not look like varnish.
I love the idea of ease and durability. We recently had some floors redone with Waterlox, as it not only looked very nice, but it is my understanding it is easier to touch up than varnish as you mention.
I am guessing from what you say that your oil/varnish blend “behaves” more like an oil finish in applying and repairing scratches, etc, rather than like varnish. I’ve always thought that houses are to be lived in, and where people are living there will be scratches and such, and ability to be “touched up/freshened up” is what I prefer. Masters may be able to “repair” a varnish finish, but I’m not one.
Hey Scott we’re slowly refinishing the floors in our house as we finish everything else in a room. (wall repair, ceiling treatment, radiator painted). Currently we’re using Waterlox original. I do sand at least once before the final coat, but you’re saying I could also use steel wool?
Max, you wanna avoid steel wool when you’re finishing floors and anytime you are using waterborne finishes. Steel and water create rust. For floors we use a floor buffer with a 150 or 180 screen between coats. Doing it by hand would be prohibitively slow.
Thank you for this helpful information. Is there a stain that you’d recommend for 100 year old Douglas Fir?
We typically use Minwax stains which I find work quite well. Doug Fir can take stain a little unevenly so I would recommend wiping the wood down with water first to open up the grain. Once the water is completely dry apply the stain and wipe off any excess.
Is it necessary to use a wood conditioner before applying stain? I’ve seen comments/instruction that say to use conditioner and some that don’t mention it at all. Would it help the stain to be absorbed more evenly?
Thanks
Wood conditioner is very helpful on woods like pine or fir that sometimes take stain unevenly. If you’re staining oak you won’t need it. You can also use plain water instead of wood conditioner. We use that prior to stain almost all the time to encourage the wood to take the stain in fewer coats.
Thank you for all the tips. I’m almost done removing the finish in the inglenook area and hopefully will be staining and finishing soon. It’s a bit scary to put something on the wood now that it is almost all clean.
For some reason I can never pin things from your website and this is a great post!!! You emailed me some advice last year on refinishing our 1905 foursquare wood work and we followed it, I meant to get back with you and say we were successful and thank you!!! We made our own finish like you suggested.
So glad! I’ll look into the issue with pinning things.