 Last week I talked about How To Cut Tenons on a Table Saw, but a tenon isn’t much good without a mortise to fit into. So, this week I’ll show you the easy way to make mortises. Like all things in woodworking, there are several ways to do this, but in my opinion, this technique is by far the easiest and most consistent.
My whole purpose in writing this post is so that when or if you start wondering how to make mortise and tenon joints, you won’t spend months experimenting with all the other methods only to realize this is the easiest way to go like I did. Trust me, this is the way to go!
What is a Mortise?
A mortise is essentially a hole in a piece of wood. Usually, they are square or rectangular, but there are some other options as well, including tools like the Festool Domino (which is like a crazy cross between a mortiser and biscuit joiner.) But like a lot of woodworkers, I can’t afford too many Festools and I wanted to make traditional joints. The domino felt a little like cheating to me.
In the context of this post, I want to talk about making mortises for use in mortise and tenon joinery. A mortise and tenon joint is one of the strongest joints you can make to join two pieces of wood together.
The tenon from one piece of wood slots perfectly into the mortise of the other piece and when glued, you can usually avoid having to use nails altogether it’s so strong!
I’ve tried several different ways to make a good clean mortise over the years. At first I used a router and chisel to make my mortises, then I tried a drill press for a time until I finally found the technique I use today.
How to Make Mortises
The are a couple challenges when making mortises because they have to be so exact. You need to make sure your mortises are:
- The proper length
- The proper width
- The proper depth
- Have clean, perfectly squared corners
- Positioned on the board in the exact same place your tenon will intersect
Each one of these things is minor but when you have to have all of them exact, it’s a bit more difficult. Some mortising techniques require you to carefully check and reset these settings every time you make a mortise (too much hassle).
What I wanted was a system where I can set up all the parameters for the first mortise I make for a project and then leave it on autopilot for the rest of the mortises that day.
How I Do It
The best way I have found is by using a tool called a hollow chisel mortiser. The one I use in my shop is a Delta Bench Mortiser that I bought on Craigslist. It’s not a cheap tool (usually between $300-$400 new), and it only does one thing, but it does that one thing incredibly well. It makes perfect mortises!
Woodworkers Journal has a good video on how to setup and use a bench top mortiser that I have included below. It’s a little dry but everything you need to know, other than my helpful tips, is in here.
If you have any plans to make more than a handful of mortises every year, this by far the fastest and most consistent way to do it. I’ll lay out the basic steps below.

Step 1 Mark Your Mortise
The first thing you have to do is mark your work piece with the size mortise you intend to make. Your mortise can really be any size you need, but for the strongest joint, divide the workpiece into thirds and make your mortise the middle third.
For example, a 1 1/2″ thick piece of wood would be divided accordingly
1/2″ + 1/2″ + 1/2″ = 1 1/2″ so your mortise should be 1/2″ wide.
Once you’ve determined the width of your mortise, choose the corresponding chisel. Most bench mortisers come with a 4-piece set of chisels (1/4″, 5/16″, 3/8″, 1/2″). You can make pretty much any size mortise with some combination of these chisels. Obviously, choose the chisel that will get your mortise made in the fewest passes (or hopefully even just one pass!)
Step 2 Secure the Workpiece
You need to make sure the workpiece is set squarely in the mortiser, and is held down securely by the hold downs on your mortiser. When removing the working end of the mortiser from the workpiece, there is a tendency for it to pull the board back up with it, so the hold downs are a necessity.
Also, make sure to hold the board securely against the fence when you are making your cuts, otherwise the mortises may wander.
Step 3 Set the Depth Gauge
Going off the marks on your board, set the depth stop on your mortiser so you can make a consistent cut every time. Every mortiser has a slightly different depth gauge, so follow the instructions for your model.
If you’re making a through mortise and tenon joint, then the depth gauge isn’t that important. Just know that depending on the size chisel you’re using, you’ll likely only get a 1 3/4″ to 2″ deep mortise. To get all the way through the workpiece, you may have to come at the piece from both sides.
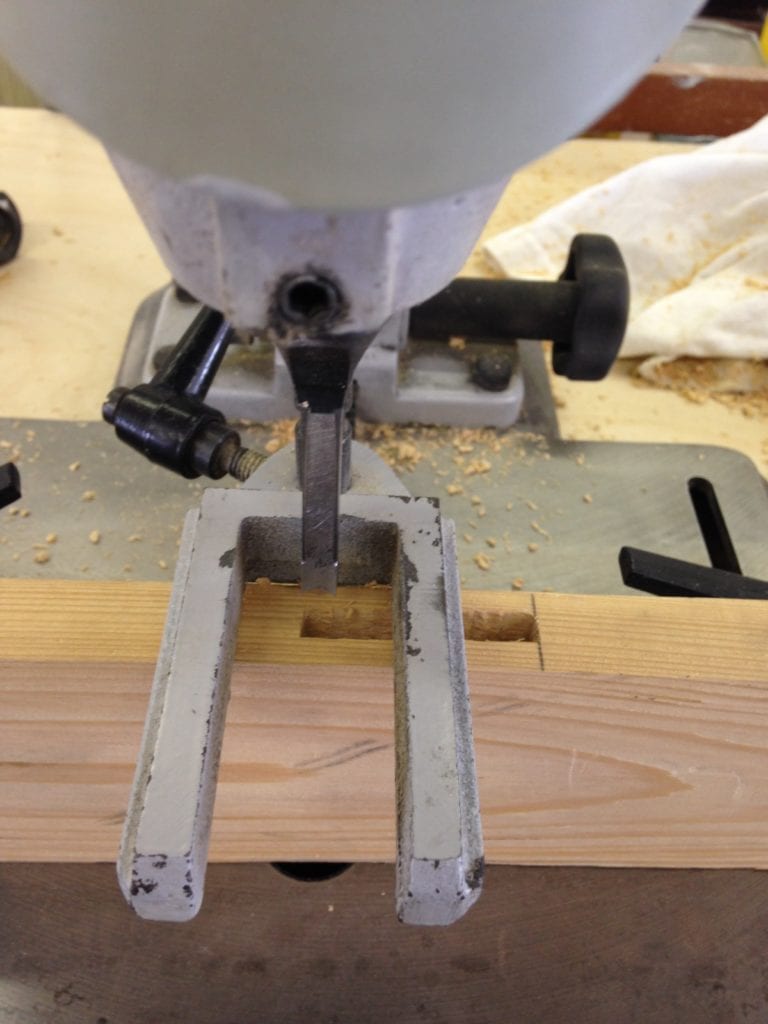
Step 4 Make Your Cut
Go slow on the first plunge cut- the auger bit and chisel will have the most friction on this cut since they are completely surrounded by wood. Proceeding cuts will go a little faster and easier.
Make sure that you are going all the way down to the depth stop on each cut, or else your tenon will not fit. When making your cuts, make sure you don’t miss any sections. It helps to go back over any questionable areas to make sure everything is completely cleared out.
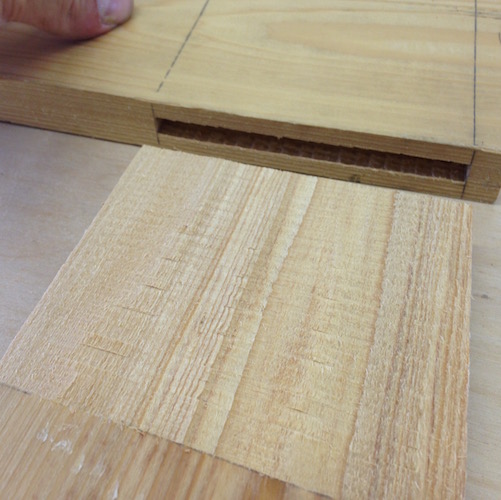
Step 5 Clean & Test
Once you’ve made all your cuts, remove the workpiece and bang out the wood chips from the mortise. If there are some stubborn ones you can always use a flat head screw driver or air hose to convince them out.
Then, it’s time to test fit your tenon and see how you did. If you need to tweak the fit, I find it’s usually easier to tweak the tenon with a hand chisel than to modify the mortise, unless there are blatant mistakes or missed areas in your mortise.
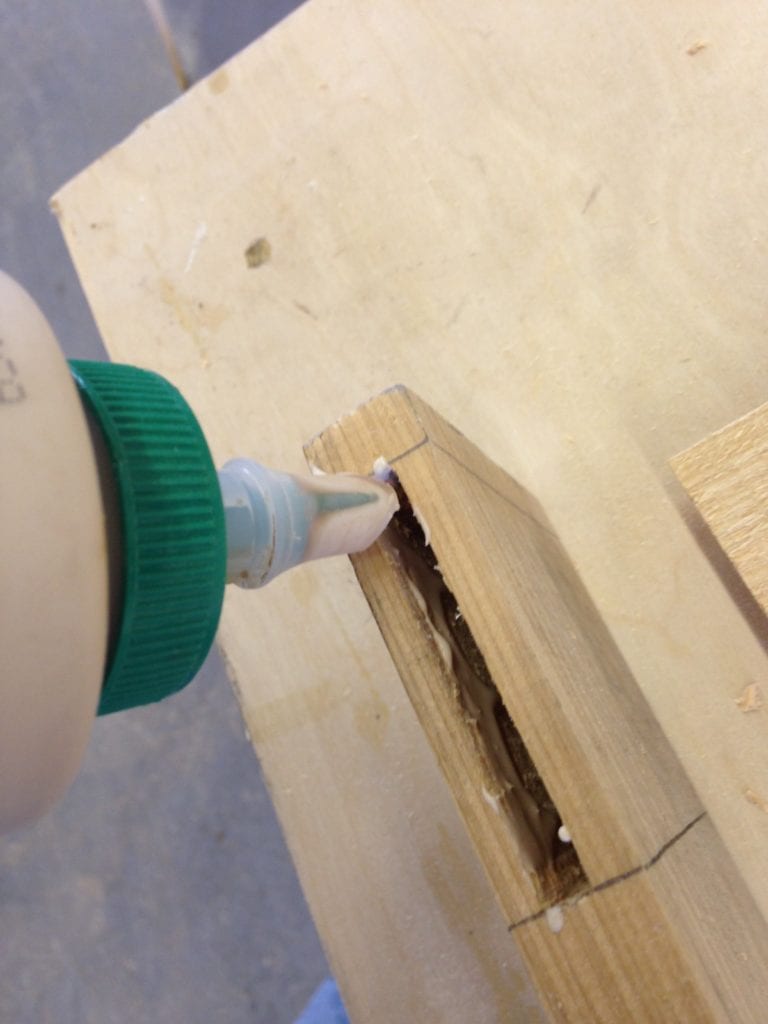
Step 6 Glue & Assemble
Not every joint needs to be glued, but if you are planning to glue your joint, then now is the time. For exterior applications, I recommend Titebond III waterproof wood glue.
Apply it generously into the mortise and use a small brush to spread it out evenly. When you assemble your joint there should be some glue squeeze out to let you know that you applied enough glue and the joint fits tightly enough. If you don’t see any squeeze out, then redo it before the glue sets up.
Once it’s assembled, you can either clamp it in place for a few hours or use a few brad nails to hold it in place. (read my post on selecting the right nails for your project) Don’t stress the joint for a good 24 hrs while the glue fully cures.
This post, along with its companion How To Cut Tenons on a Table Saw, should help you get started on making clean mortise and tenon joints. Good luck!


Founder & Editor-in-Chief
I love old houses, working with my hands, and teaching others the excitment of doing it yourself! Everything is teachable if you only give it the chance.
One thing to add. The tenon should be cut 1/32″ shorter than the mortise is deep. This allows for excess glue to have a place to go. Otherwise the tenon may not seat in the mortise properly.
Good point Mike
the tenon should go right through and be wedged from the outside after clamping….
I goose I’ll stay with dowel and biscuits, I’m a small outside builder. I make outdoor thangs four peaples and really have a haid tame bying a used drail or saiw to wark wath. I’m 73 and only keep actave.
ed