
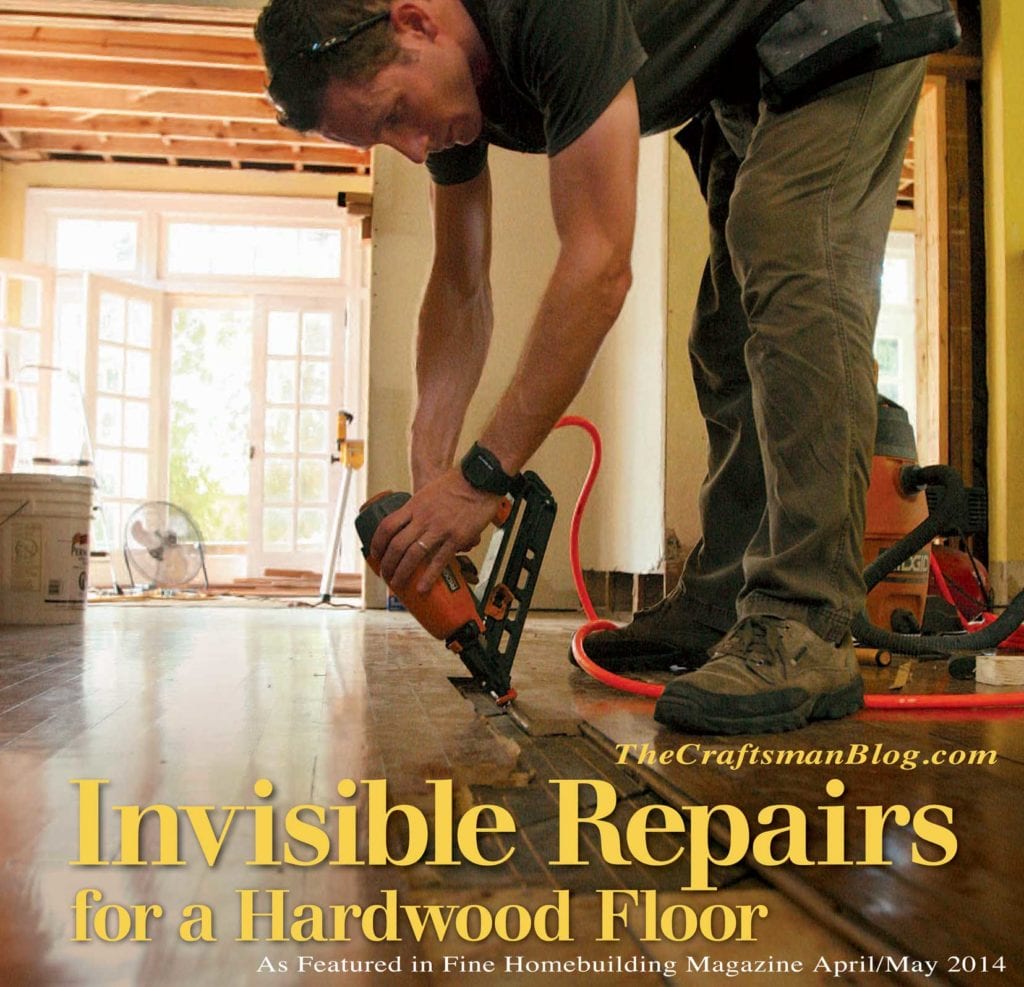
My company is featured in the April/May 2014 edition of Fine Homebuilding Magazine for the unique way we repair historic hardwood floors. Here is a large portion of the article available for free only to The Craftsman Blog family. Enjoy!
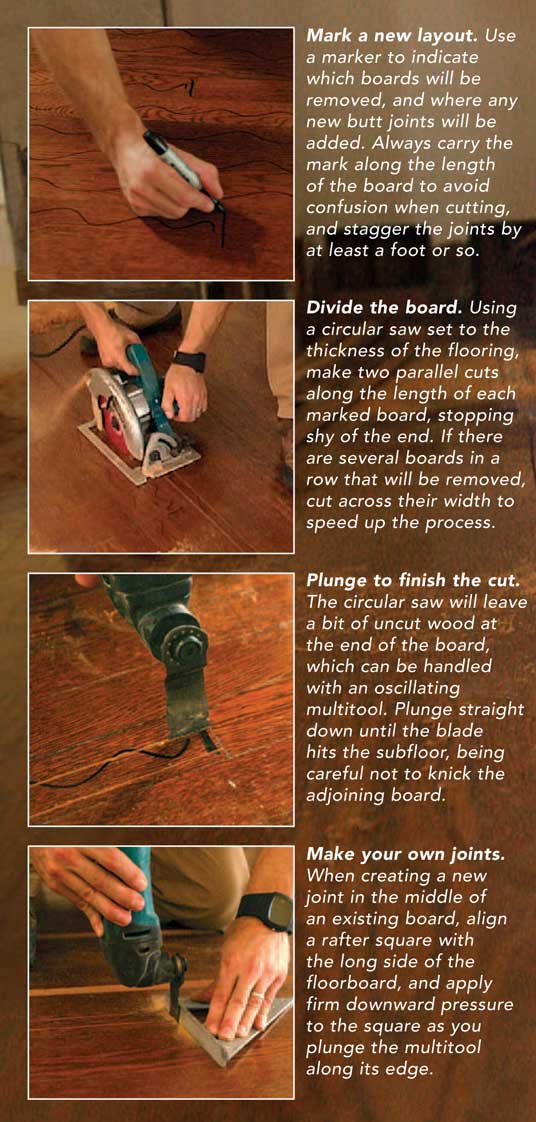
Other than refinishing hardwood floors, the most common repair my restoration company gets called to do is floorboard replacement. The most typical reasons we replace boards are due to termite or water damage, pet stains that almost blacken the boards to a point sanding won’t fix, and when customers are making changes to the floorplan that involve the removal of interior walls.
My goal is to find replacement boards that match the existing floor, and integrate them for a natural appearance. It’s a time-consuming job—one that takes skill and patience—but the payoff is another 100 years or more of use without resorting to an unfortunate solution: covering up the old floor with carpet, vinyl, or another layer of wood. The best sign of success for a restoration carpenter is for nobody to know you were ever there.
Identifying Wood and its Installation
When I get called to look at a floor-repair job, the first thing I look at is the species of the wood. Here in Florida, old homes I come across usually have heart-pine, red-oak, white-oak flooring, or occasionally Douglas fir.
There are online guides to identifying wood species, but this part of the job is a hard thing to teach. In truth, experience is the best teacher.
I can usually identify the species by examining the grain of the planks, and I know some people who can determine the species by the smell of the sawdust or weight of the boards. When in doubt, remove a couple of boards and bring them to the salvage yard for help in finding a match.
The second thing I look for is whether the joints of the floorboards are randomly spaced, or set consistently at 16-in. or 24- in. on center. Consistently-spaced joints are usually an indication that there’s no subfloor under the hardwood floor; it’s fastened directly to the framing. In my area of Florida this is common to the oldest homes (1890s and earlier) or homes in the low-end working-class neighborhoods built from the 1900s to the 1940s.
If there is a subfloor, I can use the replacement boards more efficiently, staggering the joints wherever I need. Without a subfloor, I have to use lengths in 16-in. or 24-in. increments, not to mention being careful not to fall through the floor while I’m working on large repairs. Also, in homes without subfloors, the planks run underneath the interior walls instead of butting against them, which means far more hassle when it comes to removing and replacing each piece.
Finding the Best Match
When it comes to finding replacement boards that will blend with the rest of the floor, you have a few options. In the case of this project, we got lucky. The second floor of the house had been gutted by a previous owner and the old flooring had been left behind, so we had a full stack of original floorboards to choose from. If we didn’t have that luxury, the next choice would have been to start shopping around for a match.
Don’t expect to get a good match just by driving to the local supplier to pick up some new wood of the same species. Wood will look different depending on where it was grown, when it was harvested, and how it was milled. For the best match, I rely on an architectural salvage yard. But first, you need to arm yourself with as much information about the existing floorboards as possible.
Start by taking careful measurements of the existing boards. In my experience, the width needs to be pretty accurate for a good fit and a satisfying match. Around here, depending on the house I’m working on, I’ve seen heart-pine boards in 21⁄4-in., 23⁄8-in., and 21⁄2-in. widths. Why they decided to have such minimal differences is beyond me, but they do make a difference, so measure carefully. Luckily, this is a pretty easy measurement to take right from the finished surface of the floor.
Accuracy is less crucial for the thickness of repair boards; as long as you’re within an 1⁄8 in. or so, the sanding should remedy any slight differences. That said, a thicker replacement board is better than one that’s not thick enough.
To measure the thickness, you’ll need to get creative. I typically look for floor grates or a piece of baseboard I can remove in order to get an accurate measurement of the cross section of the flooring.
Pay attention to the position of the tongue of the board, too. Generally, the tongue is right in the middle of most floorboards, but, sometimes, with thicker 7⁄8-in.- or 1-in.-thick boards, the tongue can be just below center, which allowed the boards to be sanded and refinished more times before replacement became necessary. You need enough thickness above the tongue to match the rest of the floor, but the more crucial dimension is the distance between the tongue and the bottom of the board.
Finally, you need to find an appropriate grain and color match. For instance, if the floorboards in the house are quarter sawn, then a replacement board with flat sawn grain will stick out like a sore thumb. The same holds true when comparing heartwood with sapwood. Some heart-pine floors have a lot of deep-red heartwood and others are a bit more yellow.
When searching salvage yards for a match, it helps to find out the date that the house was built. If the homeowner isn’t sure, check the property-appraiser’s website, or visit the town hall. This piece of information means I can look for replacement boards at the salvage yard that are from the same decade. If a decade match is not possible, I at least look for similar grain patterns.
Should you, despite searching, find new boards that are close but not quite perfect, there’s still a backdoor. In these cases, I like to borrow flooring from a closet or pantry to do the more visible repair, and then put the new wood in these more remote locations where it will be less noticeable. It means more repair work, but the payoff is worth it.
Watch the video of the repair process!


Founder & Editor-in-Chief
I love old houses, working with my hands, and teaching others the excitment of doing it yourself! Everything is teachable if you only give it the chance.
My wife and I are renovating a large 1870 brick house in southwestern Ohio. In 1892 there was a major renovation that added gorgeous floors. Unfortunately, over the years, these have been damaged by radiators. The section of flooring I am attempting to repair is curved. (I can send pics if that helps.) Any tips on how to install curved pieces? Planks are 3/4″ thick and 2-1/2″ to 3″ wide.
Thanks!
Our best recommendation would most likely be to use our directory to find a certified preservationist in your area who can more accurately advise upon seeing it in person. https://thecraftsmanblog.com/directory/
-Alyssa at The Craftsman Blog
P.S. I was born and raised in Cincinnati. Nice little hometown throwback seeing that your home is in Southwestern Ohio. 🙂
Thank you for the info. I too grew up in Cincinnati. Small world
I had a contractor use duct tape to attach plastic sheeting to a Douglas fir floor. When he removed the tape, he pulled up the wood and left deep (1/16 to 1/8 inch) as well as wide (about 1/2 to 3/4 inch) patches of raw wood about 1 foot in length. Not the just finish was removed, but he actually tore up the wood. Any suggestions other than board replacement?
This Blog is so awesome! I’ve literally posted something under four different topics in the past 45 minutes. It’s reassuring to see your advice is spot on with the research we’ve done since moving in to our home 3 years ago. We are patching floors in our home and we are in central Ohio and we believe they are Ash. We’ve been looking forever to find wood to match. It’s been difficult. Other than salvage yards any other suggestions?
Check with local contractors who either demo houses of the same approximate age of yours or contractors who do old flooring repairs. Not but some will sell you enough material to do a small patch job. They may be generous enough to give you advice. I am a 30+ year contractor in SE Texas. I do a fair amount of work restoring older homes. I do not specialize in flooring but, rely heavily on fellow contractors who do. If you need a significant amount of wood they will not be as helpful. They feel that they should get the job, whereas a very small job, 2 or 3 boards, are not cost-effective for them.
Hardwood floor repair is always a time consuming job and my recommendation is to take the help of experts while performing the repair. You can end up with more damage if you do not have any idea what you are doing.
forgot to check please notify me by email. thank you Ellen
Ellen, circa 2000, huh? 😉 I doubt you’ll find anything at the salvage yards. Your best bet is to keep looking until you find something close enough you’re satisfied. There’s no easy way.
Scott, thank you for your awesome info. I have a historic home, circa 2000 (ha ha), so, not so historic 🙂 and yet, The wood floor in the kitchen is one I have not found in flooring shops. It is by today’s standards an unusual board width I think. There are 3 boards about 2.656 inches wide, laminated across a larger base board. It is unfortunately a much softer would than we had understood when buying but what we thought was “hard” wood flooring. The thickness of the board is 1/4 inch, I think. We have an open floor plan between our kitchen with this wood floor and our livingroom that has carpeting. The carpeting has got to go and it seems like extending the existing floor would look best while keeping in a budget of not redoing both floors. It’s a bit unfortunate that cherry is so soft but it still seems like the nicest look would be to continue the wood floor through to the next open room. My husband is handy and wants to do this himself. I get concerned that it could mean having an unfinished floor for a long time. I’d prefer to hire someone. Either way, I am wondering if it will be possible to match this floor? What my husband found that he thinks may be the closest match is by Kahrs. The web page calls it a 2 strip design which Im guessing means 2 strips of wood laminated to a board. It says the board dimension is 5/8″ x 7 7/8″ x 95 3/8″. Can we find as “historic” as year 2000 in a salvage yard? The livingroom is 13 feet X 19 feet. Putting in carpeting or something else and having this discontinuous feeling between the 2 rooms doesn’t seem right. Although if I could do it all from scratch I’d either get a truly hard wood, less susceptible to dents and scrapes or possibly even that new tile that looks like wood. It seems to look pretty good and fairly indestructible. Sorry for the long story but we need help. Thank you
I know Ellen’s question is 4 years old, but in case anyone else sees it and has the same sort of question, it appears that what she had in her house was “engineered wood flooring” which is essentially like laminate flooring but then use a thin veneer of real wood instead of a resinated photograph of wood for the top layer. My suggestion to her would have been to try to remove a section of it and go to a full service flooring store to find a match for it. Engineered flooring panels are made for ease of installation and lower cost (closer to the cheapness of laminate “fake” wood, but with a real wood surface. Drawback is that there is not enough thickness of wood to ever do more than a light sanding for future restoration of scratches and damage. Advantage besides cost is that the backing board to which the wood is attached is more stable that solid wood in terms of expansion and contraction, shrinkage or warping. But it is a poor choice if you have dogs, kids or any home situation where the floors might need to be sanded to restore them in the future.
Hi Scott: I just discovered your wonderful site. Thank you for posting so much information. It’s great for newbies like me. I tried to download your ebook but your website tells me that it can’t find the link. Please let me know how I can download. Thank you again.
Best,
Elizabeth
Elizabeth, sorry for the glitch. I’ve fixed the link now but your email may not work. Email me at scott@thecraftsmanblog.com and I will send you a new link.
A question or two.
There are some floors (oak?) in our 1895 home where the boards are separated by 1/16th to 1/8th inch or so, as if everything has shrunk (narrowed) since put in. In some places there are remnants of some hardened and brittle material once placed between the boards.
The wood itself is mostly in good shape. I don’t think I want to refinish the floors as is, I am not sure what kind of resin, if any, will work and look nice to fill in the cracks, and the idea of taking it all up to lay it back down again in proper proximity sounds like a lot of work unless I can be convinced that is what I should do.
Any thoughts?
Also, do you always take up the shoe molding (in my case simple 1/4 round) when refinishing a floor? My guess is one should, but I see in my own house and others where it has not been done.
Thanks.
Most refinishers a use putty in the joints before sanding and coating. It fills the gaps for a while but eventually cracks and falls out. You can use some WoodEpox but unless there are very large gaps I would leave it as is and accept it as “character.”