 Caulk is often a way overused item in old houses, but abuse doesn’t rule out proper use. And proper use of the right caulk can literally save your old house from big damage.
In this post, I’ll not only show you how to pick the right caulk for the job, but also give you some caulking tips to help you know when, where and how to use that caulk.
The Wrong Way to Use Caulk
The poor use of caulk, especially in old buildings, to remedy problems is almost comical to me. I have seen more people who seem to believe caulk is like fairy dust and if you sprinkle enough of it out it will magically transform something into the picture of perfection.
There are three things I want to teach people about caulk that it is NOT:
- Caulk is not structural
- Caulk is not glue
- Caulk is not wood filler
Now that I’ve got that off my chest, I feel better. If we could compare it to the human body, caulk would be like connective tissue. It doesn’t provide the frame like the bones and isn’t functional like the muscles. It doesn’t even tie the two together like tendons or ligaments. It just fills the voids and keeps everything tight.
Scott’s Rules for Caulk
Here’s some common sense rules I like to follow when it comes to applying caulk properly.
- Don’t fill gaps larger than 1/4″ of an inch or so. For that, you need to use backer rod to backfill the hole first and then you caulk over the smaller gap you are left with.
- Horizontal joints on siding, doors and windows should be left uncaulked to allow water an escape route. Caulk only verticals except in special circumstances.
- Always tool the bead of caulk with a wet finger after application to get a smooth clean line and to help seat the caulk firmly into the joint.
- Use the best caulk you can afford and you can always afford the best caulk!
Follow these four rules for caulking and that will take care of 90% of the issues I find. Now on to helping to pick the right caulk.
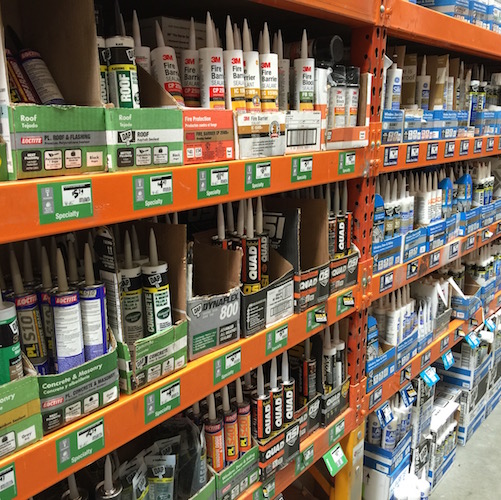
How to Pick the Right Caulk
There are a million types of caulk on the market today. It’s great to have the options, but it can make it a little tough to decide when you have so many choices. We’ll go through the different types of caulk available and when to use which type so you can have a better idea of what to buy.
Acrylic-Latex
These are some of the most versatile and easy to use caulks on the market today. In general, this is the workhorse of the caulk world and can be used in a wide variety of places. The standard acrylic-latex has been upgraded in many cases to a siliconized acrylic-latex, which increases flexibility and lifespan, but still yields an easy to work with and easily paintable surface.
The variety of available acrylic-latex caulk is immense, as is the quality. At the low end, you have inexpensive “painter’s caulk” which has little crack resistance and shrinks a lot as it dries. At the high end, there are even urethanized acrylic-latex caulks that promise lifetime flexibility and paintability. There are also quick drying versions that are paintable in 30 minutes which comes in handy in a pinch. Choose wisely!
Cleanup
Acrylic-latex caulks are water clean and generally very low odor. They are the easiest to tool and clean on the market, which makes them so popular.
Uses
Interior/Exterior uses on siding, windows, doors, baseboards, trim and moldings. It bonds well on almost all surfaces like wood, masonry, glass, stucco, plaster, and tile. Least expensive options are just over $1 per 10 oz. tube and the higher end options run closer to $4-$6.
Silicone
Silicone caulks are definitely a premium product with some excellent characteristics. They are waterproof, never loose flexibility and have excellent mildew resistance. Their one weakness? Most cannot be painted. Their ultimate flexibility makes certain no cracks will ever open up to allow water through which is of utmost importance in these wet areas.
I don’t use silicone caulks outdoors much due to the lack of paintability, but where painting is not an issue, they can be a good choice. There are a wide variety of brands, so be sure to get the best one you can afford and remember, you can always afford the best caulk.
Cleanup
Silicone is a messy caulk to work with as it is not water cleanup but rather requires denatured alcohol or mineral spirits. It also has a strong order until cured so make sure you have plenty of ventilation.
Uses
Interior/Exterior silicone is an excellent choice for tub and shower surrounds, toilets, sinks and other areas that will be exposed to water. Moderate in price between $4 and $11 per 10 oz. tube.
Butyl Rubber
The grandaddy of flexibility butyl rubber caulks and synthetic rubber caulks take the cake in terms of flexibility. With such excellent flexibility, these caulks are best used on exterior joints that are prone to extreme movement where water sealing is of utmost importance. They do have a tendency to shrink more than other caulks as they dry, so over application or two applications is sometimes helpful to ensure good coverage.
Cleanup
Butyl are messy and often difficult to work with compared to acrylic-latex. They require denatured alcohol or mineral spirits for cleanup. Also, they have a very high VOC content which makes them unavailable in places like California where the government doesn’t allow the most useful products.
Uses
Exterior use mainly as butyl rubber caulk is best saved for roofs, flashings, gutters, chimneys and similar areas though it can be used for siding as well. Many options are paintable with water based paint. Butyl is expensive, running between $7 and $14 per 10 oz. tube.
What Am I Using?
Right now, I can accomplish probably 95% of my work with just 3 tubes of caulk. These may or may not be right for you, but folks often ask what I use and recommend so I would be remiss if I didn’t share.
General Use: Sherwin Williams SherMax Urethanized Elastomeric Sealant
This is the best all around caulk I have yet to find. Excellent flexibility, water cleanup, paintable, interior and exterior with low odor and it tools very easily. As for latex-acrylic caulks (which is the category it falls under) this is relatively expensive running about $4 per 10 oz. tube, but the performance is well worth the price.
Baths & Kitchens: GE Silicone II Kitchen & Bath
For bath and kitchen remodels, this caulk gets me all the performance I need and doesn’t take a long time to dry before being ready for water like other silicones. All it needs is 30 minutes before it can get wet. And it guarantees 7 years no mold issues. Whether it’s white or clear, this caulk does the job in our remodels with zero callbacks so far.
Quick Fix: White Lightning Quick Dry
Sometimes you don’t have time to wait around for caulk to dry. Maybe it looks like rain or mother nature is out to get you in some other way. Maybe you’re on site for a limited time and need to touch up the caulk with paint before you leave. White Lighting is a water cleanup siliconized acrylic-latex that dries ready for paint in 30 mins. It’s a great caulk we use for window stops or really anywhere that we don’t have time to wait for the standard drying times of other caulk. The quick drying feature costs a premium, but sometimes it’s worth it.


Founder & Editor-in-Chief
I love old houses, working with my hands, and teaching others the excitment of doing it yourself! Everything is teachable if you only give it the chance.
Thanks for the tip that I should only caulk vertically so that there is an escape route for water. I’m currently reapplying caulk on my siding since it’s been breaking down since the snow melted back in spring. Perhaps I should find a solution that can preserve the new caulk that I’m applying so that I wouldn’t have to do this almost every year.
It was really informative! Thanks for giving such easy to understand content. All the tips to help you know when, where and how to use that caulk were so useful. Keep posting it!
nice blog. thanks for sharing this informative.
Good basic principles…BUT… My experience with silicone is that NOTHING sticks to it – not even to itself. So don’t plan on recaulking an old joint that had silicone caulk, because it won’t adhere, no matter how clean you try to get it. Also, why didn’t you review one-part polyurethane caulks? I used to use Sonolastic NP-1, which was my favorite until it got too viscous to work easily. Now I use Sikaflex. Both of these last well, and re-caulking is no problem. What say you?
Huge fan of Big stretch for most applications not involving a wet environment like a bathroom. Still searching for the best paintable silicone. GE has been around for years but it’s lifespan has yet to impress me. Thanks for the article.
This statement cracks me up:
“Also, they have a very high VOC content which makes them unavailable in places like California where the government doesn’t allow the most useful products.”
California will soon ban everything other than filtered water it seems.
Thanks!! I used some cheaper DAP Dynaflex from Home Depot and applied in a range of temperatures. I calked all my windows – inside and outside. Every bead has cracked……very, very frustrating. You understand the time and energy this takes! After reading your article I’m heading to Sherwin Williams TONIGHT. Thanks!
Happy to help Chris!