
 Mortise and tenon joinery is the great workhorse of wood joinery. It makes for extremely strong joints and it is immensely flexible in terms of the variations you can use.
If you are building something that requires 2 pieces of wood to intersect at right angles, then a mortise and tenon joint is the best option you can choose.
Yes, there are other options like pocket hole screws, dowels, biscuit joints, and on and on, but none of these have the strength of the mighty mortise and tenon.
There are tons of variations like shoulder and no shoulder, through tenon, blind tenon…I could list them all, but eventually your eyes would glaze over and you’d pass out.
Today, I’m going to teach you how to make a simple through tenon, which is pretty much the same as a blind tenon except that it goes all the way through the piece of wood instead of a blind tenon, which stops inside the wood and is hidden from view.
Next week, we’ll cover The Easy Way to Make Mortises. But right now, let’s get into how to make the tenon portion of the joint.
How To: Cut Tenons on a Table Saw
Cutting tenons on a table saw requires one of two things:
Pick whichever one you are most comfortable with. The tenoning jig is made specifically for tenoning (as if the name didn’t tip you off), but the dado blade is just as easy and sometimes less intimidating, so that’s the technique I’ll discuss today.
You can also use this technique without a dado blade, it just takes longer to complete.
Step 1 Cut to Length
The first step is to cut to length the board you plan to have your tenon on. The length you need is determined by the size of the piece you working. In this case, I am making a 32″ wide screen door with a through tenon, so I can simply cut my board to 32″. That’s the other joy of through tenons, easier math.
Step 2 Size Your Tenon
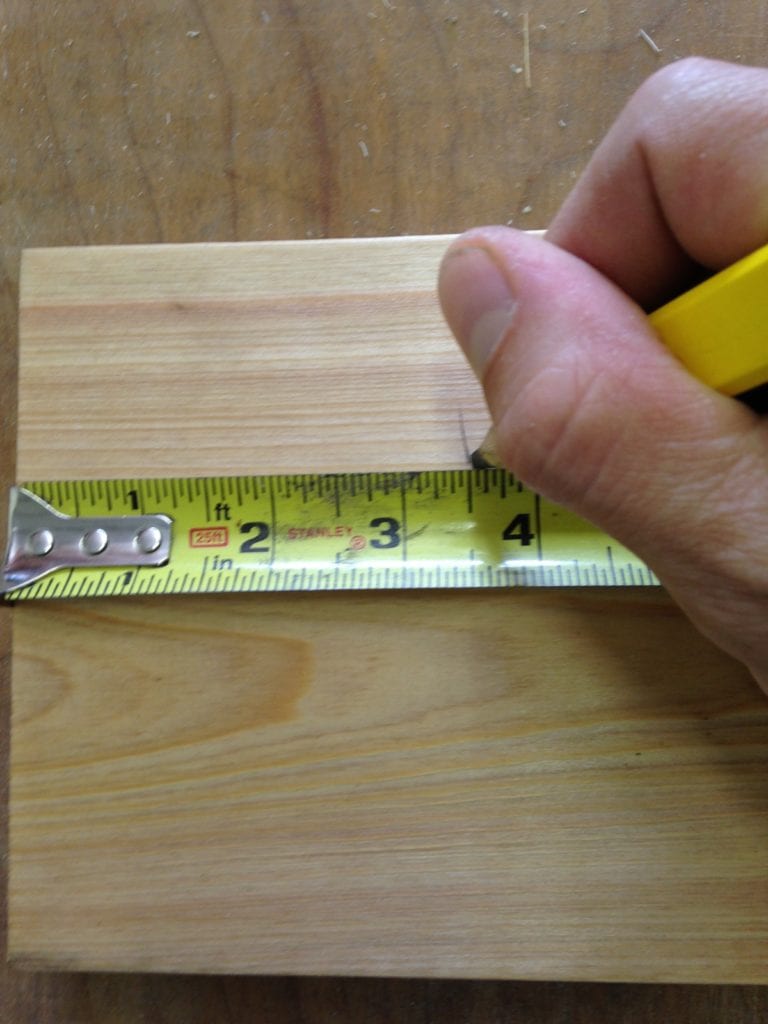
How long does your tenon need to be? Well, in this case, my through tenon will have to pass through a piece of 1×4 lumber which is 3 1/2″ wide. So, my tenon needs to be 3 1/2″ long. Make a mark 3 1/2″ from the end all the way around the board
How thick should your tenon be? The rule of thumb for sizing tenon thickness is to divide the board into thirds. We’re using 3/4″ thick stock here, so it’s easy to divide it into thirds.
1/4″ + 1/4″ + 1/4″ = 3/4″.
Therefore, your tenon should be 1/4″ thick. Make sense?
Step 3 Setup Your Saw
Step over to your table saw and measure for your tenon. First, set the fence to the length of your tenon (that’s the 3 1/2″ measurement I mentioned earlier). I usually measure the distance from the blade to the fence just to be extra precise. Mortise and tenon joinery needs to be precise.
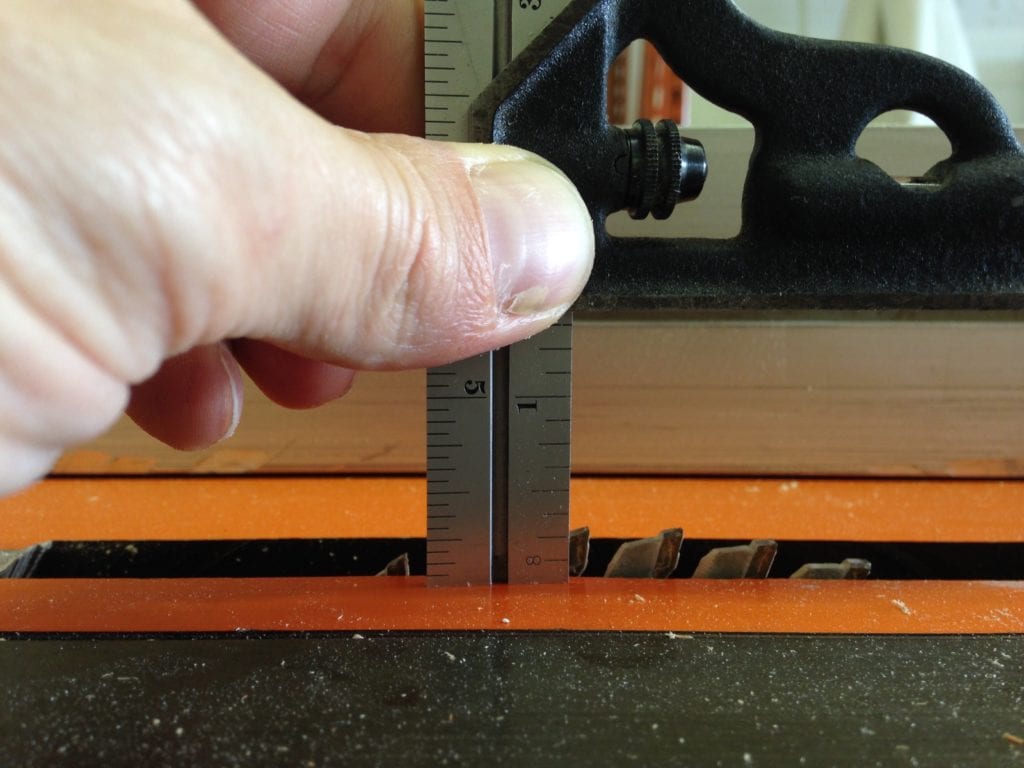
Once the fence is set, bring your saw blade (with the dado blade installed) up to the height you’ll need to remove to make your tenon. Since we are making a 1/4″ tenon here, we need to remove 1/4″ from either side of the board.
That places the tenon directly in the center of the board and makes it 1/3 of the total board thickness. So, the saw blade needs to only be 1/4″ above the table. Cut a piece of scrap lumber first if you want to test it.
It’s a lot of math, but once you get the setup and cut your first tenons, it begins to make more sense.
Step 4 Cut to Thickness
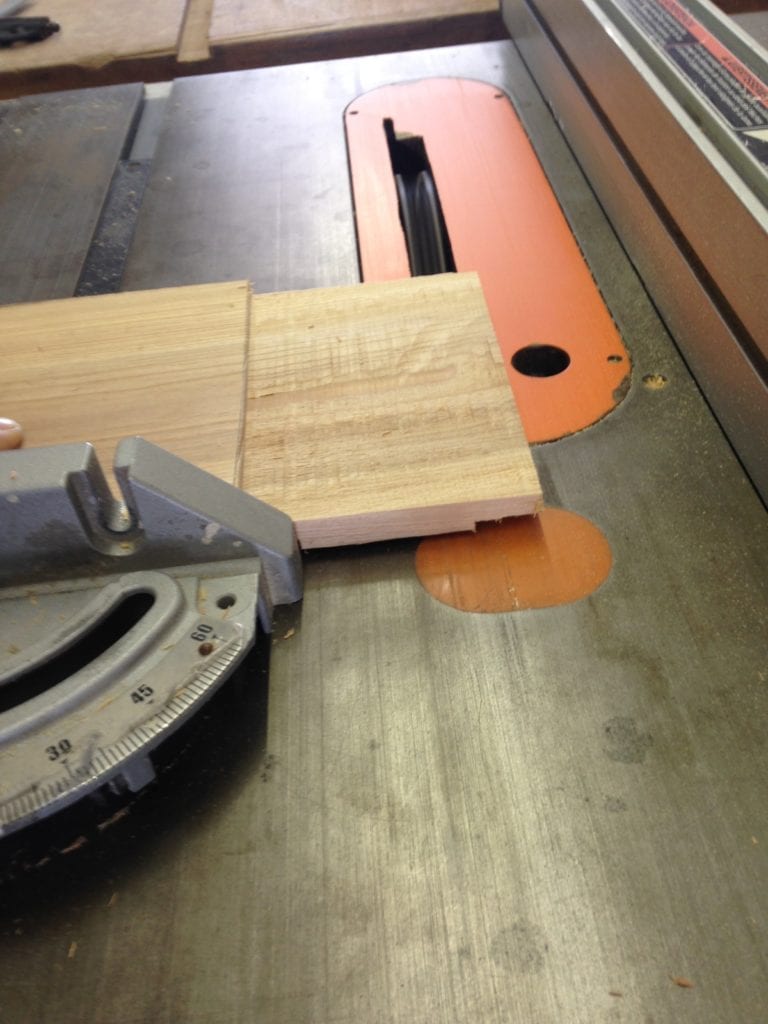
Get out the mitre gauge for your table saw and lay the board flat on the table up against the mitre gauge. This will act as your cross-cut sled to keep the board perfectly square to the fence.
Just like in the picture, run the board over the blade so it takes off a portion of the board with each pass. Then move the board over slightly with each pass until it is riding up against the fence.
Once you have cut off the first side, flip the board over and cut the second side the same way.
Step 5 Cut the Shoulder
Tenons don’t have to have a shoulder on them, but I like them and it’s easy to do while you’re already setup. Turn the board on its edge and cut your shoulder the same way as you cut the thickness, slowly working your way to the fence. Make sure you use the mitre gauge for this as well.
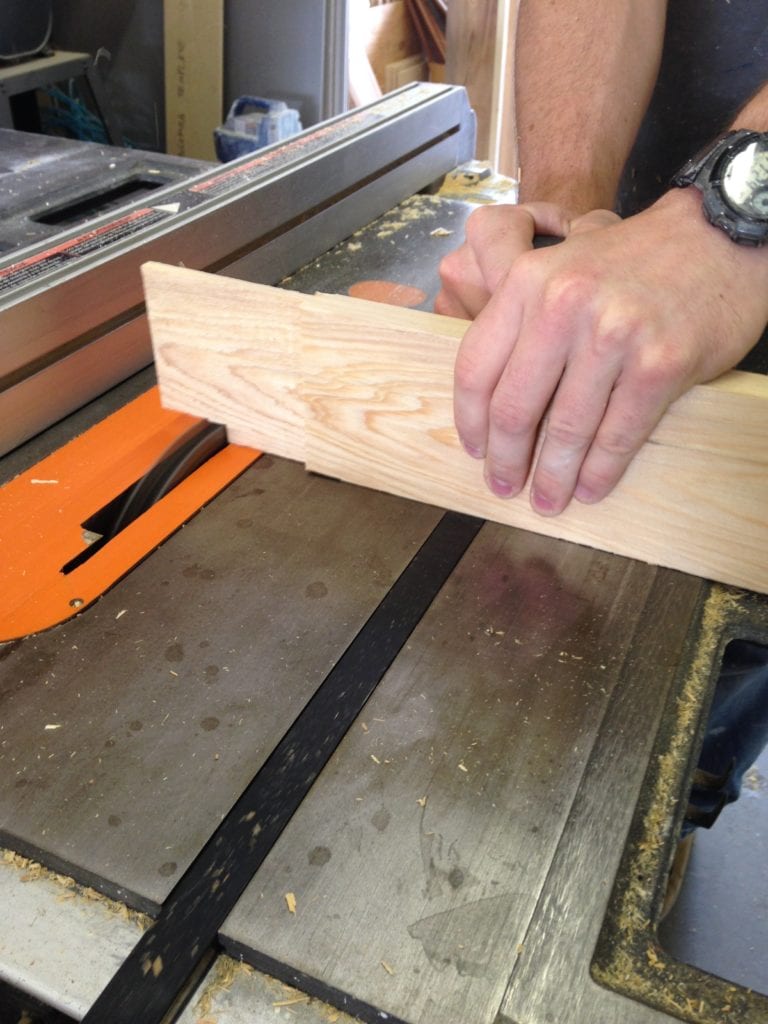
You can raise the blade or lower the blade depending on how you want to size your tenon. The larger the tenon, the more glue area and the stronger the joint, so don’t cut too much off. I removed the same 1/4″ from each side in this scenario to create the shoulders.
As far as tenons go, that is it. You tenon is ready for assembly. Next week, I’ll talk about the easy way to cut mortises. And then you’ll be ready to assemble the strongest carpentry projects.
Learning to cut mortise and tenon joints properly is a big step in the life of any carpenter or woodworker. Hopefully this tutorial will get you one step closer.


Founder & Editor-in-Chief
I love old houses, working with my hands, and teaching others the excitment of doing it yourself! Everything is teachable if you only give it the chance.
It is generally not advised to use the miter gauge with the board wedged up against the fence as it makes it easy for the board to bind up and kick back. The problem is it doesn’t leave either side of the board free to fall away from the blade as you feed it through. Instead, both sides are held tight and can end up pinching the blade. There is also no way to safely feed both sides through the blade without having to reach over it or attempt some other risky maneuver.
Also, i would be hesitant to use a dado set “freehand” like this without any featherboards.
This is really good Technic thanks for sharing with us
These are great step by step instructions. Very informative. Thanks for sharing!
This method will certainly make a fine tenon. I have read other articles using the rip fence and miter gauge. I prefer to use my tenoning jig but not everyone has such a contraption.
But I think anyone using this method needs to understand that using the miter gauge is not just good advice, it’s completely mandatory!
If anyone tries this technique without the miter gauge, look out! You may experience kickback. That is the piece of wood getting caught between the rip fence and the blade and then getting thrown at your head at 100 miles per hour. IT happens so fast that there is no getting out of the way. Trust me on that one.
Another choice is to build a crosscut sled. I use mine a lot.
http://www.finewoodworking.com/search/search.asp?cx=009096020989677304441%3Ayn5icbkse5w&cof=FORID%3A9&ie=UTF-8&q=crosscut+sled&siteurl=www.finewoodworking.com%2F&ref=&ss=2580j2363584j6
Excellent point Mike! I should modify the post t make that a bit clearer. The mitre gauge is NOT optional!